Easy Foil Technique WOW Cards Using Thermoweb Deco Foil

I am LOVING this foil technique that is popping up on Pinterest and my favorite blogs. It’s actually really easy but the results are so WOW!! All you need is: a laser printer, foil sheets, and a laminator. There are other ways to do this technique, but this is the way I did it.

  1. First, print an image on card stock using your laser printer (I have a HP Laserjet CP1525). Toner is what makes this technique possible, so photo copiers would also work.
  2. Next, lay a sheet of the Thermoweb Deco Foil (I found some at Hobby Lobby) on top of your printed image, shiny side up.
  3. Third, place your card stock and foil into a folded piece of computer paper as a carrier for the laminator.
  4. Then, run your paper through the laminator. (I found that I had to play with the settings on my laminator to get it to work. I chose the 6mil setting on mine.
  5. Lastly, just peel off the foil and voila! It’s foiled!

Here are some cards I made using this technique. I have also experimented with colored card stock. My printer doesn’t accept overly thick card stock, so I used a thinner sheet of brown in the Thank You card below. It’s not a very smooth finish so the foil is a little rough looking, but it still looks very nice.

These are all images printed from My Digital Studio.


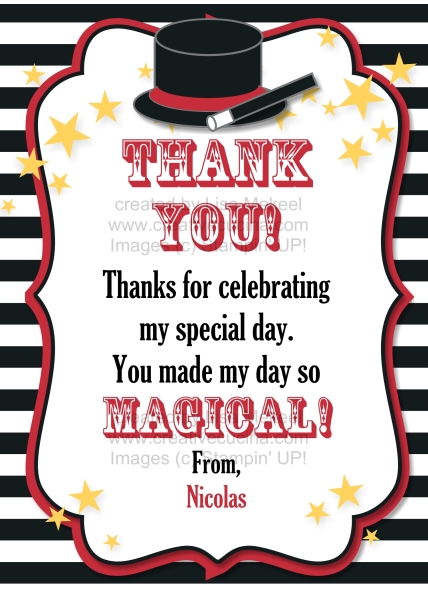
Magic Theme Kids Birthday Party Created by My Digital Studio {MDS}

magic party-001

Magic theme birthday invitation. Custom printing/Digital download available. Coordinating cupcake toppers, banner, and personalized signs also available! See the matching Thank You card below.

magic party_thanks-001

This is an invitation for a little boy’s Magic themed birthday party. My sister sent me a picture she found on Pinterest and I recreated the invitation using My Digital Studio. Here is a link to the original picture. She was surprised I was able to make it look almost exactly like the original. There really isn’t anything you can’t do with MDS!

Everything except for the hat and wand were ready to go images. I had to make the top hat and magic wand using Punch Shapes such as the square, oval, circle, etc.

The stars are from July Fourth Stamp set. The background is part of the Essentials Designer Series Paper.

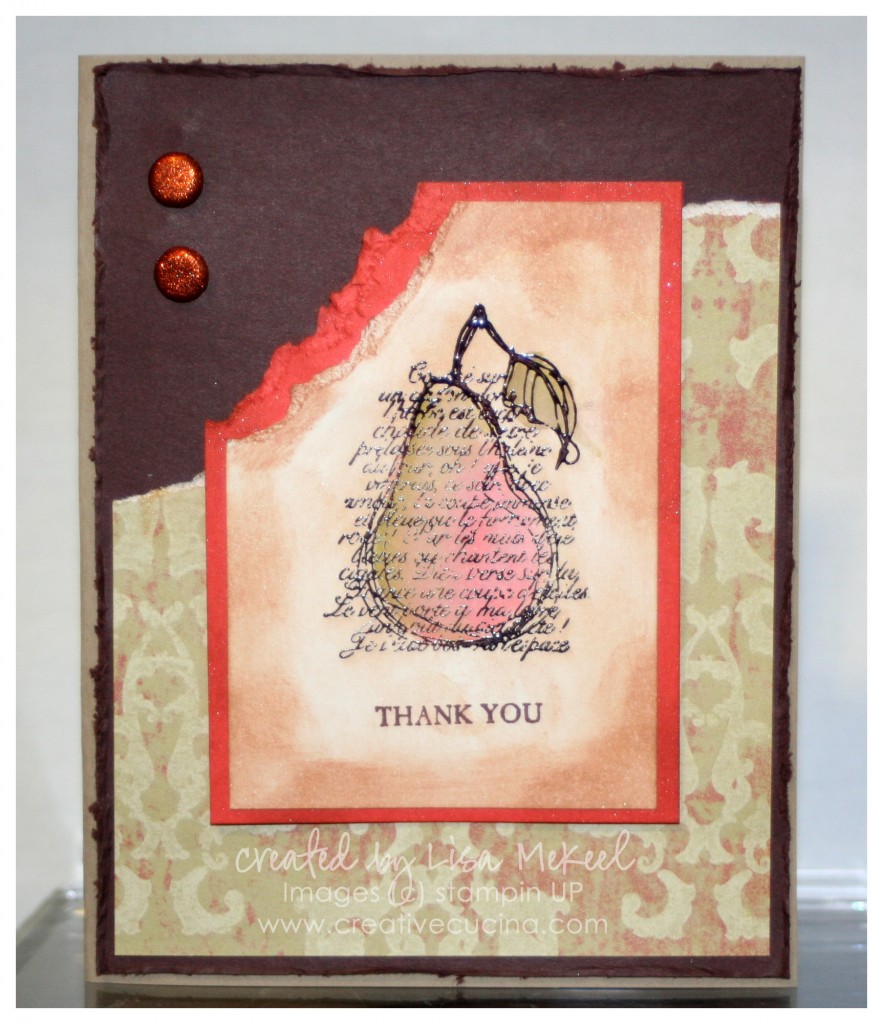
Pretty Pear {Faith in Nature}

Here, I made use of some distressing techniques. The stamp set featured is Faith in Nature, one of the Hostess Sets. I stamped the pear image with Chocolate chip craft ink on Whisper White and heat embossed it with clear embossing powder. Using the aquapainter, I colored in the pear with Lucky Limeade and Calypso Coral ink. The “thank you” sentiment is also from the same stamp set.

Next, I tore across the top corner of the card stock and used a sponge dauber with Creamy Caramel ink to distress the image layer. It was layered on Calypso Coral card stock, distressed in the same way as the image layer.

The card base is Crumb Cake card stock, layered with Chocolate Chip that was distressed along the edges using the distressing tool. A torn piece of  Well Worn DSP was also added to the card front. Since that paper is distressed looking, I didn’t need to do much to it other than tearing it and sponging it a bit. Finally, two orange glimmer brads finish off the card.

Bad Behavior has blocked 940 access attempts in the last 7 days.

css.php