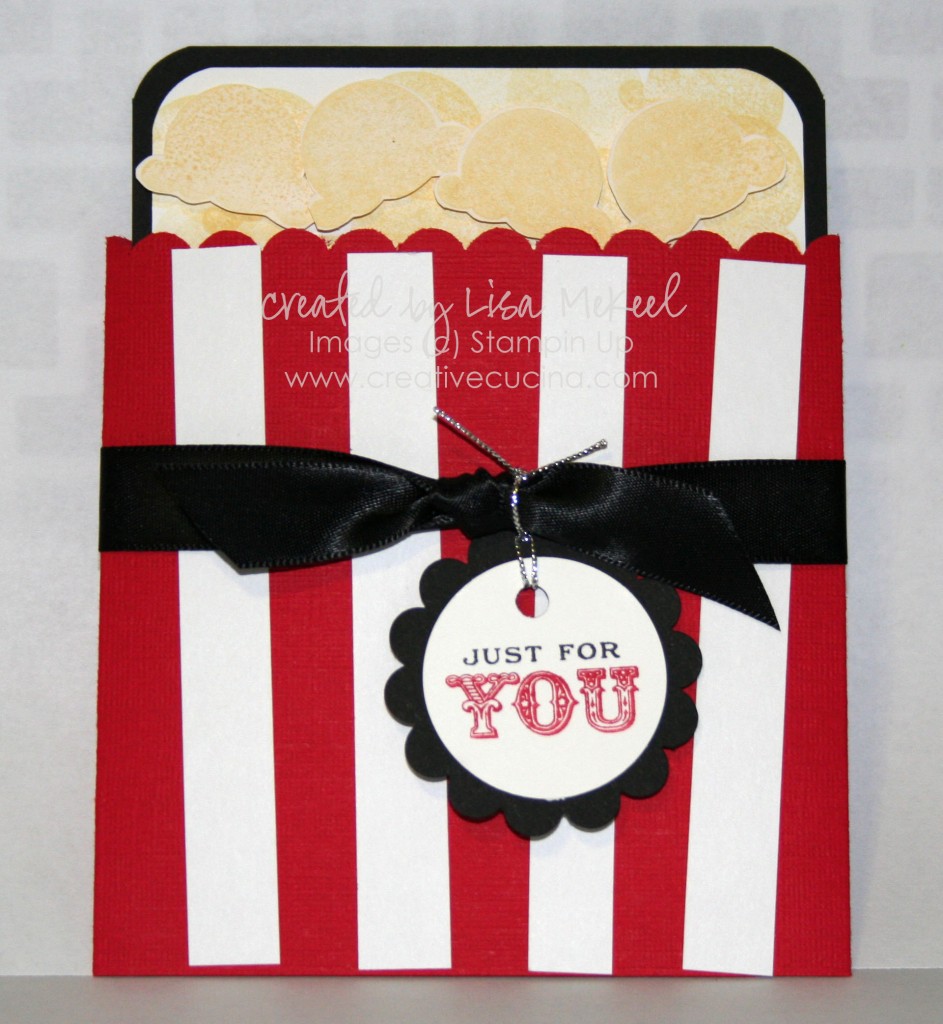
Popcorn Basket/Movie Tickets Gift Holder

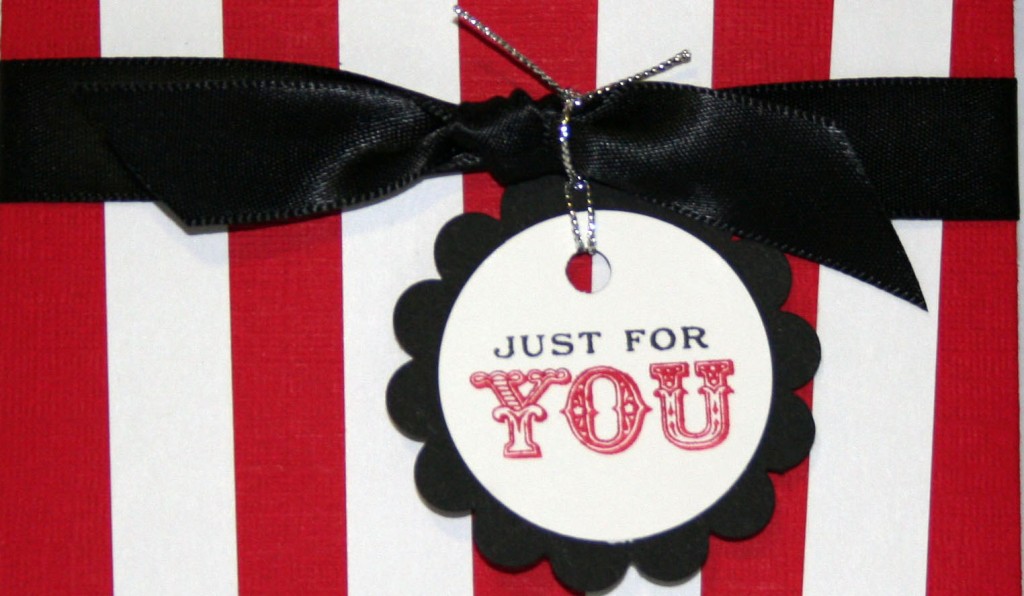
I started out making a card to put in a movie basket–a basket with popcorn, movie style candy, and tickets from the local movie theater. Thinking about movies, I came up with the Popcorn Basket idea. This is a variation on the Slide Out Gift Card Holder.

Popcorn Basket Card

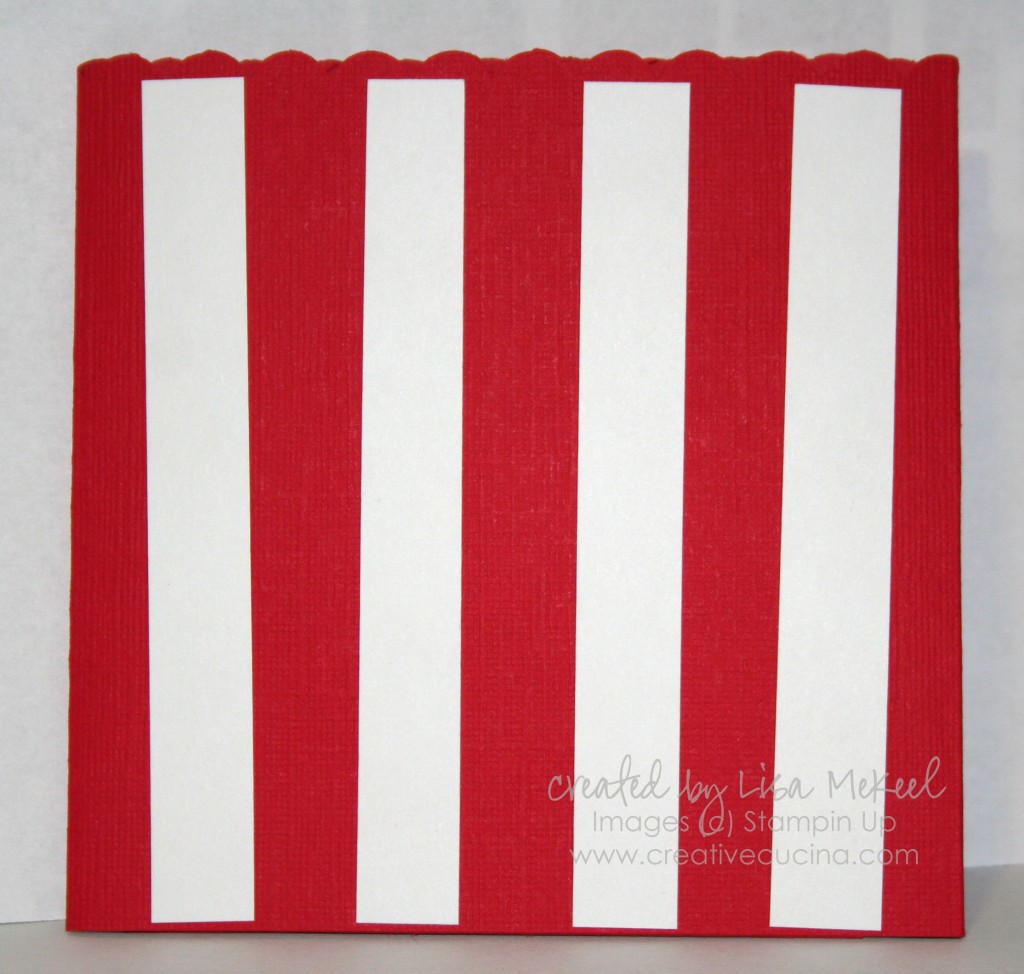
  1. Cut Real Red card stock to 4 1/2″ x 12″ and score along the long edge at 4″ and 8 1/4″.
  2. Using the Scallop Edge Punch, punch along the top of the real red card stock.
  3. Apply Sticky Strip along the bottom of the center panel and fold the right side over the center panel. Then, put Sticky Strip on the left panel, along the bottom and the left edge. Fold over and stick.
  4. Cut 4 strips of Whisper White card stock to 1 1/4″ x 4″ and using SNAIL, adhere them to the front of the card, evenly spaced.
  5. For the insert, cut a piece of black card stock to 4″ x 5″ and round the top corners with the Corner Rounder Punch. Cut Whisper White card stock to 3 3/4″ x 4 3/4″ and round the top corners again.
  6. Adhere the White to the Black card stock and using the Slit Punch, punch approximately 1″ from the bottom. This slit will hold the movie tickets.
  7. Stamp the ice cream scoop from Sweet Scoops all over the White card stock with So Saffron ink. Stamp directly on the card stock, then two more times before reinking. Keep stamping like this, in a random pattern.
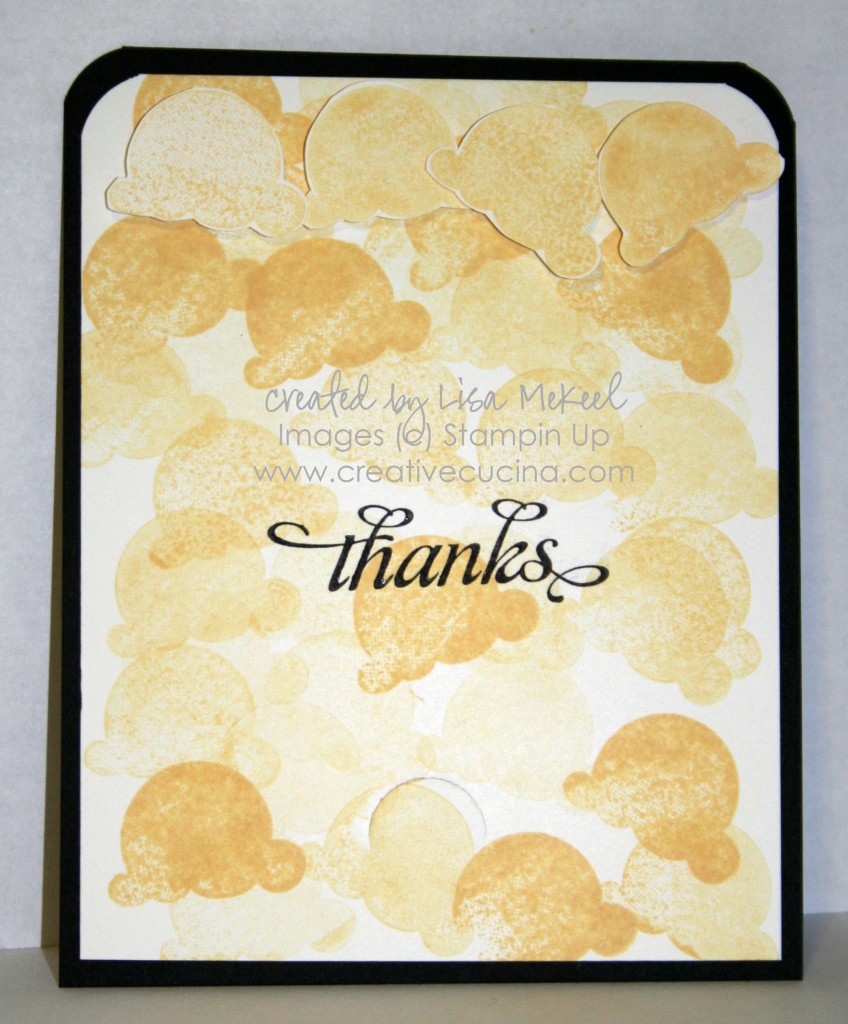
  8. Stamp 4 scoops onto scrap Whisper White or Very Vanilla, stamping off each time (to get a lighter color). Trim each one out and attach them to the top of the insert piece using Stampin Dimensionals.
  9. Stamp a sentiment on the insert, if desired.
  10. Tie Black Satin Ribbon around the card and make a knot.
  11. Stamp “Just for You” from Oval All in Black and Red Marker on Whisper White. Punch out with 1 3/8″ Circle Punch and layer onto Black Scallop Circle Punch out.
  12. Using the larger hole of the Cropadile, make a hole at the top of the Scallop Circle and loop Silver Cord through, tying it around the Black Satin knot.
Elegant Brown and Gold Wedding Card

GoldWedding 016 copy

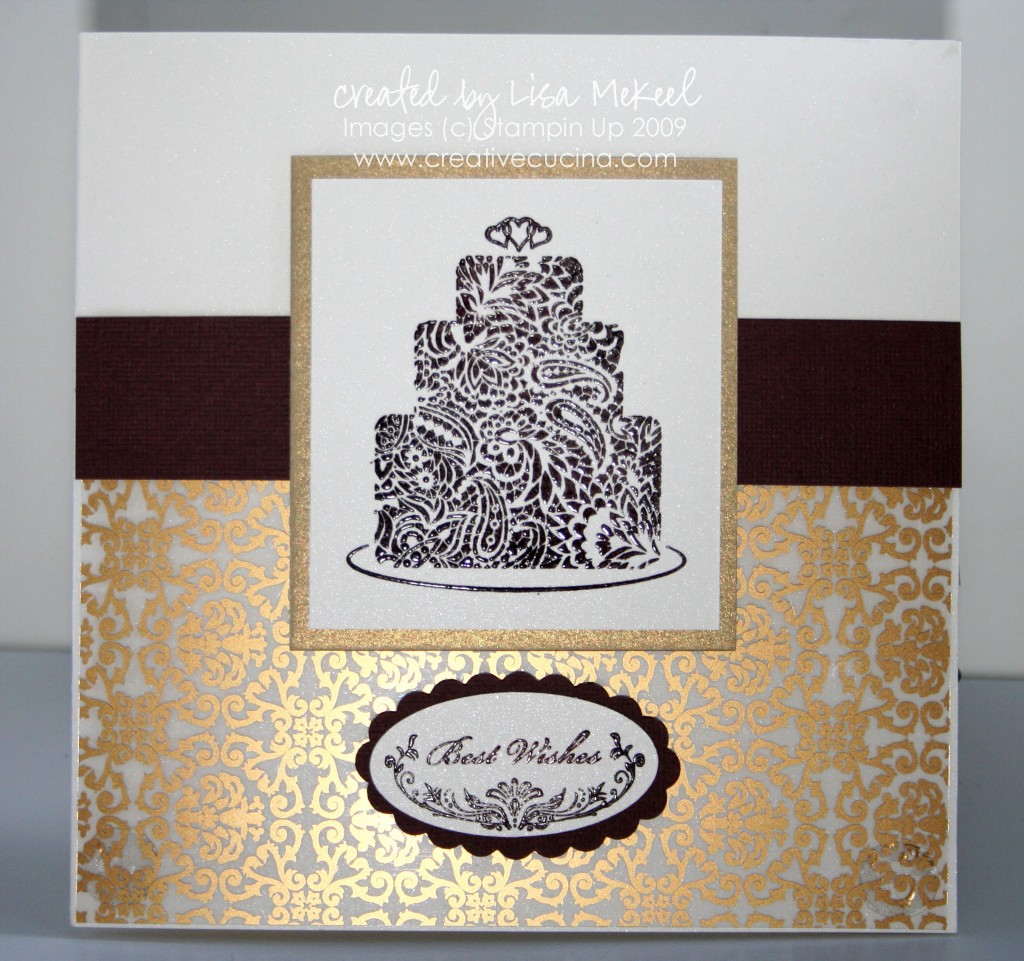
I made this card for a friend’s wedding. The card is actually a 5 1/2″ square, just shy of 6″x6″ because the base is Shimmery White card stock, which only comes in 8 1/2″x11″. If I used another color, I would have cut a 12″x12″ piece in half and then scored it at 6″.

The gold patterned acetate was from a craft store, adhered with glue dots to the base. I stamped the cake from For the Bride in chocolate chip craft ink and heat embossed it with clear embossing powder, also on shimmery white card stock. That was layered on a piece of gold card stock.

Above the acetate, I added a strip of textured chocolate chip card stock running across the front of the card. Then, I adhered my cake image to the base with dimensionals.

Underneath the cake, I stamped “best wishes” from Oval All in chocolate chip craft again, heat embossing with clear embossing powder and punched it out with the Large Oval Punch. That shimmery card stock oval was layered onto a textured chocolate chip Scallop Oval and adhered to the base with dimensionals.

Inside, I stamped “Congratulations” from For the Bride in chocolate chip craft ink and heat embossed it with clear e.p. as well.

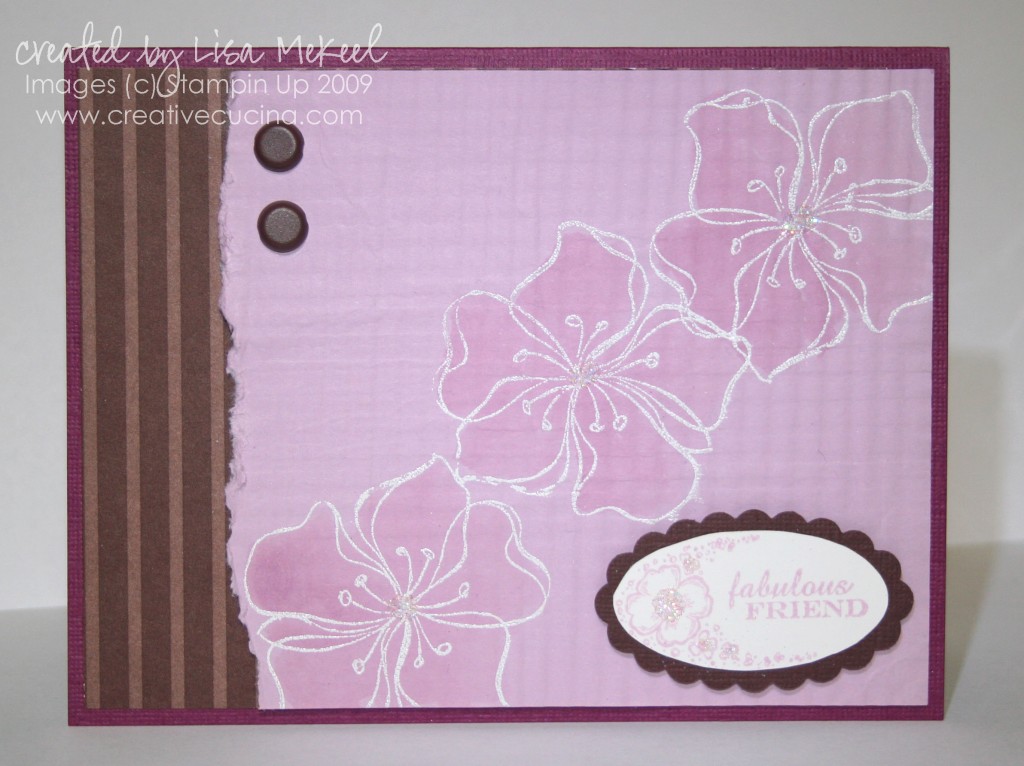
Distressed Flower Card

distressed_flower

I decided to try something a little different than my usual style this time around. I guess I have a hard time with the distressed look because I always want things to be perfect! I’m kidding, but the more clean look is definitely my strong suit.

The base here is textured rich razzleberry, layered with a piece of Chocolate Chip DSP in the striped pattern.

As for the main image, I took a piece of Pale Plum card stock and put it through the Crimper a few times, both the long way and then again the opposite way. This produced a quilted look and really softened up the paper.

Next, I stamped the flower from Embrace Life in white craft ink 3 times, following with White Embossing Powder and heat gun. To color in the flowers, I used Pale Plum ink and Aquapainter just to makethem stand out a little more. In the center of each flower, I added a bit of Dazzling Diamonds.

Before adhering the pale plum layer, I tore the edge and curled it up a bit with my Bone Folder. Then, I adhered it to the Chocolate Chip DSP and using the Cropadile, added 2 Basic 5/16″ Brads in brown. That was then attached to the card base using SNAIL adhesive.

Finally, I stamped the “fabulous friend” from Oval All in Pale Plum ink on Whisper White card stock, punched it out with the Large Oval Punch and layered it with a chocolate chip Scallop Oval Punch. In the center of the pale plum flower, I also added more Dazzling Diamonds and attached the whole thing to the card front with dimensionals.

Bad Behavior has blocked 1008 access attempts in the last 7 days.

css.php