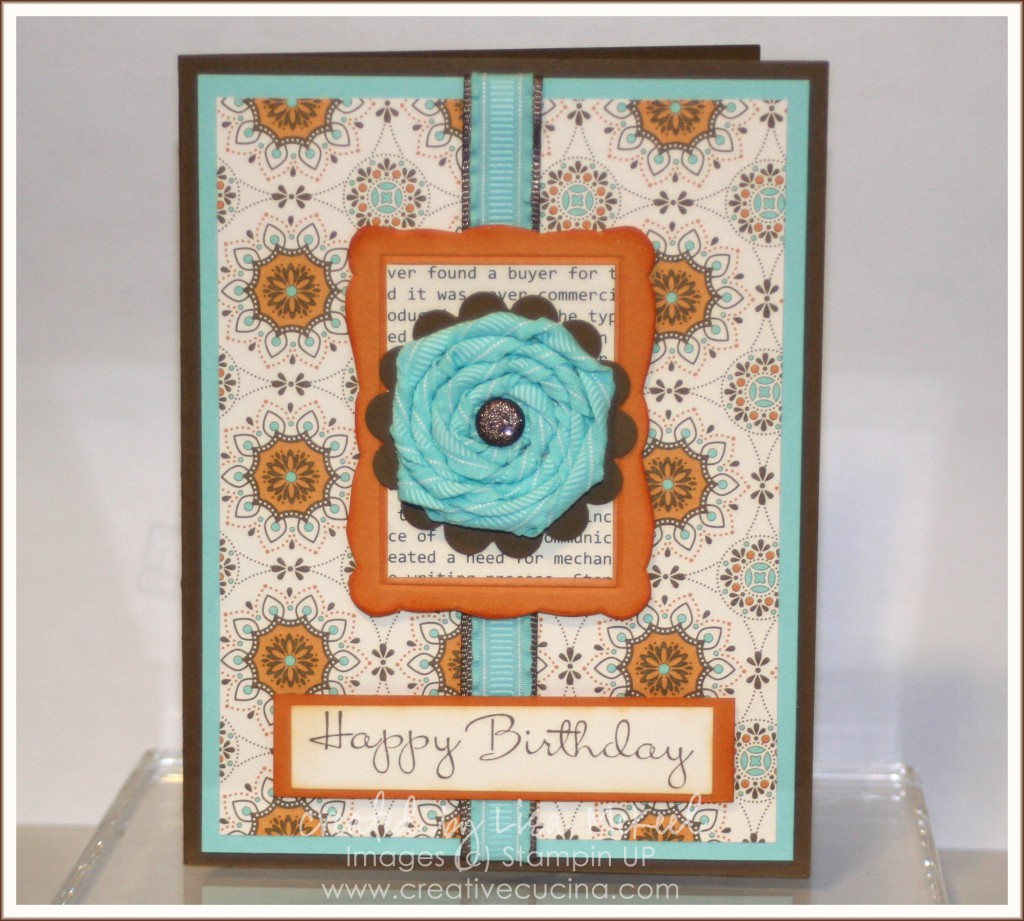
Spice Cake Birthday Card with Twisted Ribbon Medallion

Fall is my favorite season, so it wasn’t a surprise when I fell in love with the new Spice Cake Designer Series Paper, from the Holiday Mini Catalog. The colors in the paper are Pool Party, More Mustard, Pear Pizazz, River Rock, Soft Suede, and Very Vanilla. Other than the great colors and patterns, the paper gives me an excuse to use Pool Party 3/8″ Ruffled Ribbon! Scroll down for directions on how to make the Twisted Ribbon Medallion shown on this card.

The base is Soft Suede card stock, layered with Pool Party and a layer of Spice Cake DSP. Down the front, I added Pool Party 3/8″ Ruffled Ribbon layered with 1/2″ Polka Dot Soft Suede Grosgrain (retired).

In the center, I made a little frame by using the Designer Frames Textured Impressions folder in the Big Shot with More Mustard card stock. I cut the frame out and then sponged More Mustard ink around the edges to add depth. The patterned paper inside the frame is from First Edition Specialty DSP.

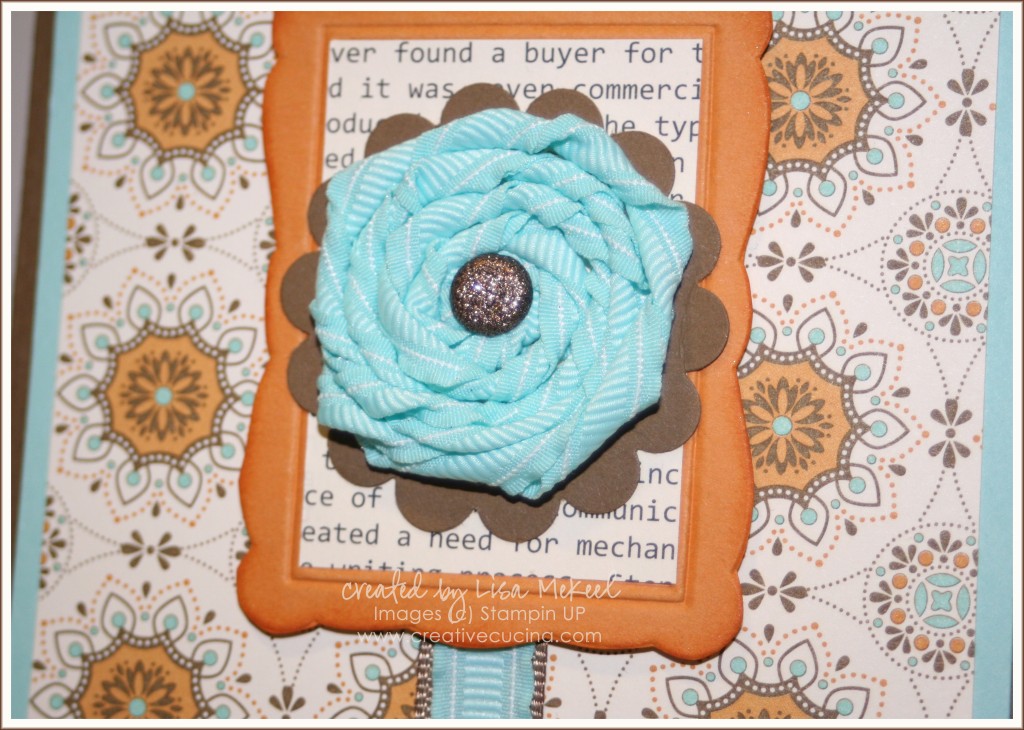
As for the Twisted Ribbon Medallion (that’s what I’m calling it anyway), it’s very simple to make.

  1. Punch out a circle from card stock using the 1 3/8″ Circle Punch (you can make it any size you want but that is what I used here)
  2. Cover the front of your circle with Sticky Strip.
  3. Leave your ribbon on the roll and start in the center of the circle. Stick the end of your ribbon down in the middle of the card stock and start twisting the roll until your ribbon starts to twist as well.
  4. Keep twisting and spiraling the ribbon around the circle until you get all of the card stock covered.
  5. To finish, cut your ribbon off the roll, fold the end over the back of the circle, and adhere it with Sticky Strip.
  6. To add a brad in the center, use the cropadile. If your circle is too large for the cropadile to reach the center, you can use your paper piercer as well.

For this card, I used a gorgeous Glimmer Brad (I think this is a Soft Suede one) in the center of the medallion. Then, I layered the medallion onto a Soft Suede scallop circle made with the Scallop Circle Punch.

The sentiment is from Happiest Birthday Wishes, stamped with Soft Suede ink on Very Vanilla card stock. I sponged the edges with More Mustard ink and a sponge dauber, then matted it on More Mustard card stock. It’s attached to the card with stampin dimensionals.
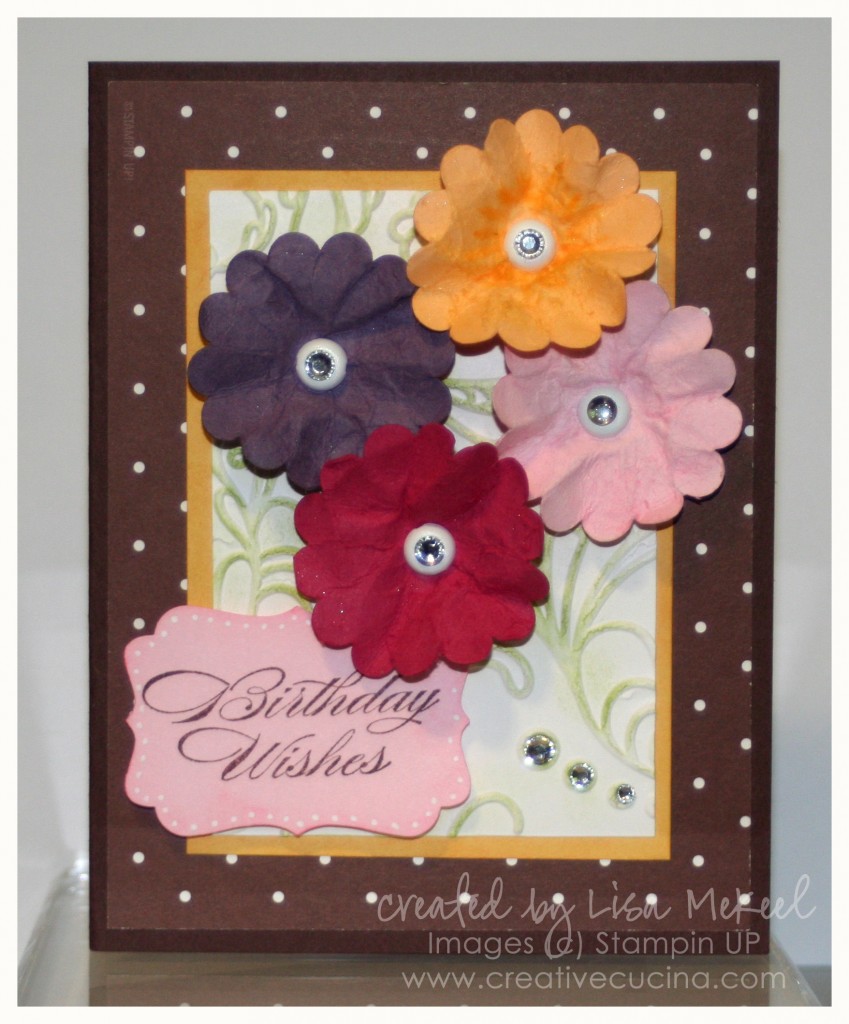
Birthday Flowers & Dots

I made this card for my husband’s grandmother. He suggested mailing her a card but I told him that was impossible because this one was BIG and bulky!

The card base is chocolate chip, layered with Chocolate Chip DSP in this polka dot pattern. As for the flowers, I made them by punching different colored card stock  with the Scallop Circle Punch. Then, I sprayed the scallop circles with water, crumpled them up, and let them dry. I added a white Basic Brad in the center of each flower, topped with a Rhinestone Jewel.

In the background, I used Apricot Appeal card stock, layered with Whisper White that I ran through the Big Shot with the Elegant Lines Embossing Folder. Using the sponge dauber, I added Certainly Celery ink to the raised portions.

The sentiment is from Bring on the Cake. I stamped it in Chocolate Chip ink on Pretty in Pink card stock, then punched it out with the Decorative Label Punch. To give it more interest, I sponged the edges with Pretty in Pink ink and added white dots with the White Gel Pen.

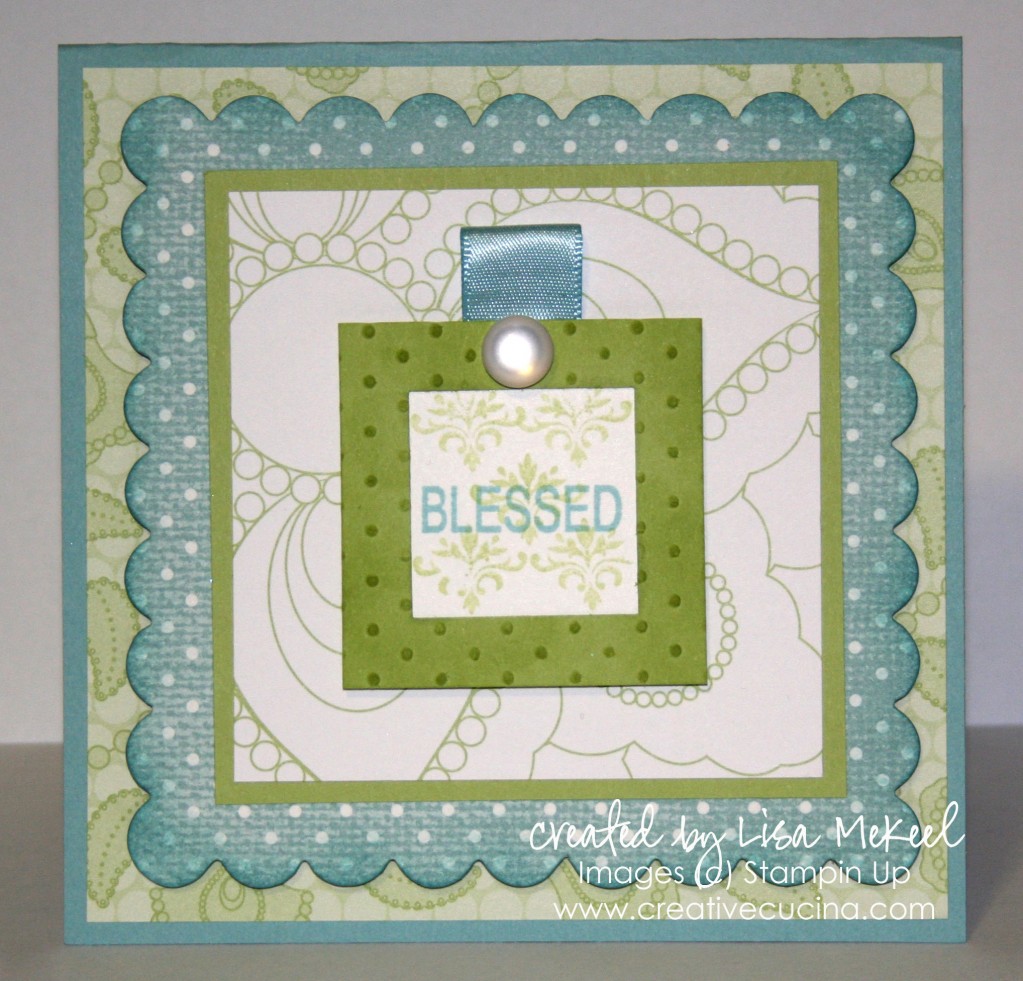
{Blessed} Baptism Card CASED from Stampin Success May 2010

I copied this card from the May issue of Stampin Success, by Jolene Slack, on page 23. Unfortunately, I am not allowed to post the original picture, but it was featured in the new Color Renovation section. Jolene’s sample used new Marina Mist, here, I substituted Baja Breeze, a returning In Color.

The card base is made from a 5 1/4″ x 10 1/2″ piece of Baja Breeze, folded in half. Next, I took a 5″ square of Shades of Spring DSP in the Certainly Celery pattern and layered it on the card base.

I used the Scallop Square Bigz Die and the Big Shot to cut a scallop square from Parisian Breeze DSP (retired). I sponged Baja Breeze ink along the edges using a Sponge Dauber, then adhered it to the base with Stampin Dimensionals.

Using more paper from Shades of Spring DSP, I layered a 3 1/4″ square of Certainly Celery on a 3″ square of DSP, attaching it to the base with SNAIL adhesive.

The square window was made by embossing Certainly Celery card stock with the Swiss Dots embossing folder and the Big Shot. Then, I cut the embossed piece down to 2″ square. I punched a window in the center with the 1 1/4″ Square Punch and sponged the frame with Certainly Celery ink. I stamped “Blessed” from So Very (a retired SAB set) in Baja Breeze on Whisper White, layering it behind the window. I also stamped an image from Tiny Tags in Certainly Celery ink, stamped off, randomly over the whisper white.

At the top, I added a loop of Baja Breeze Satin Ribbon from Valet Ribbon Originals and a half back sticky pearl. Finally, I adhered the window piece to the base with Stampin Dimensionals.

Bad Behavior has blocked 362 access attempts in the last 7 days.

css.php