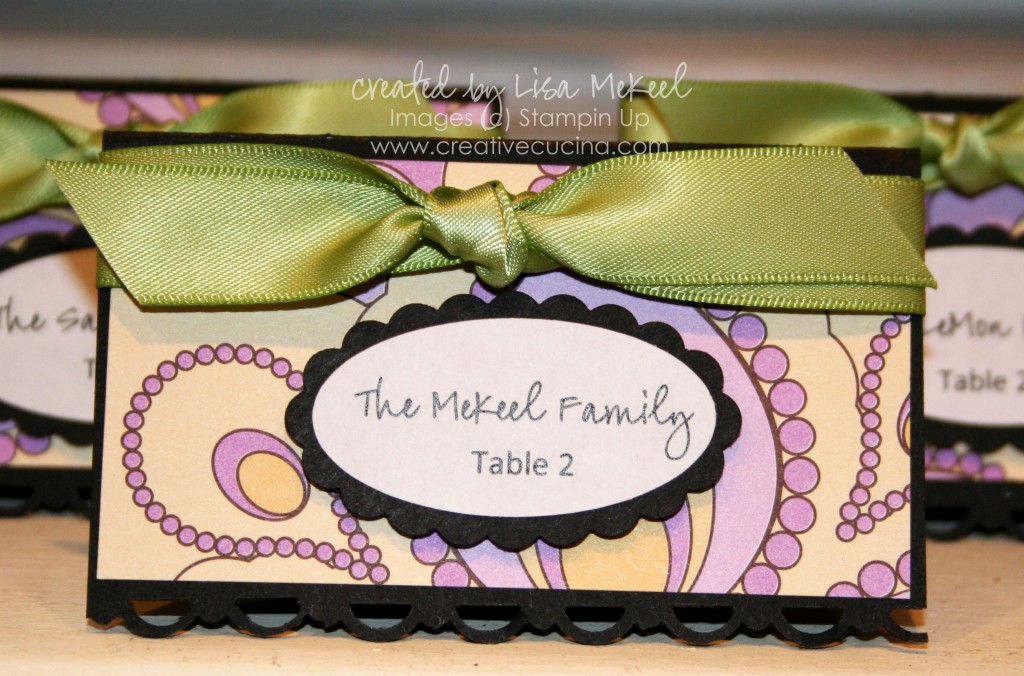
Elegant Place Cards–Shades of Spring

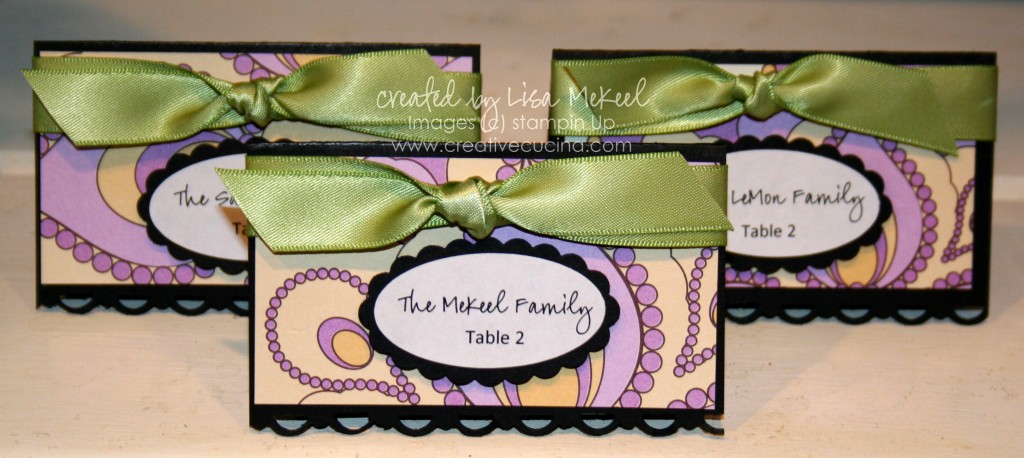
I made these place cards for my Aunt’s 50th Birthday party. I wanted them to be elegant and fun, but not too formal. Shades of Spring DSP made a perfect backdrop for the place cards, cut to 3 1/2″ x 2″. The Basic Black card stock was cut to just under 3 3/4″ x 4 1/2″. Then, I used the Scallop Trim Border Punch along the 3 3/4″ side and folded it in half as shown.

Next, I adhered the Shades of Spring DSP to the black card stock with SNAIL adhesive. The ribbon is Certainly Celery 5/8″ Satin Ribbon, which I tied around the inside of the place card and knotted in the front.

The names and table numbers were printed on the computer, punched out with the Large Oval Punch and layered on Basic Black card stock I punched out with the Scalloped Oval Punch. That was then attached to the front with a Stampin Dimensional.
Something Sweet Gumball Machine for Boys

gumball_boy

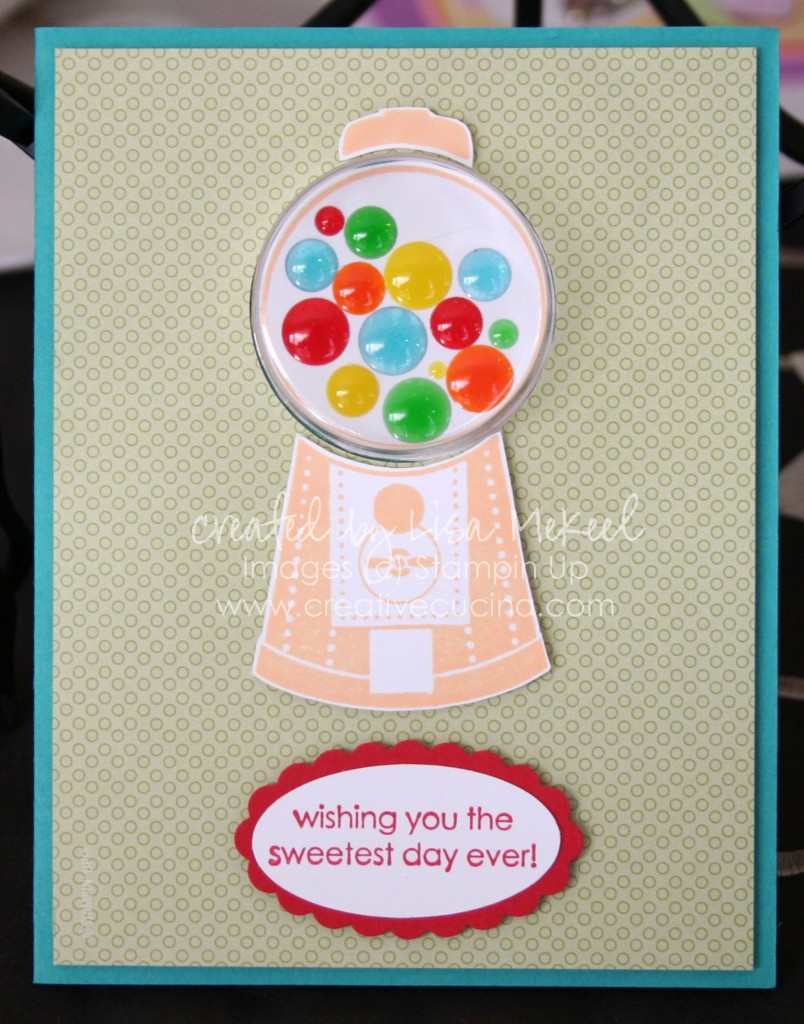
When I play with a stamp set, I like to make a few cards at once. It gives me a chance to try out different ideas, all of which won’t work on just one card. Yesterday I made gumballs with Circle Rhinestone Brads. Today, I used Rain Dots in these bright gumball colors.

The card base is Tempting Turquoise, layered with Tall Tales Designer Series Paper. The gumball machine from Something Sweet was stamped in Apricot Appeal Ink on Whisper White card stock. I trimmed the bottom part with scissors and the top circle was punched with the 1 3/4″ Circle Punch. I added the adhesive backed Rain Dots to the circle portion and set them aside.

Before adhering the DSP to the base with Stampin Dimensionals, I punched a hole in the DSP with the 1 3/4 Circle Punch. I added a Sweet Treats Cup and removed the adhesive ring. Then, I put the circle with the Rain Dots behind the Sweet Treats Cup so that the edges of the circle touch the adhesive ring. This helps hold the circle in place. The bottom of the gumball machine was then adhered with Stampin Dimensionals.

Finally, I stamped the sentiment from Something Sweet in Real Red ink on Whisper White, punching it out with the Large Oval Punch and layering it onto a Real Red Scallop Oval Punch. That was attached to the base with Stampin Dimensionals.

Make Your Own Bronze Ink: Thanksgiving Place Cards

112609 015

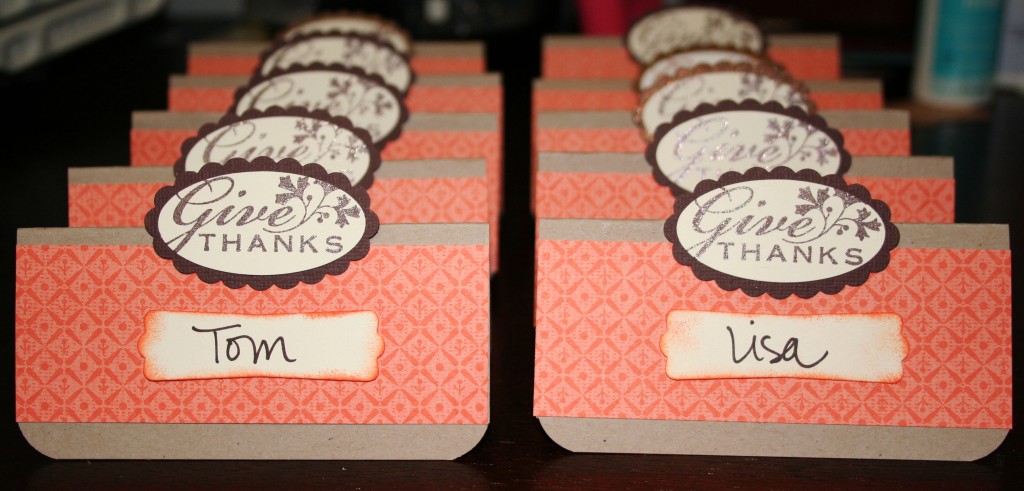
I made these quick and simple place cards last night. The base is a 4″x4″ square of kraft card stock, the corners trimmed with the Corner Rounder Punch. Then, I folded them in half and glued on a 4″ x 1 1/4″ strip of Holiday Bulk Buy DSP in this tangerine pattern.

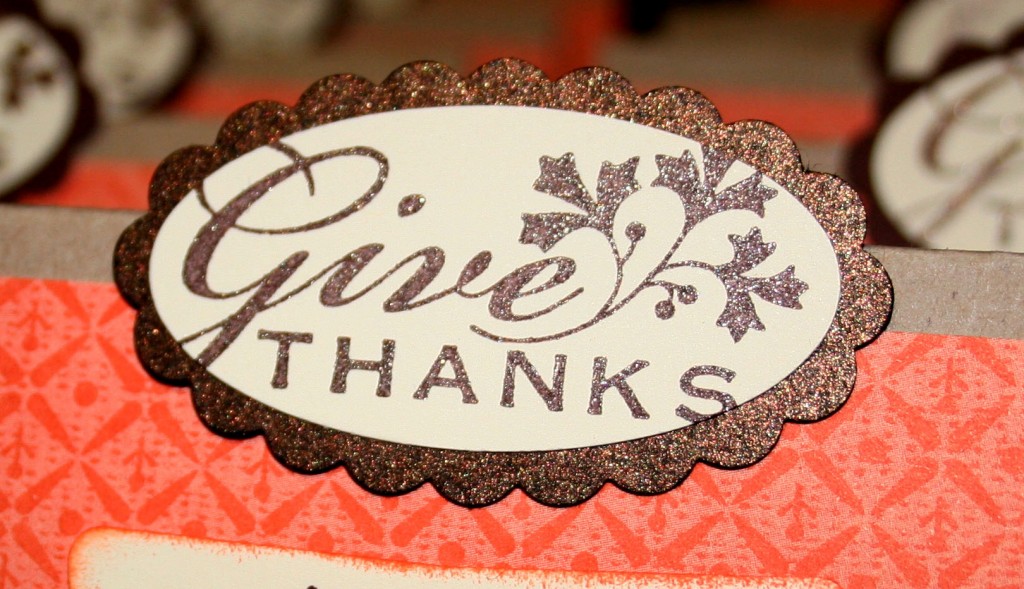
I’ve been using Shimmer Paint a lot lately, and for this project, I created a sparkly Bronze Ink by mixing a couple drops of Chocolate Chip Reinker and Champagne Shimmer Paint. I mix them in an empty button container, then dab it onto my stamp with a Sponge Dauber.

For these place cards, I stamped “Give Thanks” from Holiday Best in the chocolate chip/shimmer paint and stamped it onto Very Vanilla card stock. Then, I punched it out using the Large Oval Punch and layered it onto Bronze Card Stock (Taste of Textiles, retired) that I punched with the Scallop Oval Punch. (Some of the ovals are matted onto textured chocolate chip card stock because I did not have enough Bronze.) The shimmer is hard to see but here is a close up view:

placecard_closeup

To finish off the cards, I wrote our names in a dark brown Sharpie on Very Vanilla card stock, punched out with the Modern Label Punch. I sponged Tangerine Tango ink around the edges with the Sponge Dauber and adhered them with mini glue dots.

Bad Behavior has blocked 347 access attempts in the last 7 days.

css.php