Spice Cake Birthday Card with Twisted Ribbon Medallion

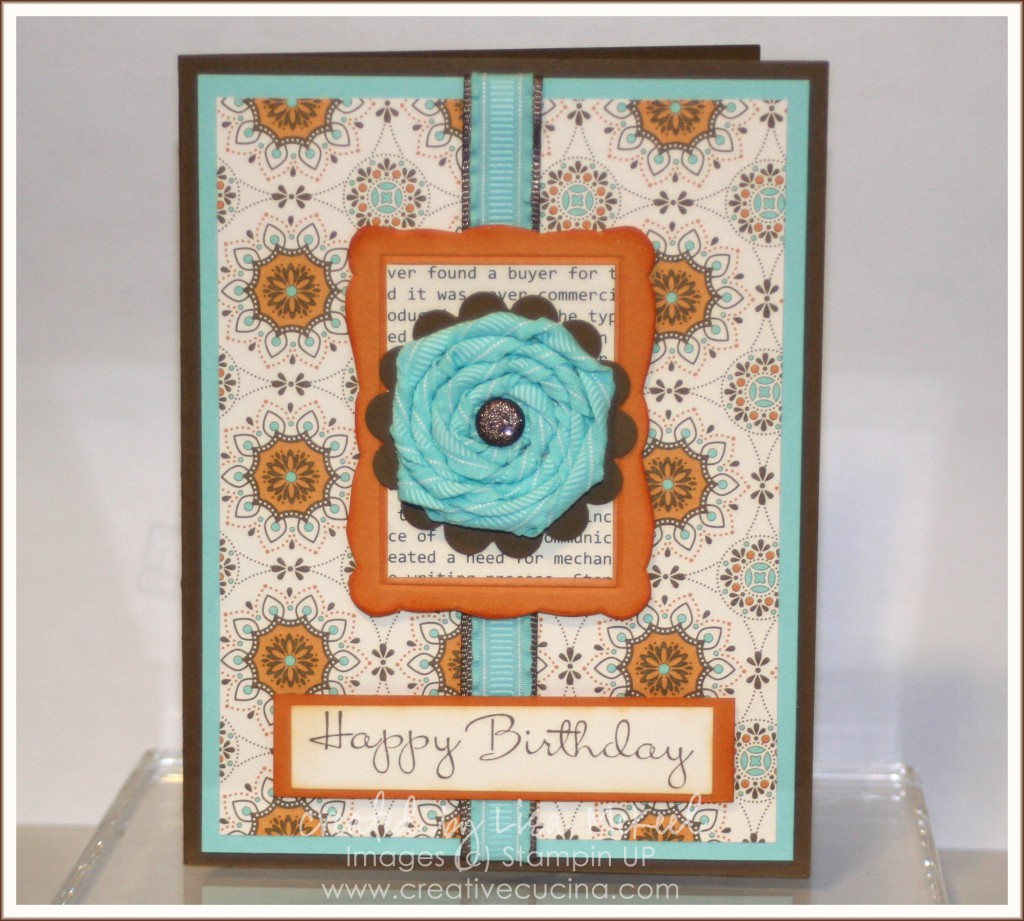
Fall is my favorite season, so it wasn’t a surprise when I fell in love with the new Spice Cake Designer Series Paper, from the Holiday Mini Catalog. The colors in the paper are Pool Party, More Mustard, Pear Pizazz, River Rock, Soft Suede, and Very Vanilla. Other than the great colors and patterns, the paper gives me an excuse to use Pool Party 3/8″ Ruffled Ribbon! Scroll down for directions on how to make the Twisted Ribbon Medallion shown on this card.

The base is Soft Suede card stock, layered with Pool Party and a layer of Spice Cake DSP. Down the front, I added Pool Party 3/8″ Ruffled Ribbon layered with 1/2″ Polka Dot Soft Suede Grosgrain (retired).

In the center, I made a little frame by using the Designer Frames Textured Impressions folder in the Big Shot with More Mustard card stock. I cut the frame out and then sponged More Mustard ink around the edges to add depth. The patterned paper inside the frame is from First Edition Specialty DSP.

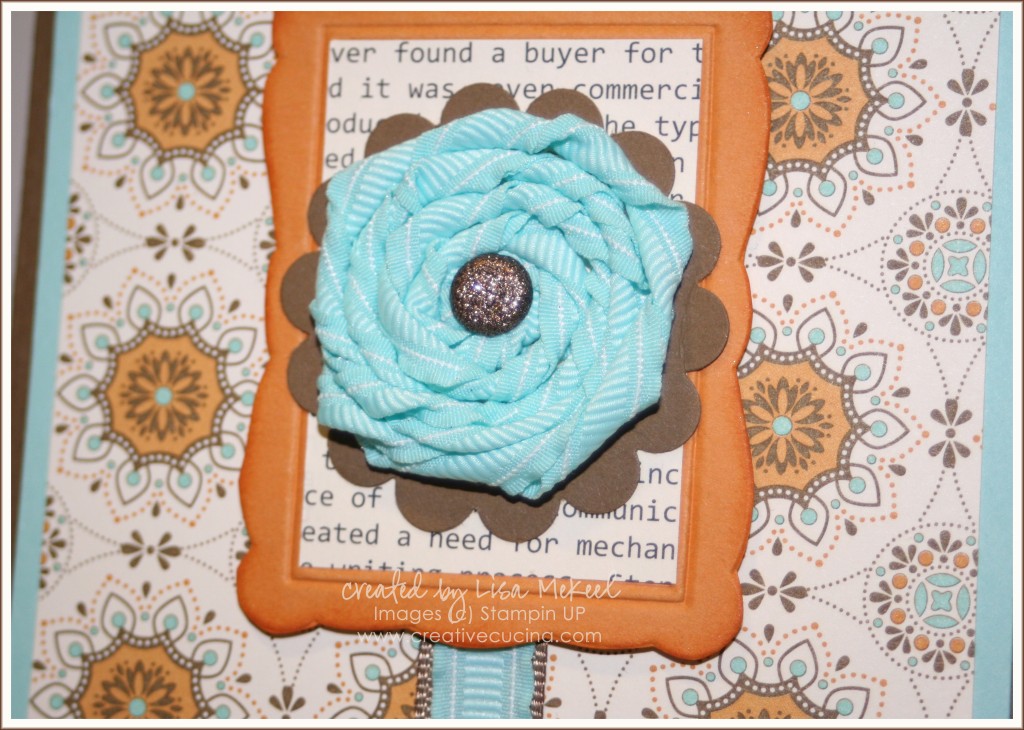
As for the Twisted Ribbon Medallion (that’s what I’m calling it anyway), it’s very simple to make.

  1. Punch out a circle from card stock using the 1 3/8″ Circle Punch (you can make it any size you want but that is what I used here)
  2. Cover the front of your circle with Sticky Strip.
  3. Leave your ribbon on the roll and start in the center of the circle. Stick the end of your ribbon down in the middle of the card stock and start twisting the roll until your ribbon starts to twist as well.
  4. Keep twisting and spiraling the ribbon around the circle until you get all of the card stock covered.
  5. To finish, cut your ribbon off the roll, fold the end over the back of the circle, and adhere it with Sticky Strip.
  6. To add a brad in the center, use the cropadile. If your circle is too large for the cropadile to reach the center, you can use your paper piercer as well.

For this card, I used a gorgeous Glimmer Brad (I think this is a Soft Suede one) in the center of the medallion. Then, I layered the medallion onto a Soft Suede scallop circle made with the Scallop Circle Punch.

The sentiment is from Happiest Birthday Wishes, stamped with Soft Suede ink on Very Vanilla card stock. I sponged the edges with More Mustard ink and a sponge dauber, then matted it on More Mustard card stock. It’s attached to the card with stampin dimensionals.
{To a Classic} Birthday Card for Dads

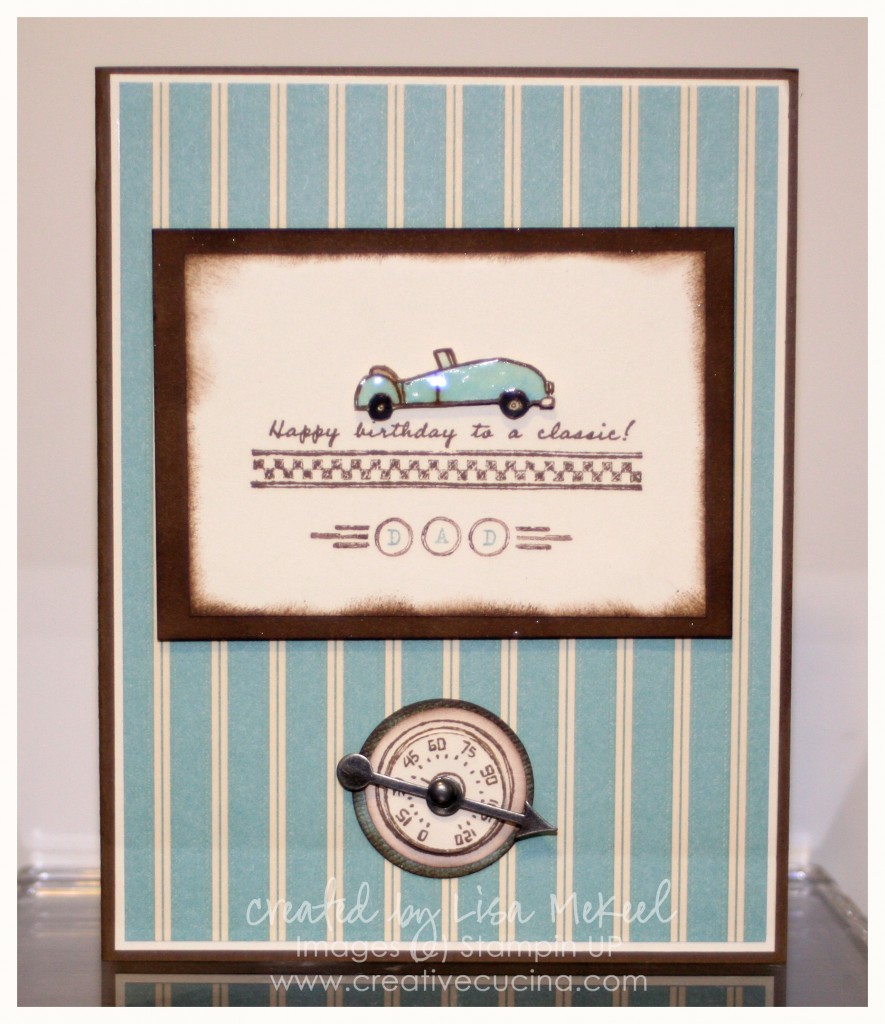
This is a card I made for my father in law’s birthday. It uses the stamp set To a Classic. The card base is chocolate chip card stock. layered with Very Vanilla and Elegant Soiree DSP in this striped pattern.

I stamped the images in chocolate chip ink on Very Vanilla card stock. The car and the DAD circles were stamped again on Very Vanilla scrap, cut out and adhered to the base image with stampin dimensionals. The car was colored in with Baja Breeze marker and then topped with Crystal Effects.

Around the edges of the stamped layer, I sponged some chocolate chip ink, then matted it onto chocolate chip card stock.

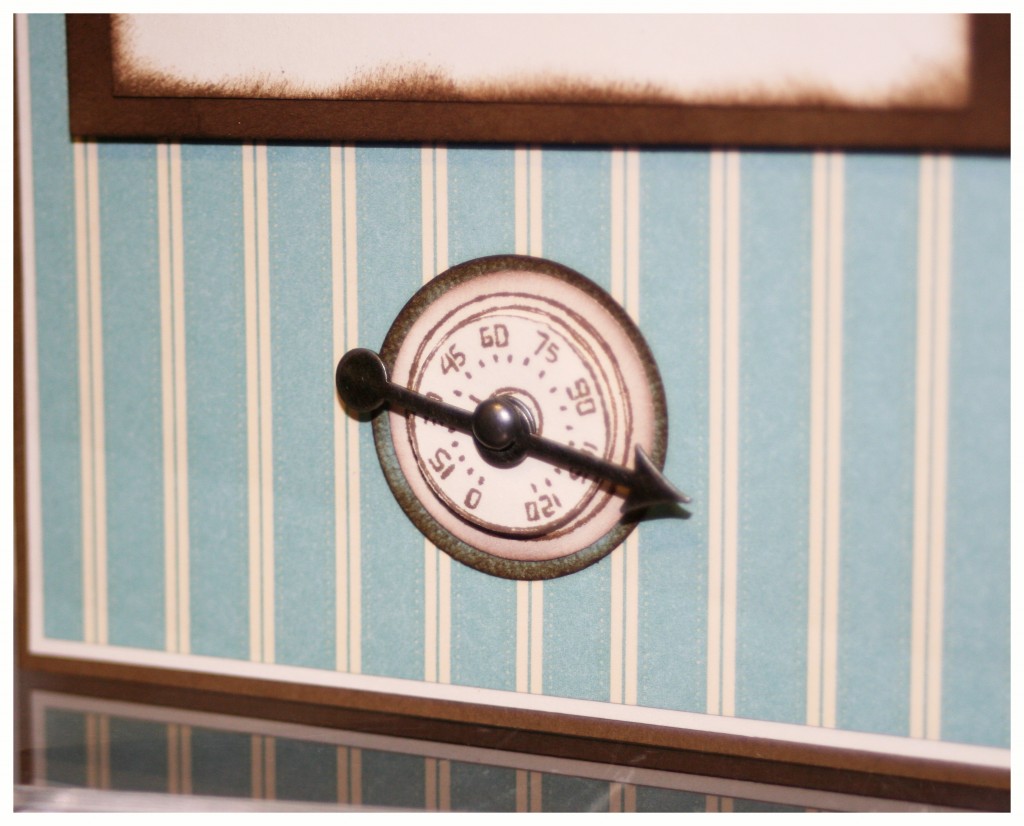
For a fun accent, I stamped the speedometer on Very Vanilla with chocolate chip ink, punched out the circles and matted them on Baja Breeze card stock sponged with chocolate chip ink. Then, I used a Game Spinner arrow for the center of the speedometer, and of course I put it all the way to 100 mph!

More Flirtatious Specialty Fabric Cards

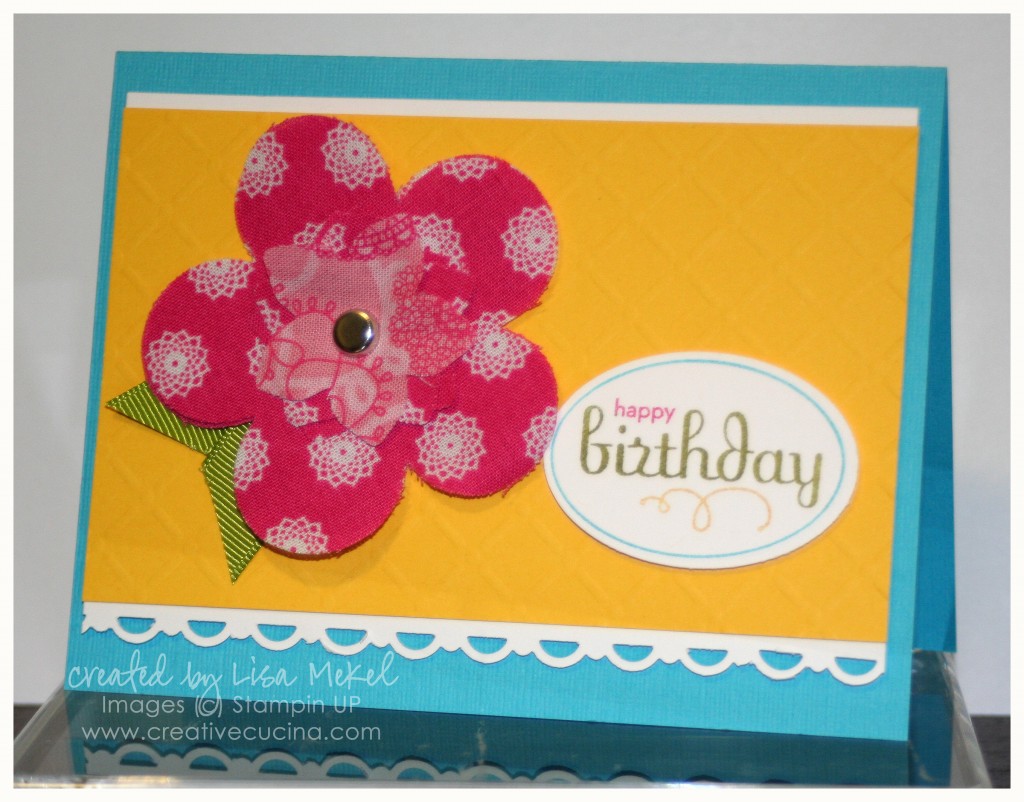
Here are the last two cards I made experimenting with the Flirtatious Specialty Fabric. First up is this bright birthday card in  Tempting Turquoise, Daffodil Delight, and Melon Mambo. I used the Perfect Details Texturz Plate in the Big Shot to texturize the yellow card stock. I layered it on Whisper White, which I punched with the Scallop Trim Border Punch.

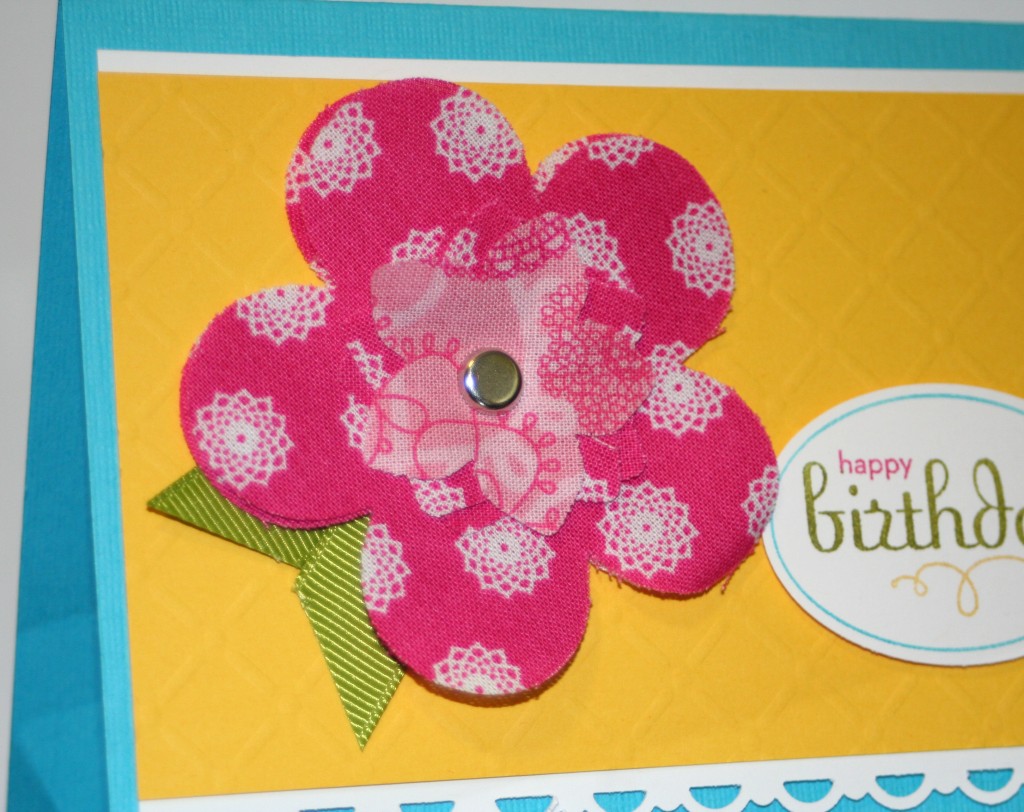
The flower was made using Island Floral Bigz Die. I layered two of the large flowers and two of the small ones, using a 5/16″ Basic Brad in the center to hold them together. I made “leaves” with Old Olive 5/8″ Grosgrain ribbon.

As for the sentiment, I used Perfect Punches colored in with SU Markers and then punched using the Extra Large Oval Punch, then attached to the card using stampin dimensionals.

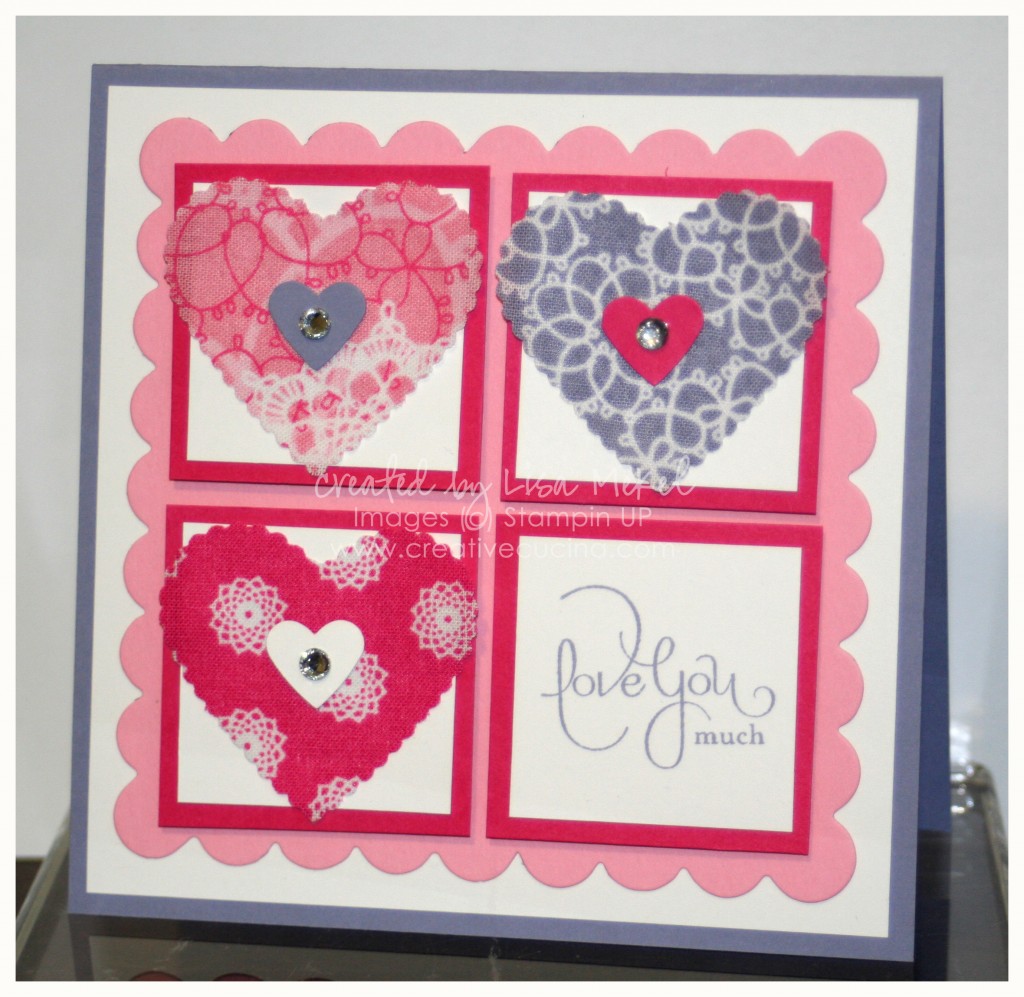
Finally, I made one last card with Flirtatious Designer Fabric. It’s a 5″x5″ square using Wisteria Wonder as a base. The next layer is Whisper White, followed by Pretty in Pink die cut with Bigz Scallop Square Die.

The fabric was cut using the Scalloped Heart of Hearts Embosslit Die. I layered them onto melon mambo/whisper white squares, with a Small Heart Punch in the center. A rhinestone was added to the middle of each heart. The squares are adhered with stampin dimensionals.

The sentiment is from Well Scripted, stamped in Wisteria Wonder ink.

Bad Behavior has blocked 183 access attempts in the last 7 days.

css.php