Archives for 2009

Making a Blog Banner with My Digital Studio

Making a blog banner is so easy using Stampin Up’s My Digital Studio.  Here are step by step directions on how to turn your MDS creation into a work of art you can display on your blog. Click on the images to enlarge.

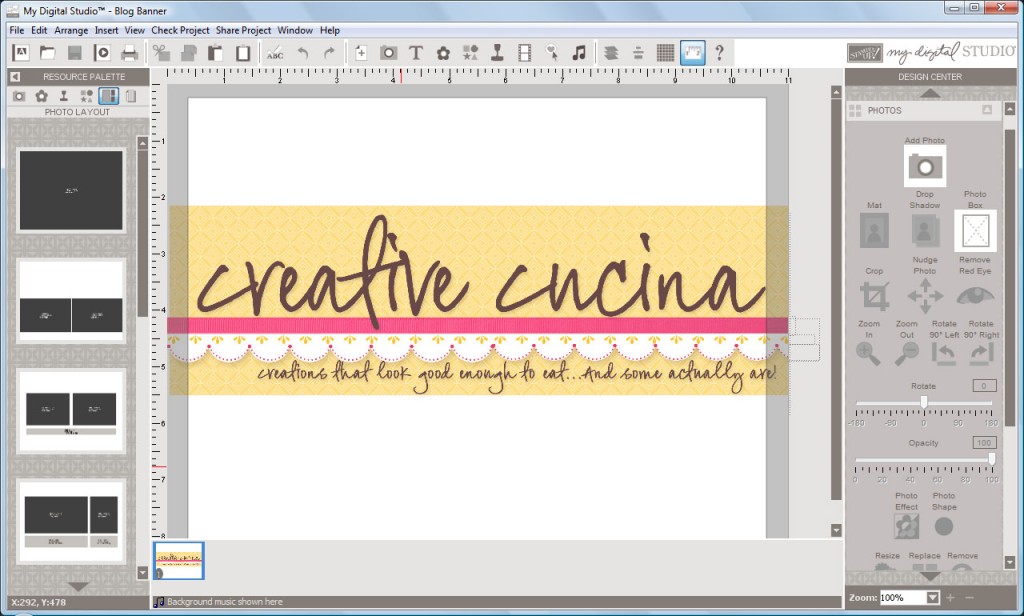
Step 1: Create your image in MDS

blog_banner1

As you can see, I made my image in MDS by opening up a blank 8 1/2″ x 11″ page and kept my design approximately 3 1/2″ x 11″ (roughly the size of my blog header). Save your file as a .JPEG in MDS.

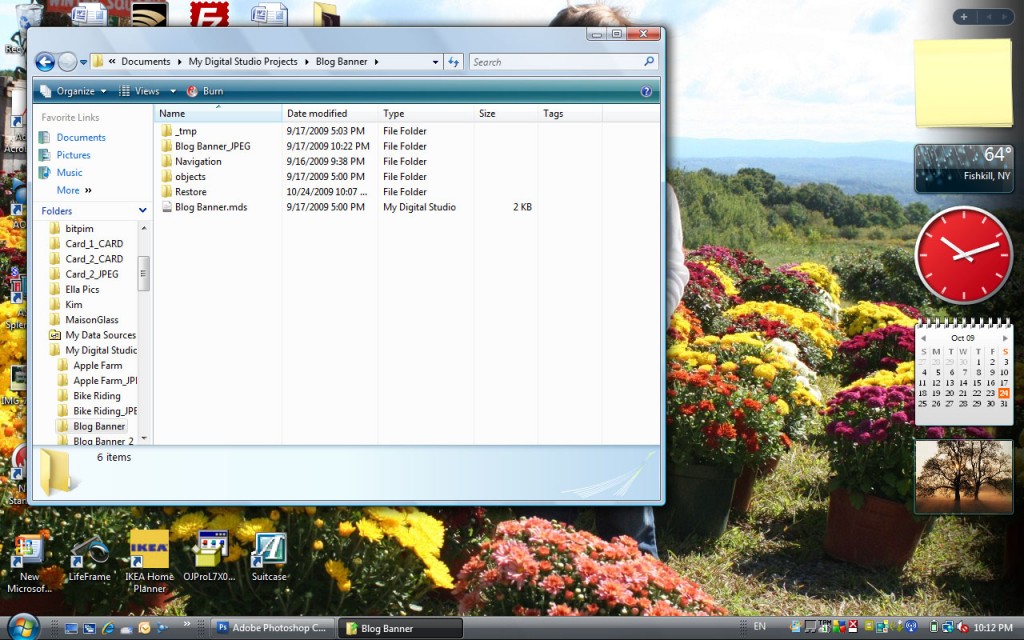
Step 2: Open up your My Digital Studio Projects Folder and select the folder where your .JPEG is saved (Mine is called “Blog Banner_JPEG”)

blog_banner2

Step 3: Right Click on the .JPEG file and select “Open with Photoshop”

blog_banner3

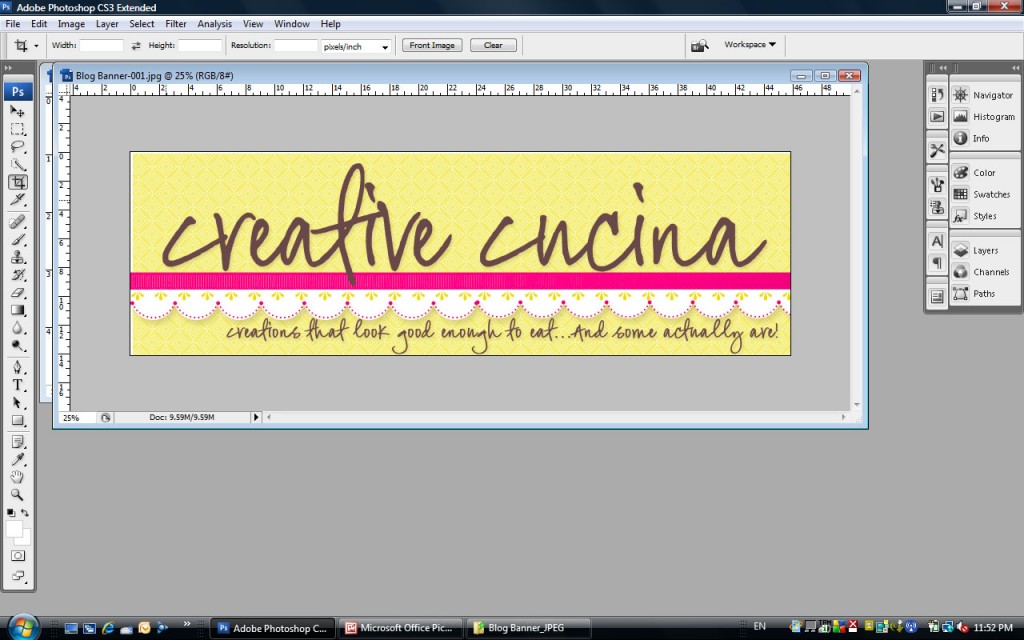
Step 4: Crop your image in Photoshop so there is no white space showing

blog_banner5

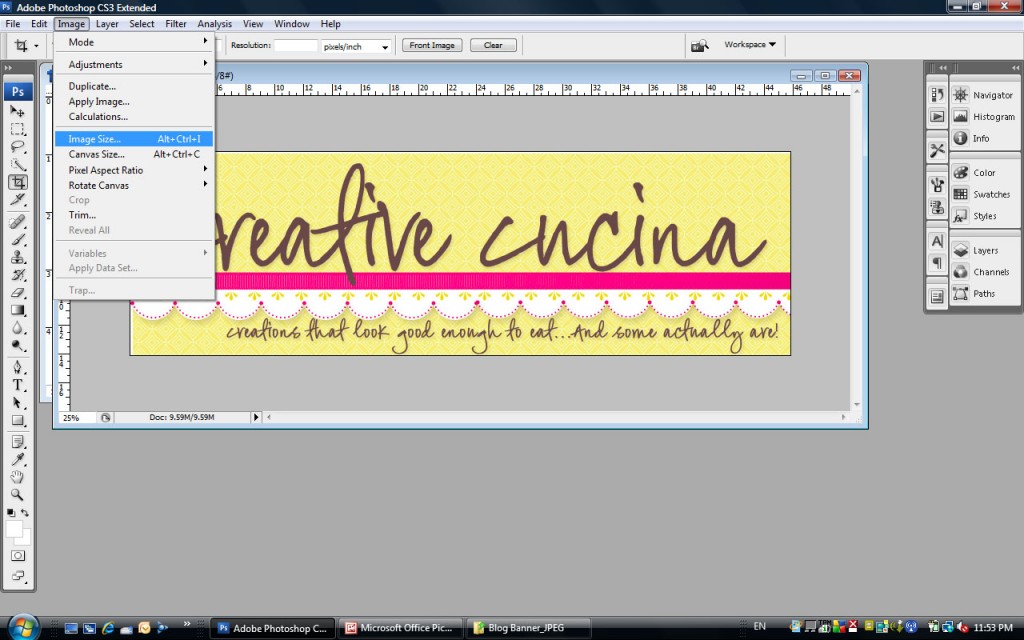
Step 5:Click Image/Image Size

blog_banner6

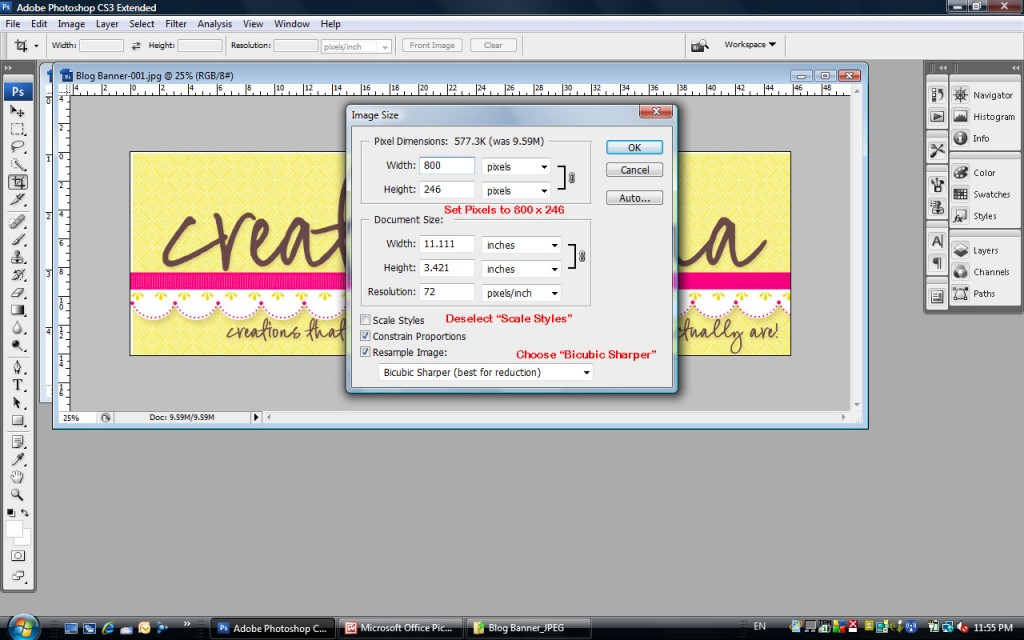
Step 6: Resize your image

blog_banner7

Resizing may be necessary before uploading the image to your blog. To resize and avoid distortion (a)Deselect “Scale Styles” box; (b) Choose “Bicubic Sharper” at the bottom; and (c) Set the pixel width to 800 (you can play around with the number but close to this seems to work for most blogs). Note: The pixel value for height will automatically adjust once you input 800 for the width. Click OK.

Now that you’ve resized your image, make sure to view it at 100%. It should not look pixelated or blurry. If it looks good, then you’re done! Uploading to your blog will vary depending on which service you use (wordpress, blogspot, etc.)

For my wordpress blog, I saved the .JPEG file to my site theme’s image folder, and made a simple HTML anchor link with the image. Then, I placed the anchor into the header.php file of my theme so it would show up on my blog.  Generally, the code will appear as shown below. Yours may vary so it may not work for everyone. Try substituting in your information as follows:

<a href=”http://www.yoursite.com” alt=”http://yoursite.com“><img src=”http://yoursite.com/wp-content/themes/your-theme/images/yourbannerfilename.jpg“</img></a>
55th Wedding Anniversary Invites

My grandparents are celebrating their 55th wedding anniversary soon and guess who’s in charge of making the invitations??  That’s right, me!

I don’t know why we didn’t have a 50th anniversary party for them?  Maybe it was because my grandfather was ill at that time. I don’t remember, but in any event, their 55th is coming and they want to celebrate.

Option 1:

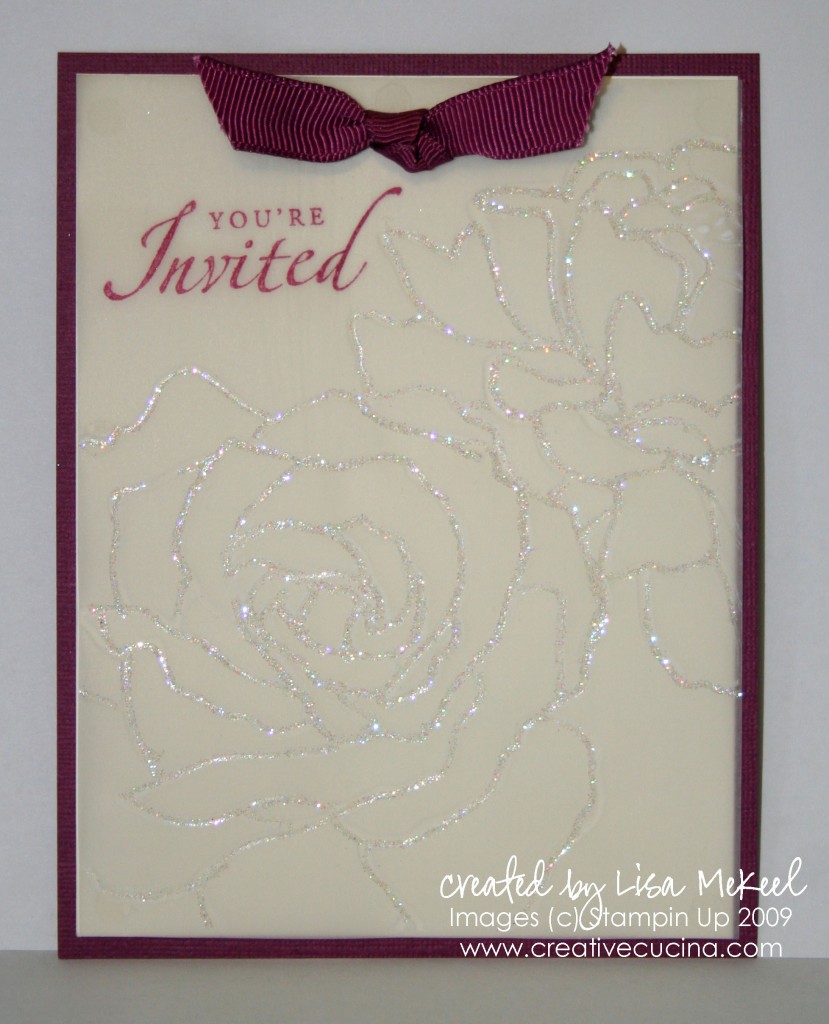
GRAinvite_1

This is so sparkly in real life, I tried my best to get it on camera. The base is rich razzleberry card stock, layered with a very vanilla panel. On top, I ran a 4″ x 5 1/4″ piece of vellum through the Big Shot using the Manhattan Flowers Embossing Folder. Then, with the debossed side up (raised side down), I filled in the image with my fine tip glue pen and added Dazzling Diamonds Glitter. I love this result! (See here for another example).

To finish it off, I stamped “You’re Invited” from Sincere Salutations in Rich Razzleberry ink on the vellum and tied some polka dot rich razzleberry ribbon in a knot and adhered it to the top of the card using a glue dot.

Option 2:

GRAinvite_2

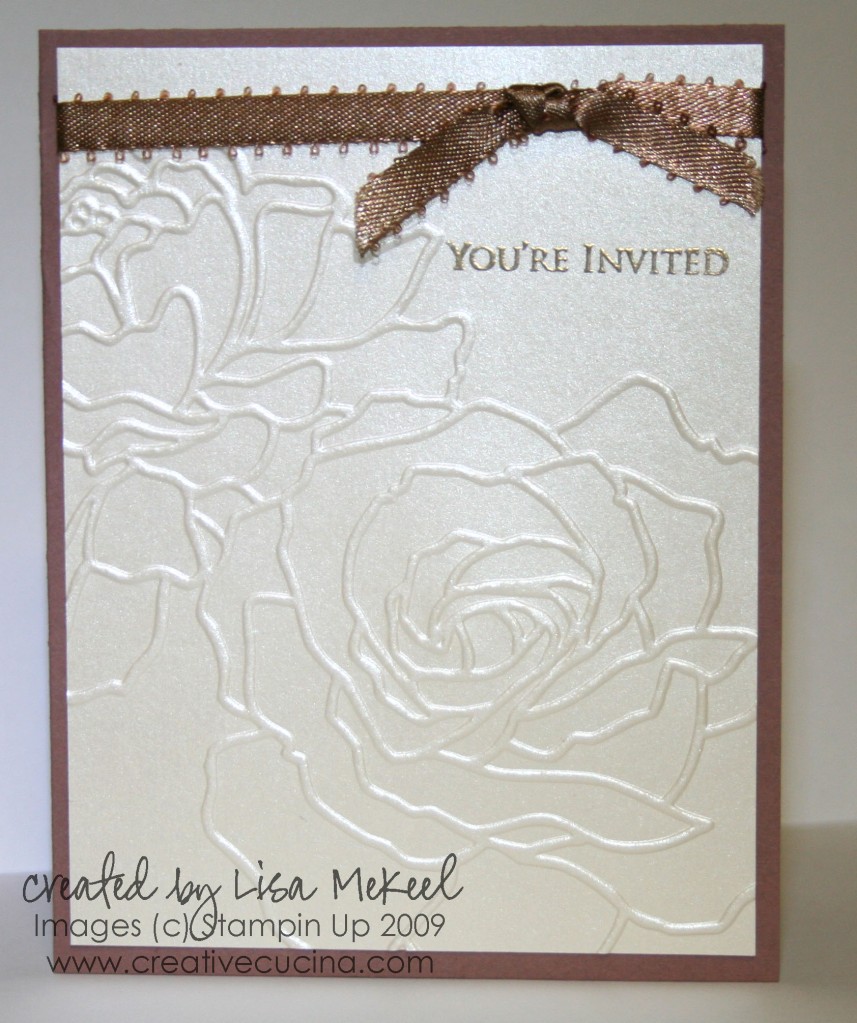
So simple but so elegant. The card base is close to cocoa, layered with an ivory shimmer paper which I embossed using the Manhattan Flowers Embossing Folder and the Big Shot. In the upper right corner, I stamped “You’re Invited” from For the Bride in Versamark and embossed it with Gold Embossing Powder. The ribbon was purchased from a craft store, and it’s a shimmery version of close to cocoa.

Option 3:

GRAinvite_3

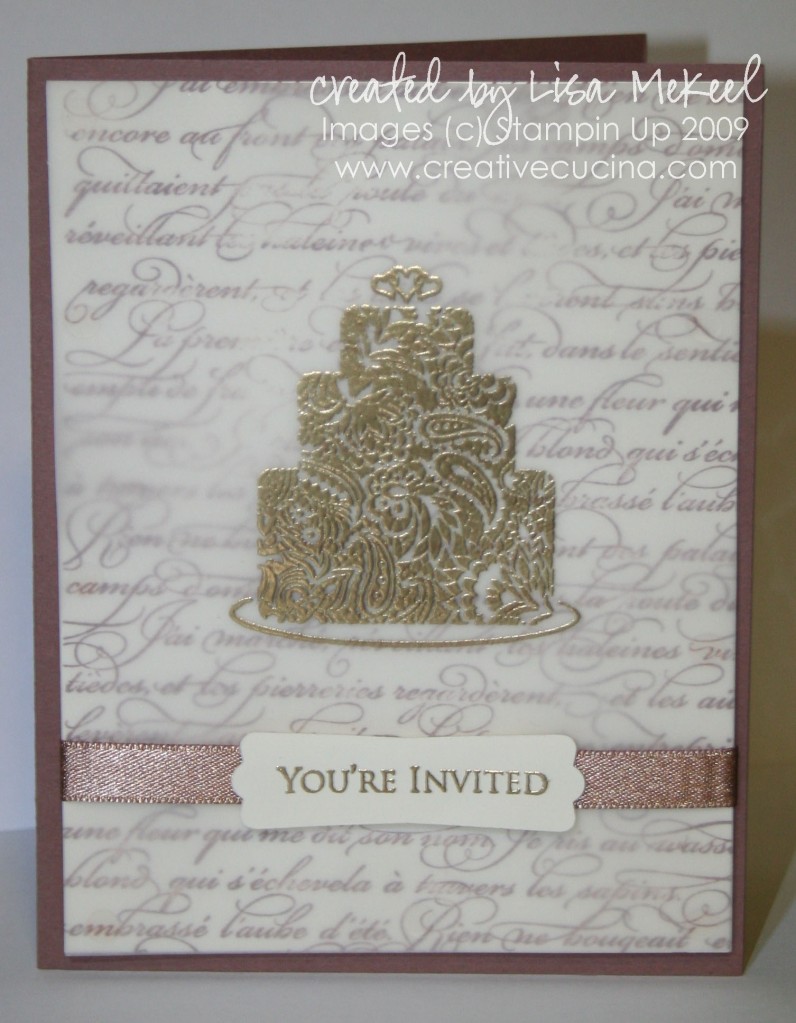
This version is well suited for a 50th Anniversary card. The base is close to cocoa again, layered with very vanilla which I stamped with En Francais in close to cocoa ink. A vellum overlay was stamped with the cake from For the Bride in Versamark and embossed with Gold Embossing Powder.

The ribbon was purchased from a craft store and the “You’re Invited” from For the Bride was stamped on very vanilla card stock in Versamark and embossed with Gold Embossing Powder as well. I punched out the sentiment using the Modern Label Punch and adhered it using dimensionals.

Option 4:

GRAinvite_4

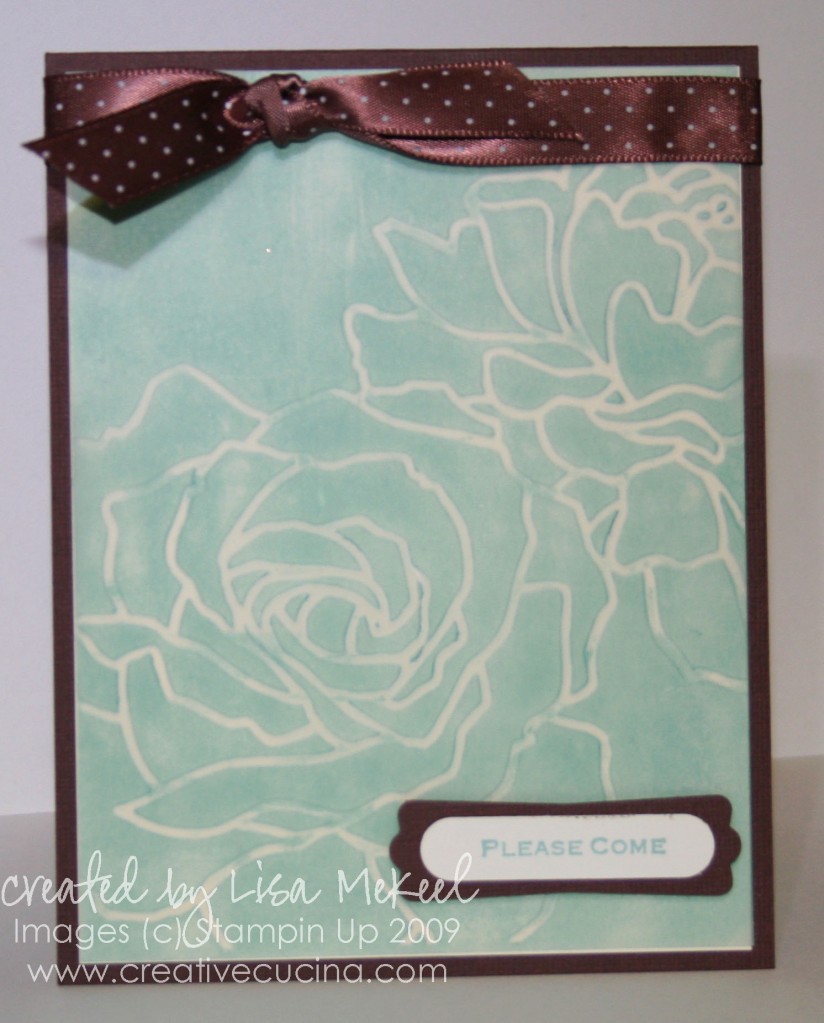
This is beautiful, but not really my grandparents’ style. The base is chocolate chip textured card stock, layered with whisper white. On top, the vellum layer was embossed using the Manhattan Flowers Embossing Folder and then with the debossed side up (raised side down) I brayered over the vellum using Baja breeze ink.

At the top, I added ribbon from Valet Ribbon Originals (retired). The sentiment is from Please Come stamped in Baja Breeze on whisper white. I punched it out with the Word Window Punch and mounted it on chocolate chip card stock punched out with the Modern Label Punch.

3D Pumpkin Punch Card

IMG_0805

Fall is my favorite time of year, one of the reasons being it’s Pumpkin Season!

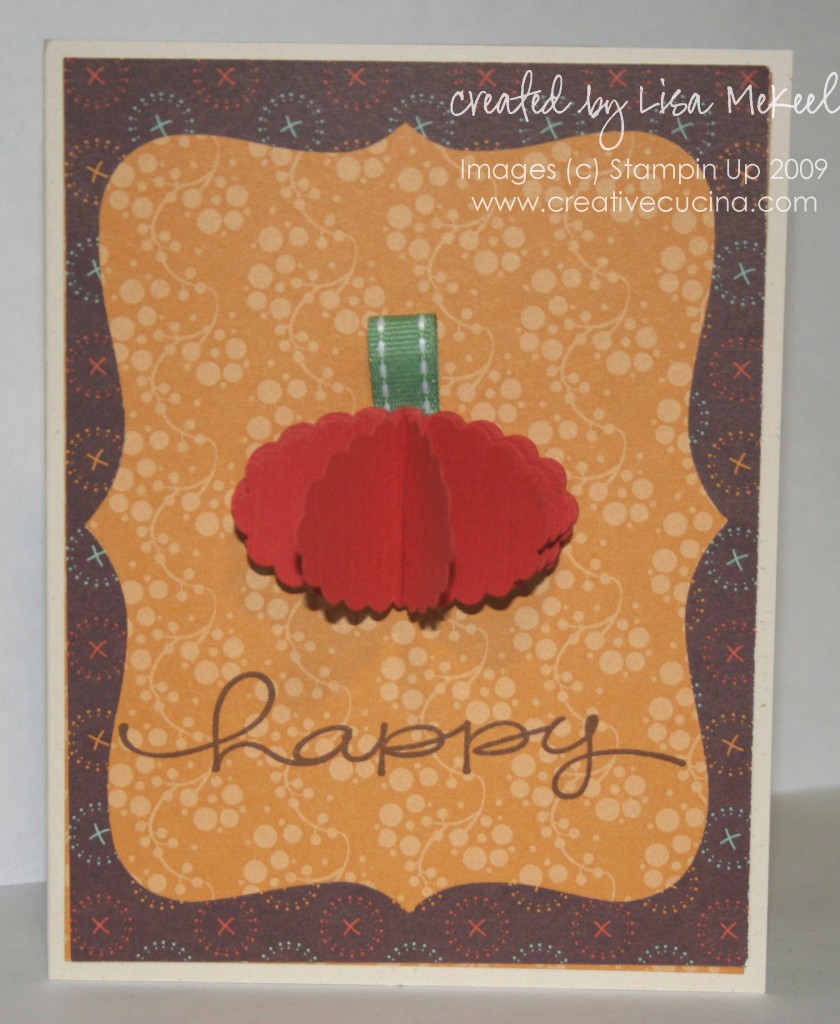
The card I made above is based on this card made by Brandi Wiggins. I used her idea of making a 3D Pumpkin using the Scallop Oval Punch. The card base is Very Vanilla, layered with Autumn Vine DSP, one of which was cut using the Top Note Die. I made the pumpkin using Dusty Durango textured card stock punched with the Scallop Oval Punch, each one folded in half. The stem is made from Wild Wasabi Stitched Ribbon.

To finish the card, I stamped “happy” from Happy Everything in chocolate chip ink at the bottom. It would make a great Halloween card, Thanksgiving card, or even a fall Birthday card!

Bad Behavior has blocked 268 access attempts in the last 7 days.

css.php