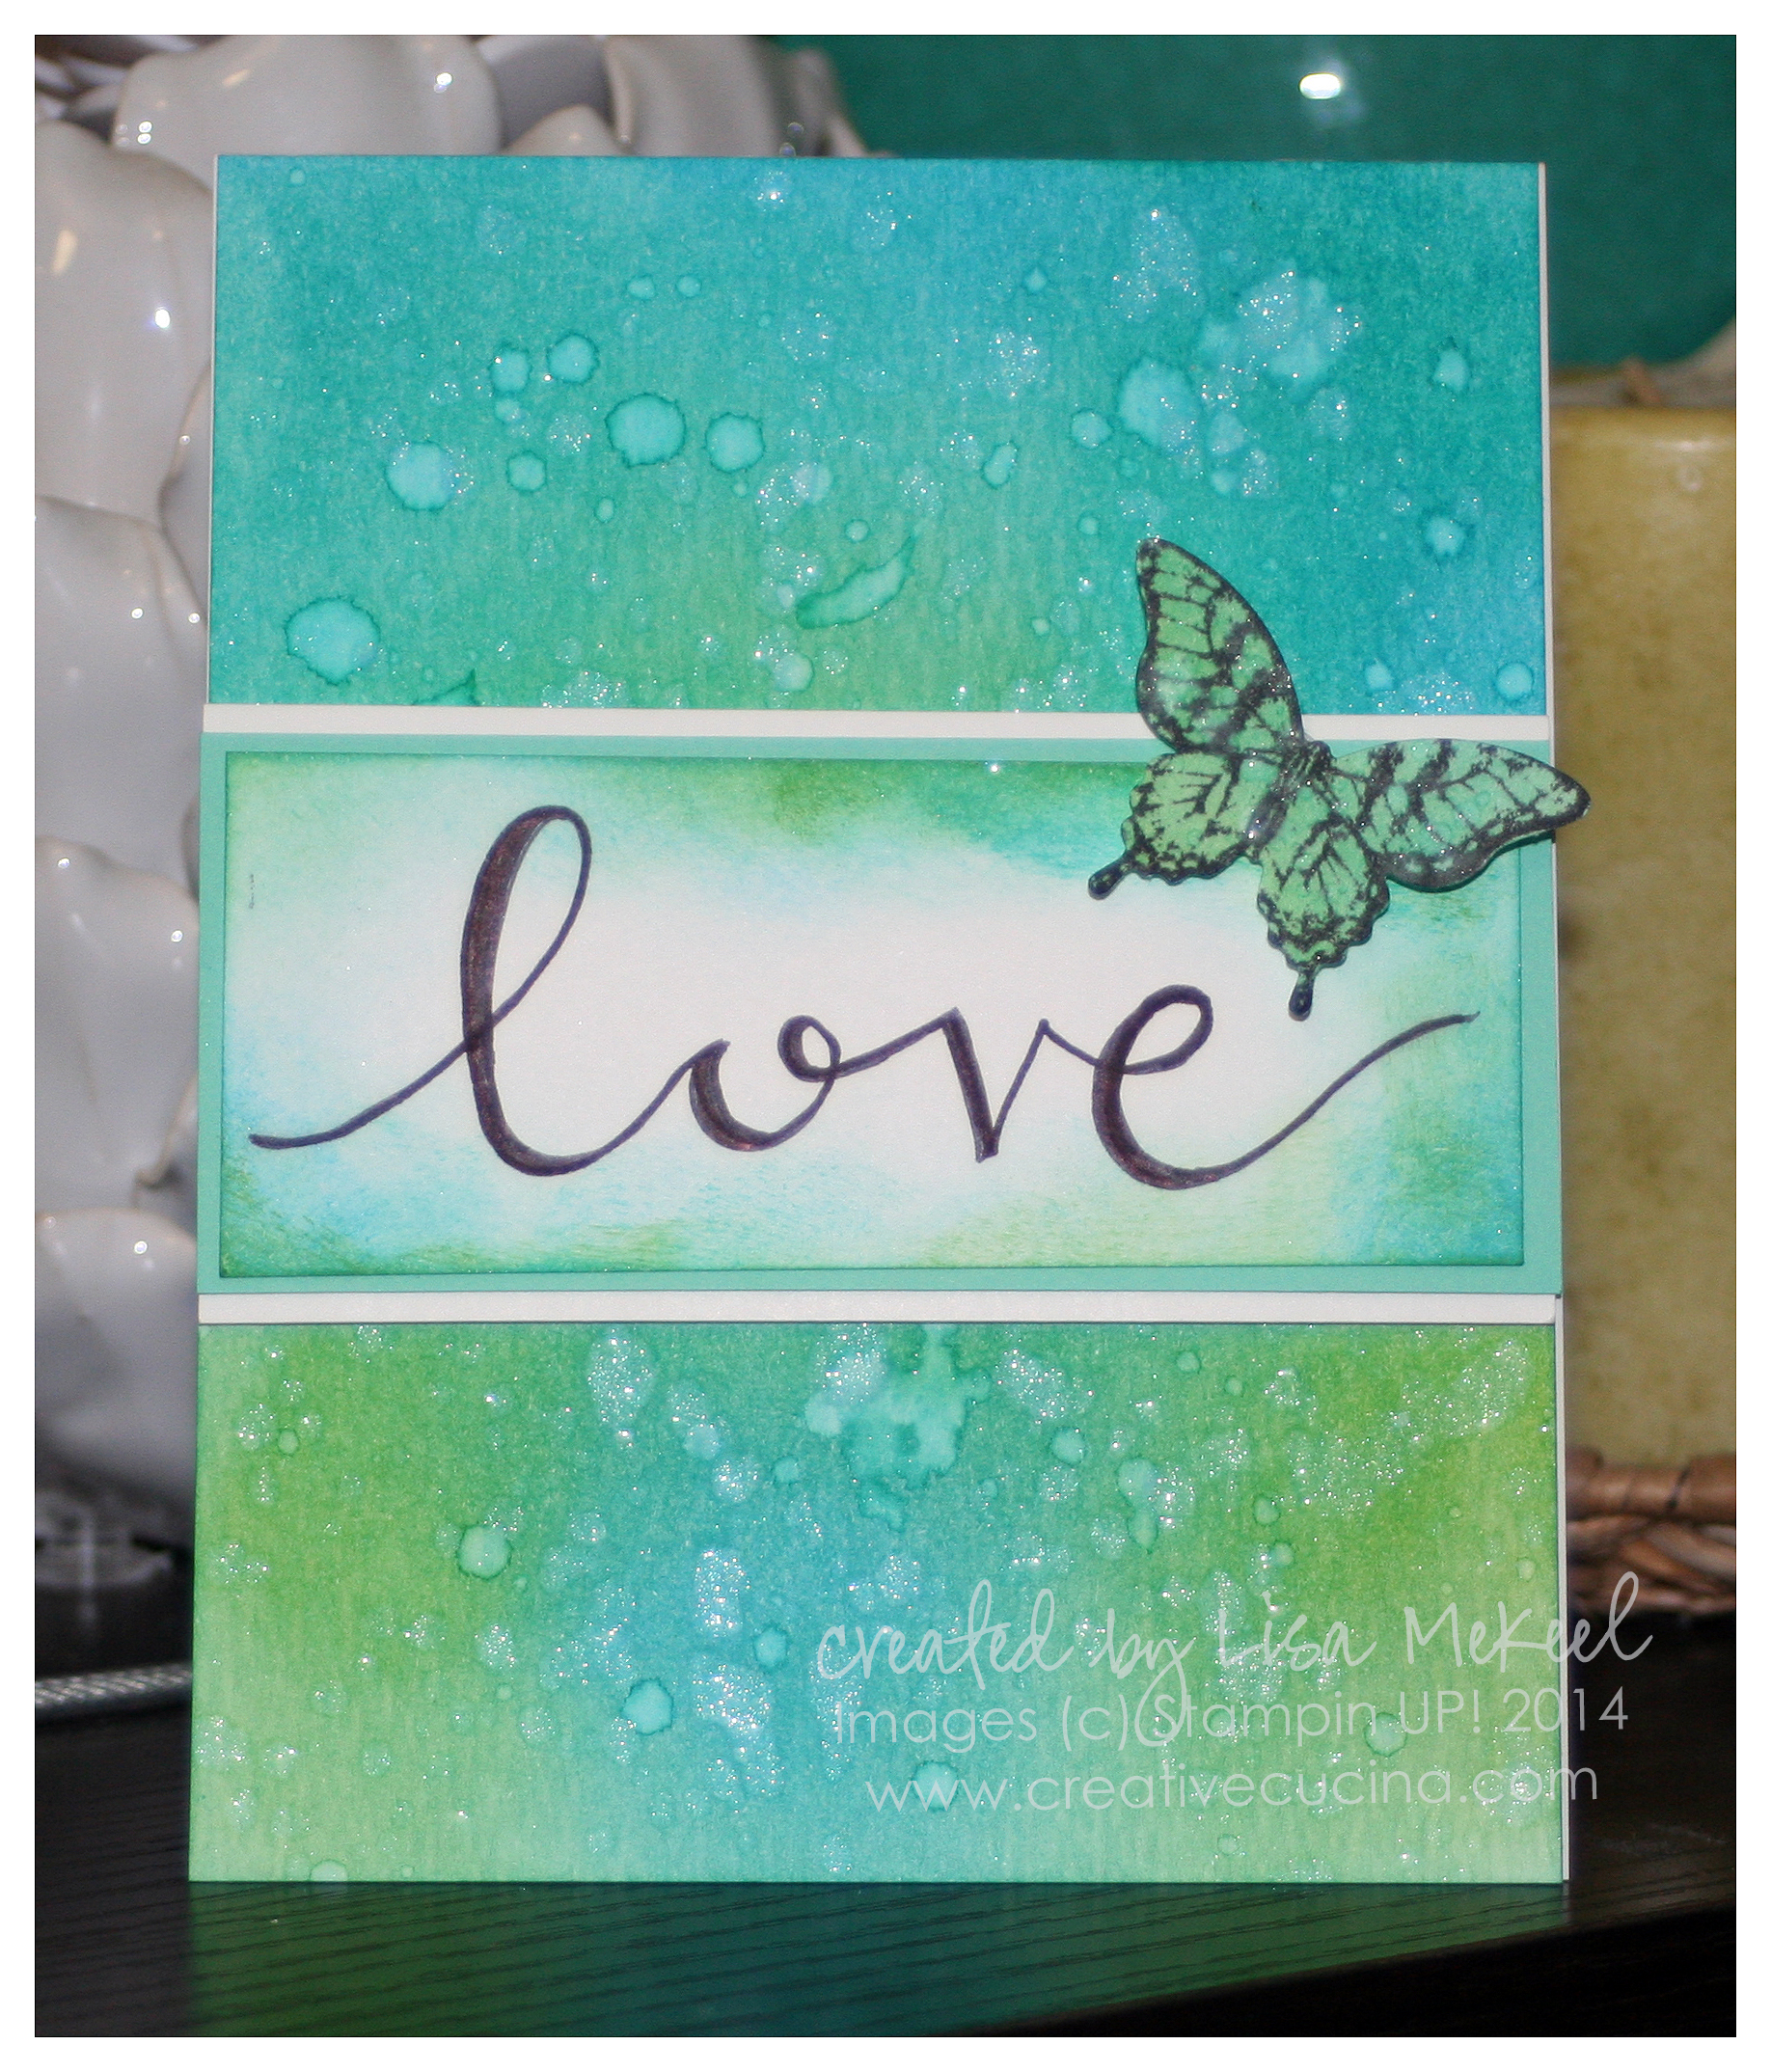
 I’ve recently discovered the talented Jennifer McGuire. I love watching her videos and perusing her blog. Her projects inspired me to experiment with Distress Inks, which I have never used before. I bought a small package of spots when they went on sale at Hobby Lobby last week. Tonight I decided to use them and made this card.
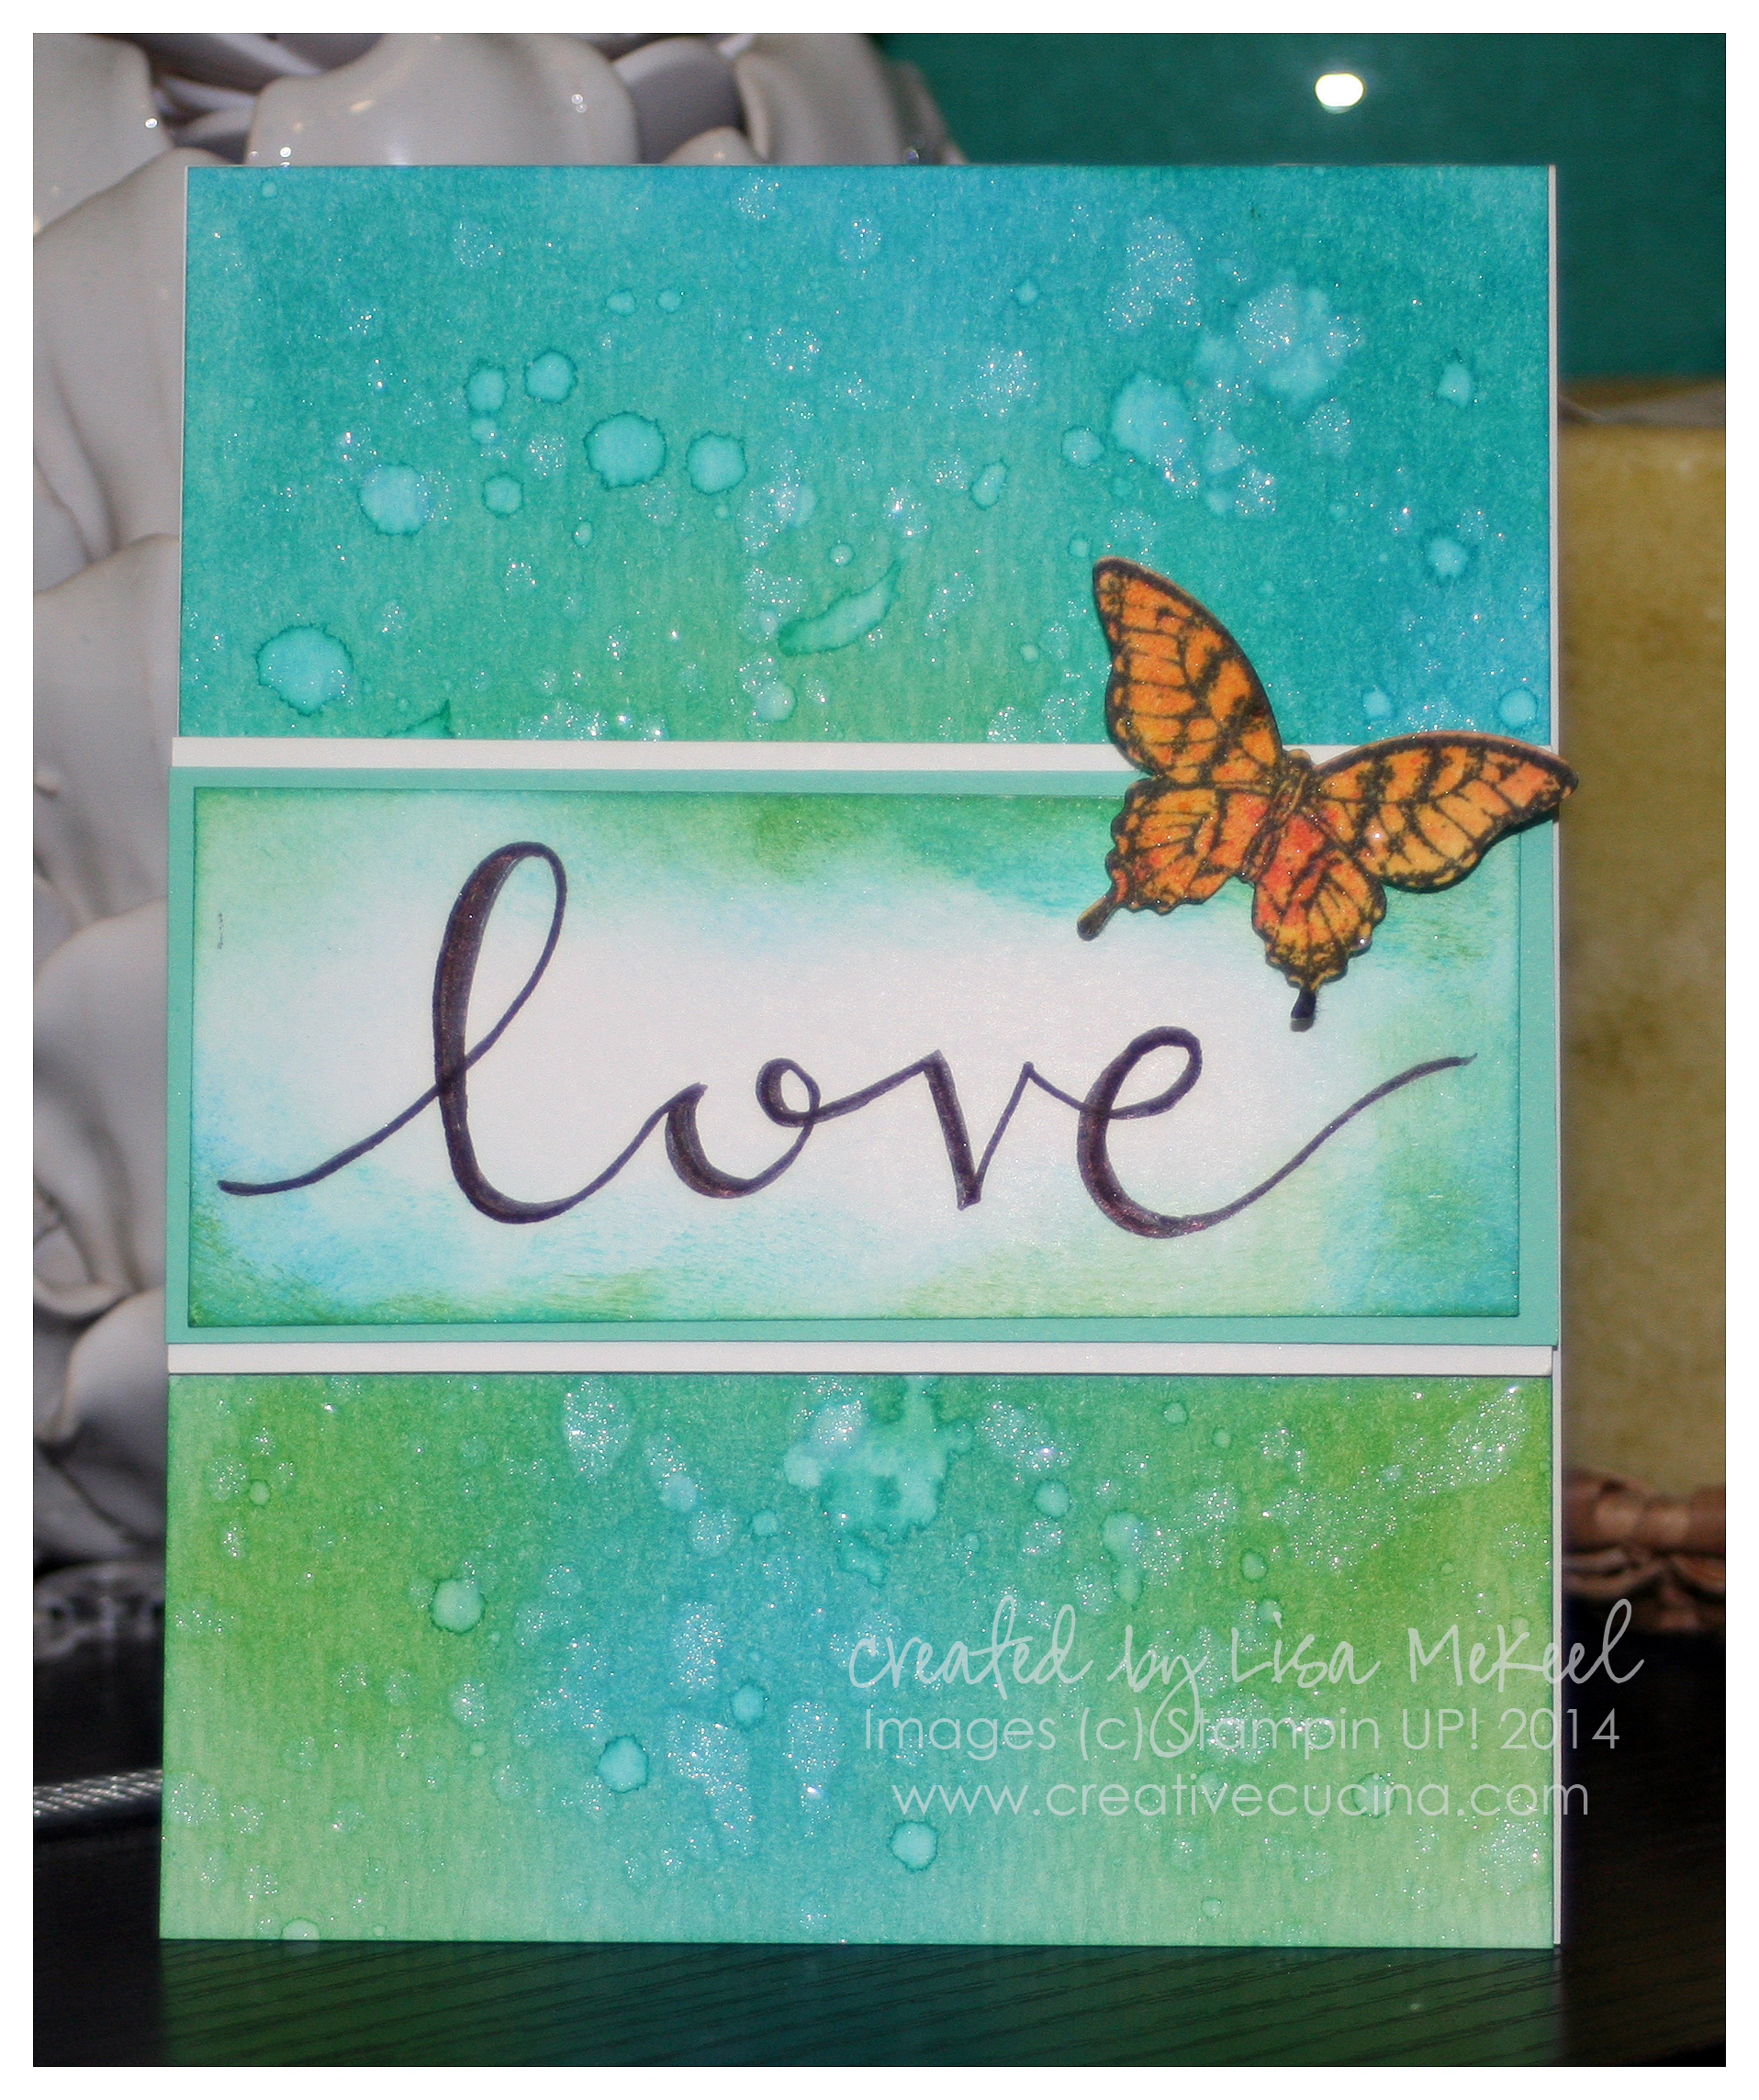
Overall, I’m very happy with how it turned out, but I wasn’t sure about the blue/green butterfly. I experimented with some other colors, which you can see below. Please help me finish my card and vote which butterfly looks best here!
 So what do you think? Vote below.
 As for how I made the card, I used watercolor paper (Tim Holtz brand), and with the Ranger mini round ink blender, I blended 3 colors of Distress Inks: Salty Ocean, Mowed Lawn, and Peacock Feathers. Then, I sprayed some shimmer mist (made with 70% alcohol and shimmer paint) onto a craft sheet and using a paint brush, flicked the liquid all over the watercolor paper. I also did the same thing with plain water, which resulted in larger/lighter splotches.
The word “love” was handwritten in my “fake calligraphy” style on white card stock. Using the same 3 Distress Ink colors, I blended around the edges of the white card stock. Then, I matted the white card stock onto a piece of Stampin’ UP! Pool Party card stock, and another layer of white. That panel is attached to the card with foam tape.
For the butterfly, I stamped the image from Papillon Potpourri in Memento black ink. For the blue/green butterfly, I used the same 3 Distress Inks I used for the background. The other two were made with Distress Ink also–Mustard Seed/Picked Raspberry. I cut out the butterfly using the Elegant Butterfly Punch, then attached it to the card with a stampin dimensional.

