Branch Out Fall/Autumn Wedding Save the Date or Invitation

Ella 019 copy copy

Below is the updated version of the custom printed Branch Out Save the Date. The above version is no longer available.

Branch Out Sample Photo

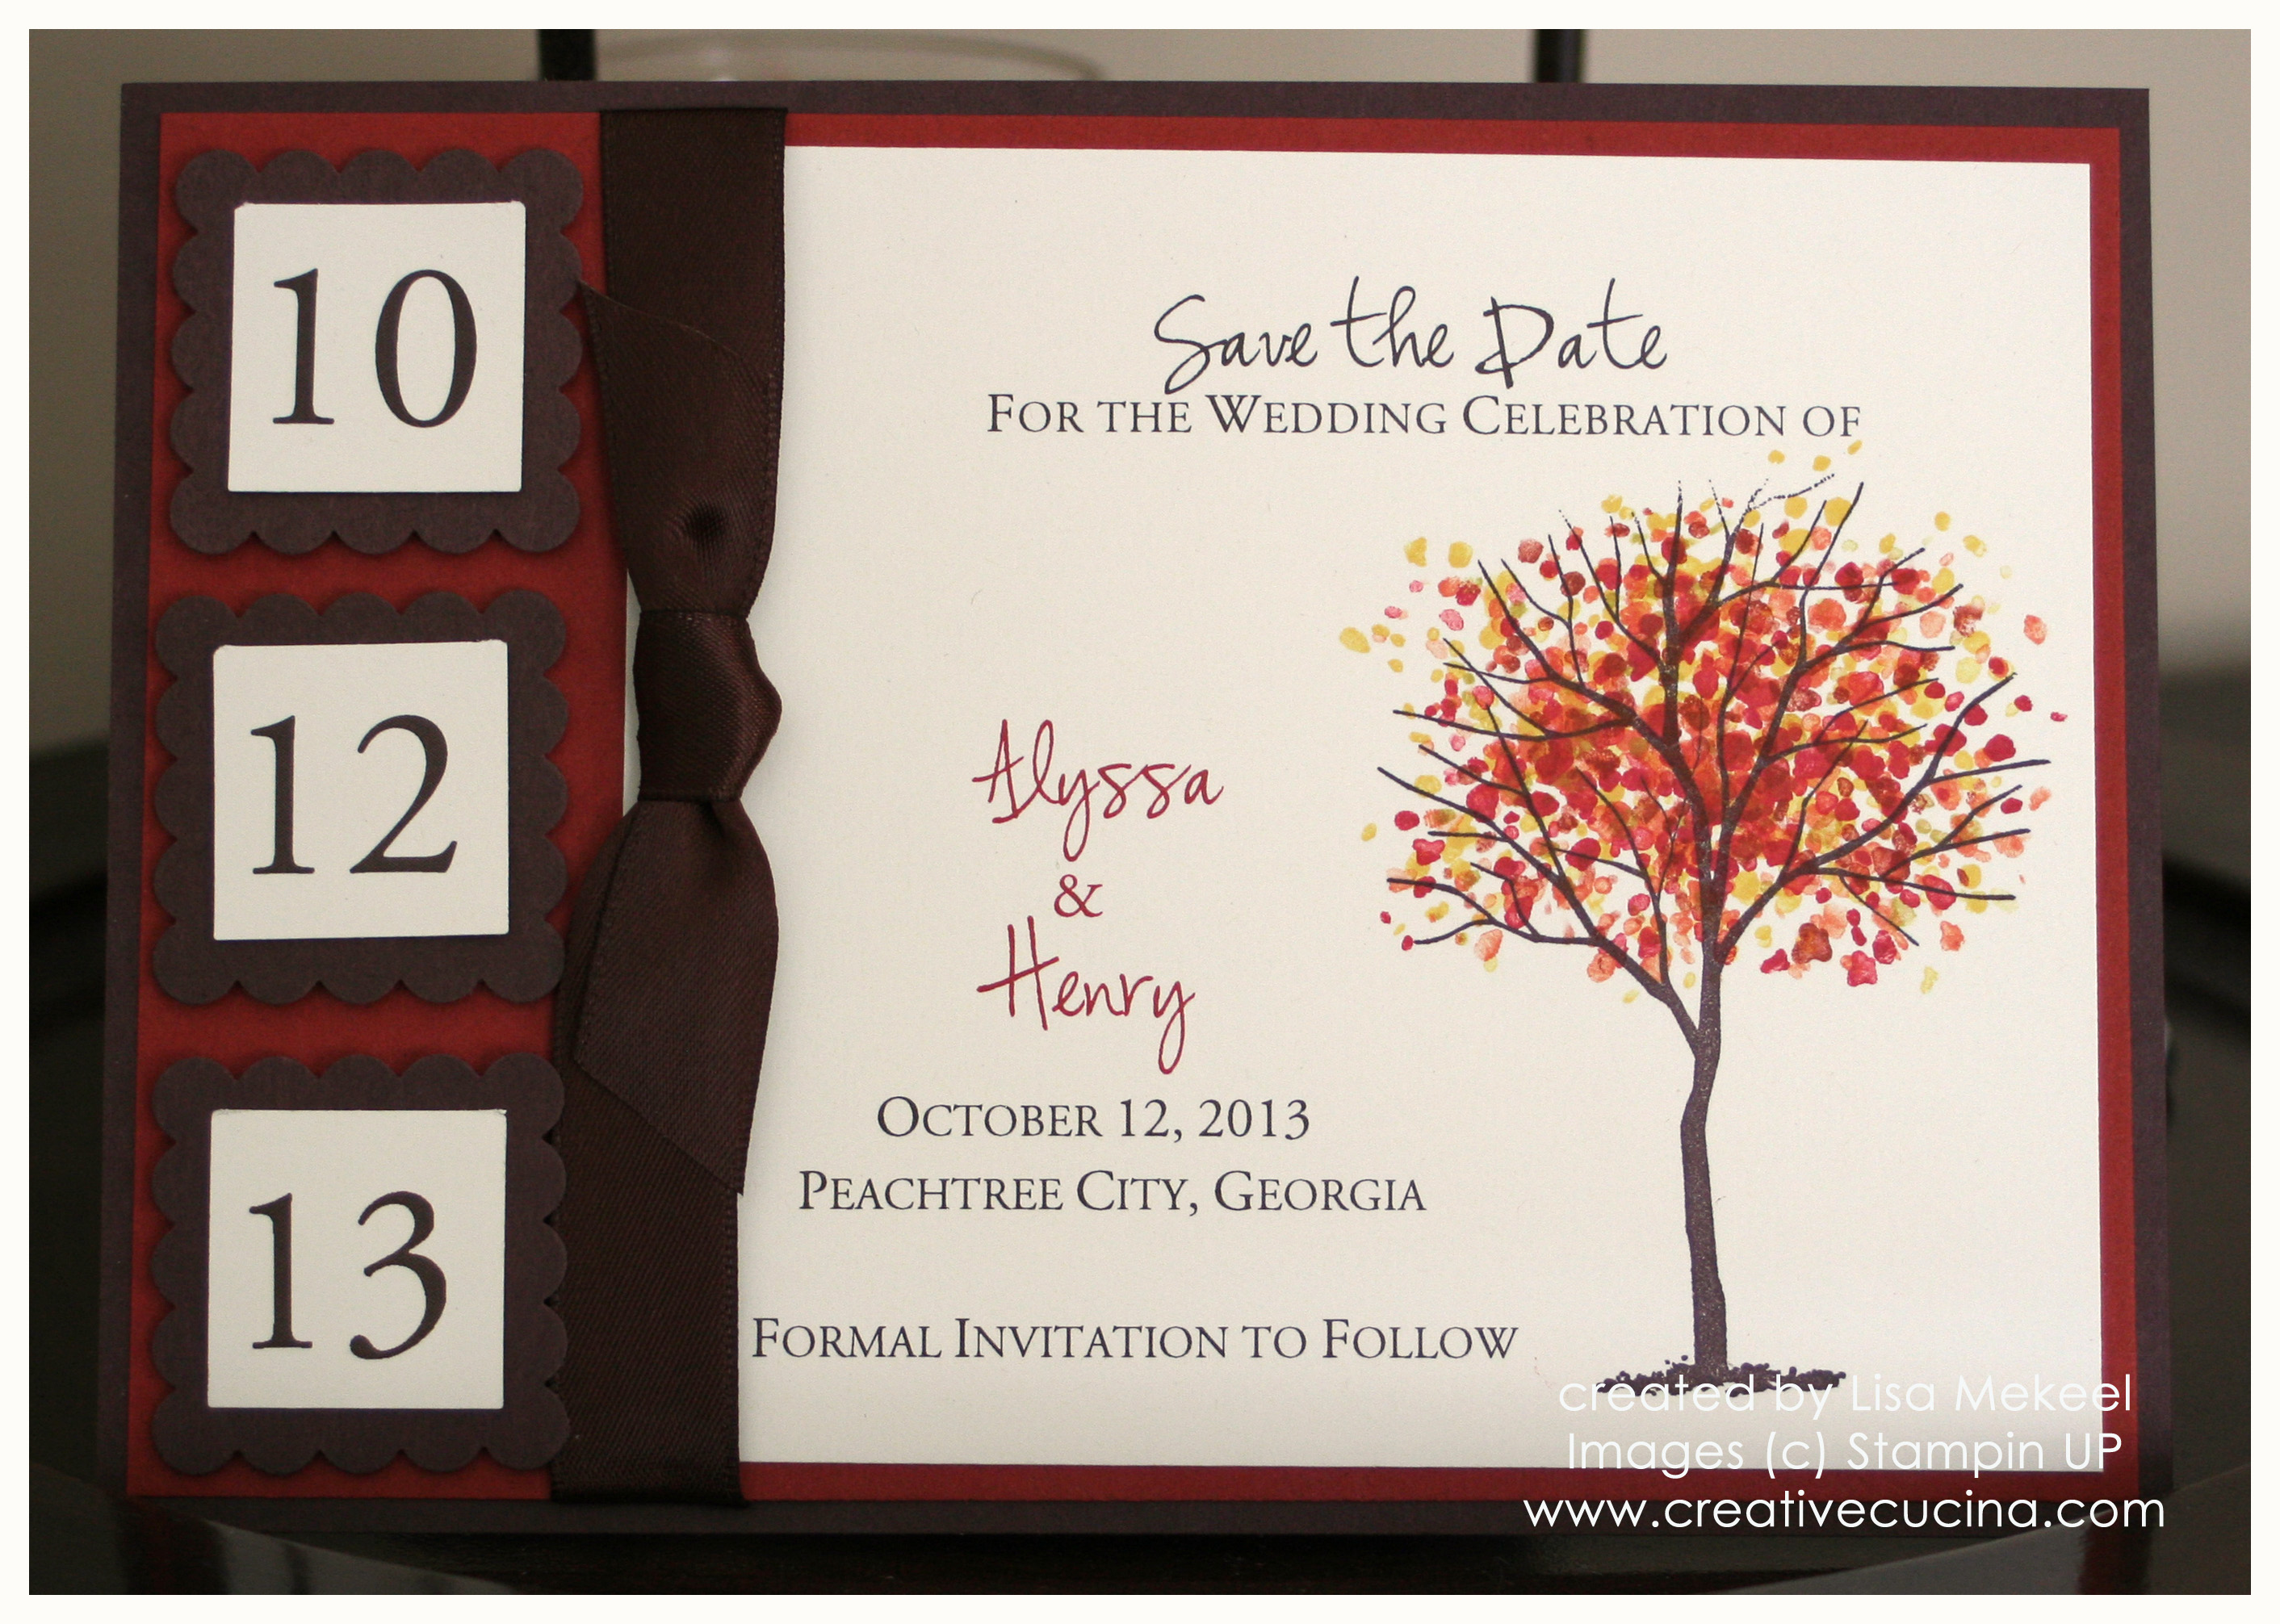
Here is another Save the Date card for a fall themed wedding. This is a 5″x7″ card, also known as an A7 card. The base is chocolate chip textured card stock, layered with a 4 3/4″x 6 3/4″ piece of cajun craze card stock.

Along the left side, I featured the wedding date. I punched out textured chocolate chip card stock using my Square Scallop Punch and printed the numbers on very vanilla card stock, trimmed to 1″ squares. They are adhered to the base with dimensionals.

The stamped image is from Branch Out. I stamped the tree in chocolate chip ink on very vanilla card stock. The leaves were stamped in various shades of ink.

To finish off the card and tie it all together, I added 5/8″ Chocolate Chip Satin Ribbon.

I think this could easily be turned into an invitation by printing the very vanilla panel with all the wedding information and maybe changing the three numbers to monograms, like A & B for example.

Fall Wedding Save the Date Card

IMG_1228 copy

My brother in law and his fiancee are getting married next year in October and I thought I might make a few samples of save the date cards and possible wedding invitations to give them ideas.

This is just a card front, more mustard base layered with chocolate chip textured card stock and very vanilla, which I stamped using the Jumbo Wheel Leaves Awash in Chocolate chip ink. Then, I colored in the leaves using my Earth Elements Watercolor Crayons and Aquapainter just to blend a bit.

On top, I stamped a piece of vellum with the “Save the Date” stamp from Please Come in chocolate chip craft ink and heat embossed it with Clear Embossing Powder. Along the top and bottom border, I paper pierced the vellum and adhered it to the base with mini glue dots.

To finish the card, I tied some Hemp Twine around the top and added a Scallop Oval in Dusty Durango layered with a Very Vanilla Large Oval. I stamped “save the date” in dusty durango ink and sponged some creamy caramel ink over top.

Christmas Trees–Three Ways

I made a few Christmas cards featuring trees as the main image. One is stamped, one is made from punches, and one is a hybrid version.

IMG_1199 copy

Version 1 is stamped. I broke out of my usual color choice here and opted for Always Artichoke instead of old olive or kiwi kiss. I don’t know that I’ve ever made a card with Always Artichoke before–but I like it! I stamped the base repeatedly with the Season of Joy block stamp in Always Artichoke ink.

The main image is the tree from Season of Joy, colored in with SU Markers (always artichoke, chocolate chip, and so saffron) stamped on whisper white card stock. I layered the whisper white on real red textured card stock and then kraft card stock. Using my Paper Piercer, I made holes on the tree for “ornaments”.

The ornaments were made using a small silver brad, tiny glue dots, and red glitter. Apply a tiny glue dot to the head of the brad, pressing it down and flattening it around the sides too. Dip the sticky brad into Romantic Red Glitter, pressing with your finger to really get the glitter stuck on there. Brush off any excess and then push the brad ends through the paper pierced holes. You may need to work the piercer around in a circular motion to widen the holes enough.

To finish off the card, I stamped “Merry Christmas” from Christmas Greetings in real red ink under the tree image.

IMG_1202 copy

The second version I made uses stamps and punches to make a Christmas themed tree. I stamped the tree from Season of Friendship in chocolate chip ink on whisper white card stock.

The circles were made using the Delightful Decorations stamp set. I stamped the circles in real red and glorious green ink on whisper white. Using the 1/4″ Circle Punch, I punched out the center of the stamped circles. Then, I layered the 1/4″ circles with 3/4″ Circles of alternating real red and glorious green card stock. In the center of each, I added a sticky rhinestone and adhered them to the tree with dimensionals.

Next, I layered the whisper white onto Glorious Green card stock and attached it to the Kraft card base. Across the bottom, I added a strip of real red card stock that I put through the Crimper. The sentiment is from Berry Christmas, stamped in real red on whisper white. I punched it out using the Modern Label Punch and sponged the edges with Glorious Green and a Sponge Dauber. The label was then adhered using dimensionals.

IMG_1205 copy

For version 3, I made a Christmas tree card using punches. I once made this using the 3 Flower Punch, but since I no longer have that punch, I used the 1/4″ Circle Punch. Take Old Olive card stock and punch out 20 circles. I adhered them to a piece of very vanilla in an overlapping pyramid formation, using Mono Multi Glue.

The tree stem is made with chocolate chip card stock and the Word Window Punch.

I stamped the star from Season of Joy in So Saffron ink on barely banana card stock and trimmed it out, but you could easily use a small star punch.

Around the very vanilla layer, I used the Paper Piercer, then adhered it to barely banana and real red card stock. I took a piece of Chocolate Chip 5/8″ Grosgrain Ribbon and tied it around the bottom before adhering it all to the Old Olive base.

Bad Behavior has blocked 976 access attempts in the last 7 days.

css.php