Archives for March 2010

Another Easter Card {Good Egg Pastel Version}

Sorry to keep bombarding you with this little chick image but it’s so cute I couldn’t stop myself from using it in almost every Easter card I made this year. I found the stamp and the sentiment a few weeks ago as they were calling my name from the bin they were in at the store. You can see what else I’ve made with them here.

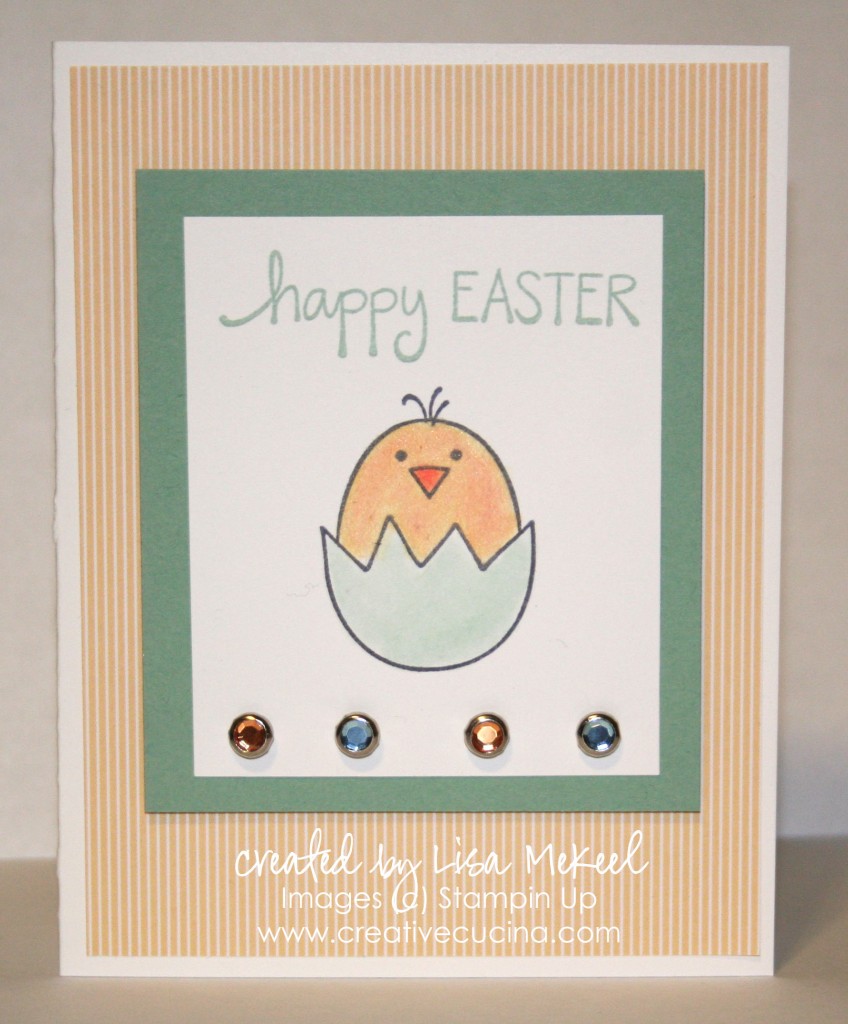
The card base is Gina K Luxury white base weight, layered with a So Saffron striped paper from Welcome Neighbor DSP paper pack. I stamped the chick/egg in Basic Gray ink on Whisper White paper and colored the image with my Aquapainter and ink pads for a soft watercolor effect.

The chick was “fluffed up” using Martha Stewart Flocking Powder in White. I applied 2 Way Glue all over the chick, then added the Flocking Powder. It’s really somewhat translucent, and just lets whatever color is underneath still show through the fluff.

I matted the image on Sage Shadow card stock, and stamped the sentiment in Sage Shadow ink. Then, using the Cropadile, I punched four holes along the bottom and added Circle Rhinestone Brads in shades of light blue and yellow. That was adhered to the base using Stampin Dimensionals.
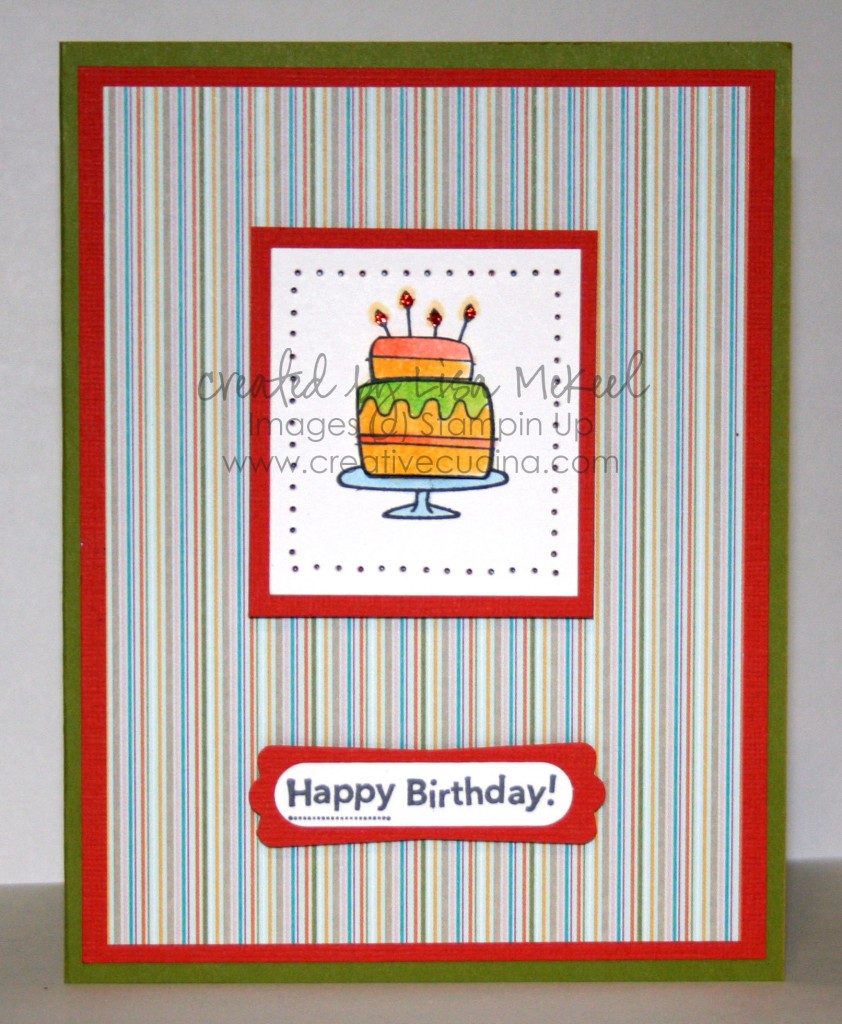
Bitty Birthday Card

As part of the Sale-A-Bration promotion this year, certain stamp sets from the main catalog are available to choose from, free with $50 purchase. This set, Bitty Birthday is one of them.

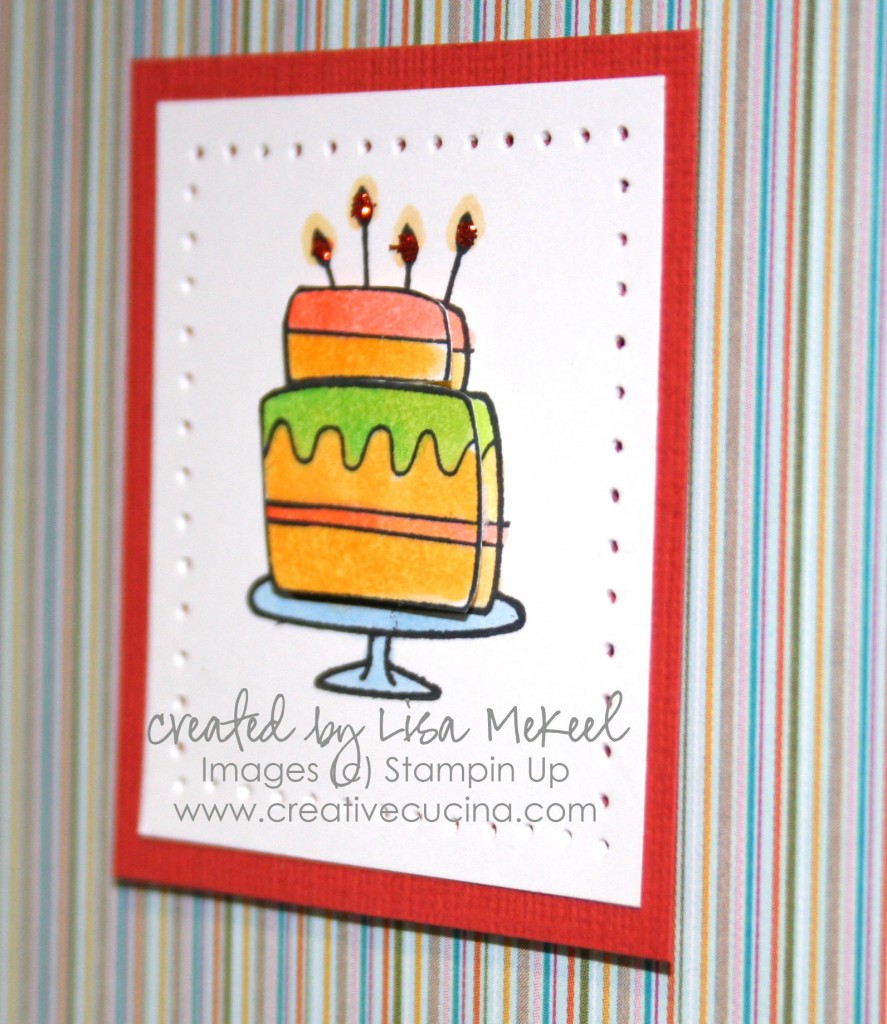
This card is for a boy, so I tried to keep the colors boyish (always a challenge for me).  The card base is Old Olive, layered with Dusty Durango textured card stock and Welcome Neighbor DSP. I stamped the cake twice on Whisper White with Memento Tuxedo Black ink and colored the images with Copic Markers. Then, I cut one cake apart and popped it up on top of the bottom image using Stampin Dimensionals.

I added some Supernova Orange Fine Glitter to the candles using my MS fine tip glue pen. The image layer is paper pierced around the edges and matted on Dusty Durango with Stampin Dimensionals.

The greeting is from On Your Birthday, stamped in Basic Gray ink on whisper white. I punched it out with the Word Window Punch and layered it onto the Modern Label Punch using Dusty Durango.

Woven Ribbon Easter Basket Bunny Card

Ribbon weaving is addicting! Once I start I want to use it on everything I make. Here are some other examples of cards I made using the ribbon weaving technique.

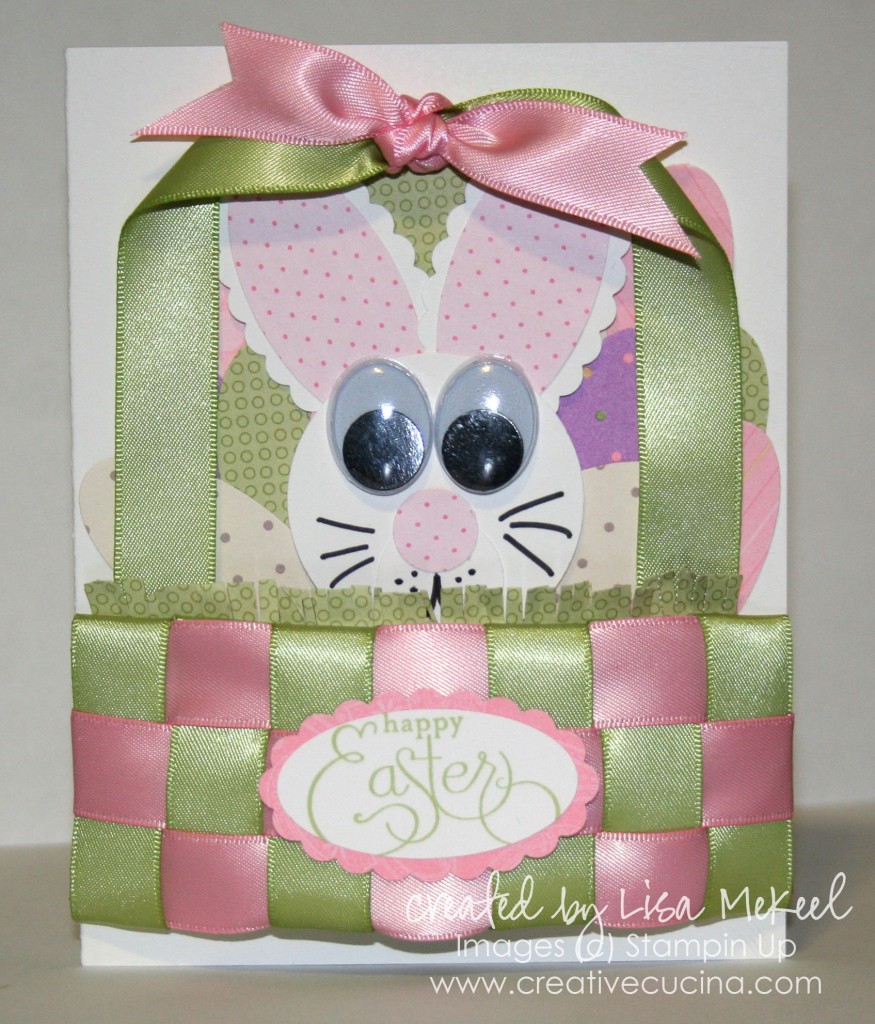
I’ll go through what I used to make the card, and for those of you who would like detailed instructions, keep reading below. The card base is Gina K Luxury Base weight card stock. I punched various DSP with the Large Oval Punch to make eggs. I adhered them to the card base using SNAIL.

The bunny was made using the Large Oval Punch & Scallop Oval Punch (for the ears),  1 3/4″ Circle Punch (f0r the face), 1/4″ Circle Punch (for the nose). I drew on the mouth and whiskers, then glued on some googly eyes.

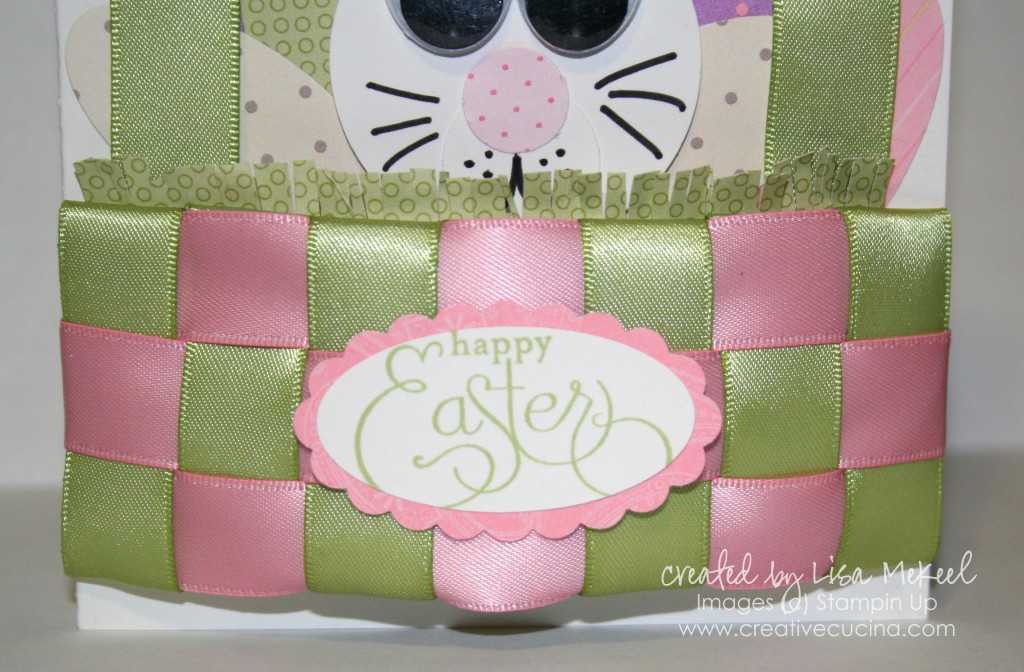
The basket is made with Pretty in Pink Satin Ribbon and Certainly Celery Satin Ribbon. The sentiment is from Well Scripted, stamped in Certainly Celery ink on Whisper White. I punched it out with the Large Oval Punch and layered it onto Pretty in Pink Patterned Paper, punched out with the Scallop Oval Punch.

——————————————————————————————————————–

How to make the Easter Basket using the Ribbon Weaving Technique (with 5/8″ Satin Ribbon)

Step 1: Cut a piece of card stock to 4 3/8″ x 1 7/8″. This is the card stock you will wrap the ribbon around for the basket portion. It won’t be visible so feel free to use any color. The measurements are weird because we’re using 5/8″ ribbon and your card stock has to be a multiple of 5/8″.

Step 2: Cut 3 strips of 5/8″ PINK satin ribbon about 5″ long and 7 strips of 5/8″ GREEN satin ribbon about 3″ long.

Step 3: Using SNAIL adhesive, run a line of adhesive on the RIGHT short side and along the TOP edge of your card stock. Carefully attach your GREEN ribbon strips along the TOP EDGE, being careful to keep the ribbon pieces just touching each other (not overlapping and not leaving a gap between them). There should be about 1/2″ of ribbon attached to the card stock and the rest of the ribbon should hang off the top, away from the card stock. Do the same with your PINK ribbon along the RIGHT EDGE, with the strips of ribbon hanging off toward the right.

Step 4: Turn your card stock over so that the adhered edges of ribbon are on the back side. Your PINK ribbon should be on the LEFT side now and the GREEN ribbon should be on the TOP edge.

Step 5: Start weaving your ribbon like you would do a lattice pie crust. Pull the strips tight as you weave, making sure you keep them straight. I start by folding the PINK across the front of the card stock and then weaving the short GREEN ribbon over and under. When you get to the bottom, fold the GREEN ribbon over and adhere it to the back of the card stock with SNAIL. Repeat with the rest of the ribbon strips.

Step 6: Cut a piece of green card stock or DSP (here I used Tall Tales) to 4″ x 2 1/2″. Adhere it to the back of your card stock to hide all the edges of ribbon. Leave about 1/2″ extending at the top to make the grass. I cut the paper with paper snips, then bent some pieces forward and back to make the “grass”.

Step 7: Put 2 pieces of Sticky Strip on the back of the basket piece (one along each SHORT SIDE). Attach the basket to the card base by sticking down the left side first, then gently bend the card stock slightly and stick the other side down so the basket edges line up with the edges of the card.

Step 8: Adhere all your eggs and bunny face to the card so they’re peeking out of the basket.

Step 9: Cut a long piece of Certainly Celery Satin Ribbon for the handle. I attached it to the back/inside of the basket using Glue Dots. I also added Glue Dots at the top of the handle, where the ribbon folds over, on both sides. Tie a piece of Pretty in Pink Satin Ribbon at the top and snip with Craft & Paper Scissors. Secure the pink ribbon knot to the card by placing a glue dot on the back.

Bad Behavior has blocked 473 access attempts in the last 7 days.

css.php