Archives for September 2009

Why didn’t I order the Ornament Punch again???

I could kick myself for taking the Ornament Punch off my last order. I knew I was going to see awesome projects with it and love it but I still decided to take it off the list for reasons unknown to me now. So, I cut these out myself by hand like a crazy person. I’m ordering it as soon as I can!

Card base is Chocolate chip layered with Real Red that I used the Scallop Edge Punch along the bottom, with a piece of Bashful Blue card stock on top. I stamped the snowflake stamp from Delightful Decorations all over the blue in Bashful Blue ink.

I stamped the polka dotted ornaments, also from Delightful Decorations in Riding Hood Red ink on Whisper White (my Real Red ink is shot–goopy and weird–I need to order another one of those asap too). I cut out the ornaments and tied a piece of Silver Elastic Cord to the tops. Then, I stamped the snowflake stamp from the set in Chocolate Chip ink onto whisper white and cut them out using the 3/4″ Circle Punch, attaching them to the front of the ornaments with dimensionals.

The right and left ornaments are adhered to the base using dimensionals, with the elastic cord taped on the back of the Bashful Blue layer. As for the middle one, I punched out a circle using 7/8″ Circle Punch and added tiny pieces of dimensionals to the sides of the ornament to adhere it to the base. The photo was also punched out using the 7/8″ Circle Punch and adhered with a dimensional. But you could just as easily attach the photo to the front of the ornament and do away with punching circles. Or your could recess the picture, which is what I think I wanted to do at first but ended up putting a dimensional on the back of the picture by accident so I went with it.

Finally, I tied a knot using a short piece of Real Red Polka Dot Grosgrain Ribbon and adhered it to the top of the card using a glue dot.

On an unrelated note: this picture of my daughter was taken last year–I can’t believe how big she has gotten! I almost cried!! She’s not a baby anymore!

Fluffy Snowflake Card

I know, terrible name for this post, but you can’t really tell from the picture that this DSP is textured. The snowflake is actually a felt-like material raised onto the paper, part of the Christmas Cocoa DSP.

Card base is Rich Razzleberry textured card stock, layered with piece of the DSP. I wanted to keep it kind of simple but my Ice Circle Rhinestone Brads were screaming out to me so I added one in the center of the snowflake, with a 1/4″ Circle Punch of rich razzleberry behind it to give it added pop.

To finish off the card, I stamped “Merry Christmas” from Christmas Greetings (I love this stamp–it’s like the handwriting I always wanted to have) in Rich Razzleberry ink.

Inside, I layered the base with a piece of White card stock and stamped it with the other stamp in Christmas Greetings, perfect for inside sentiments.

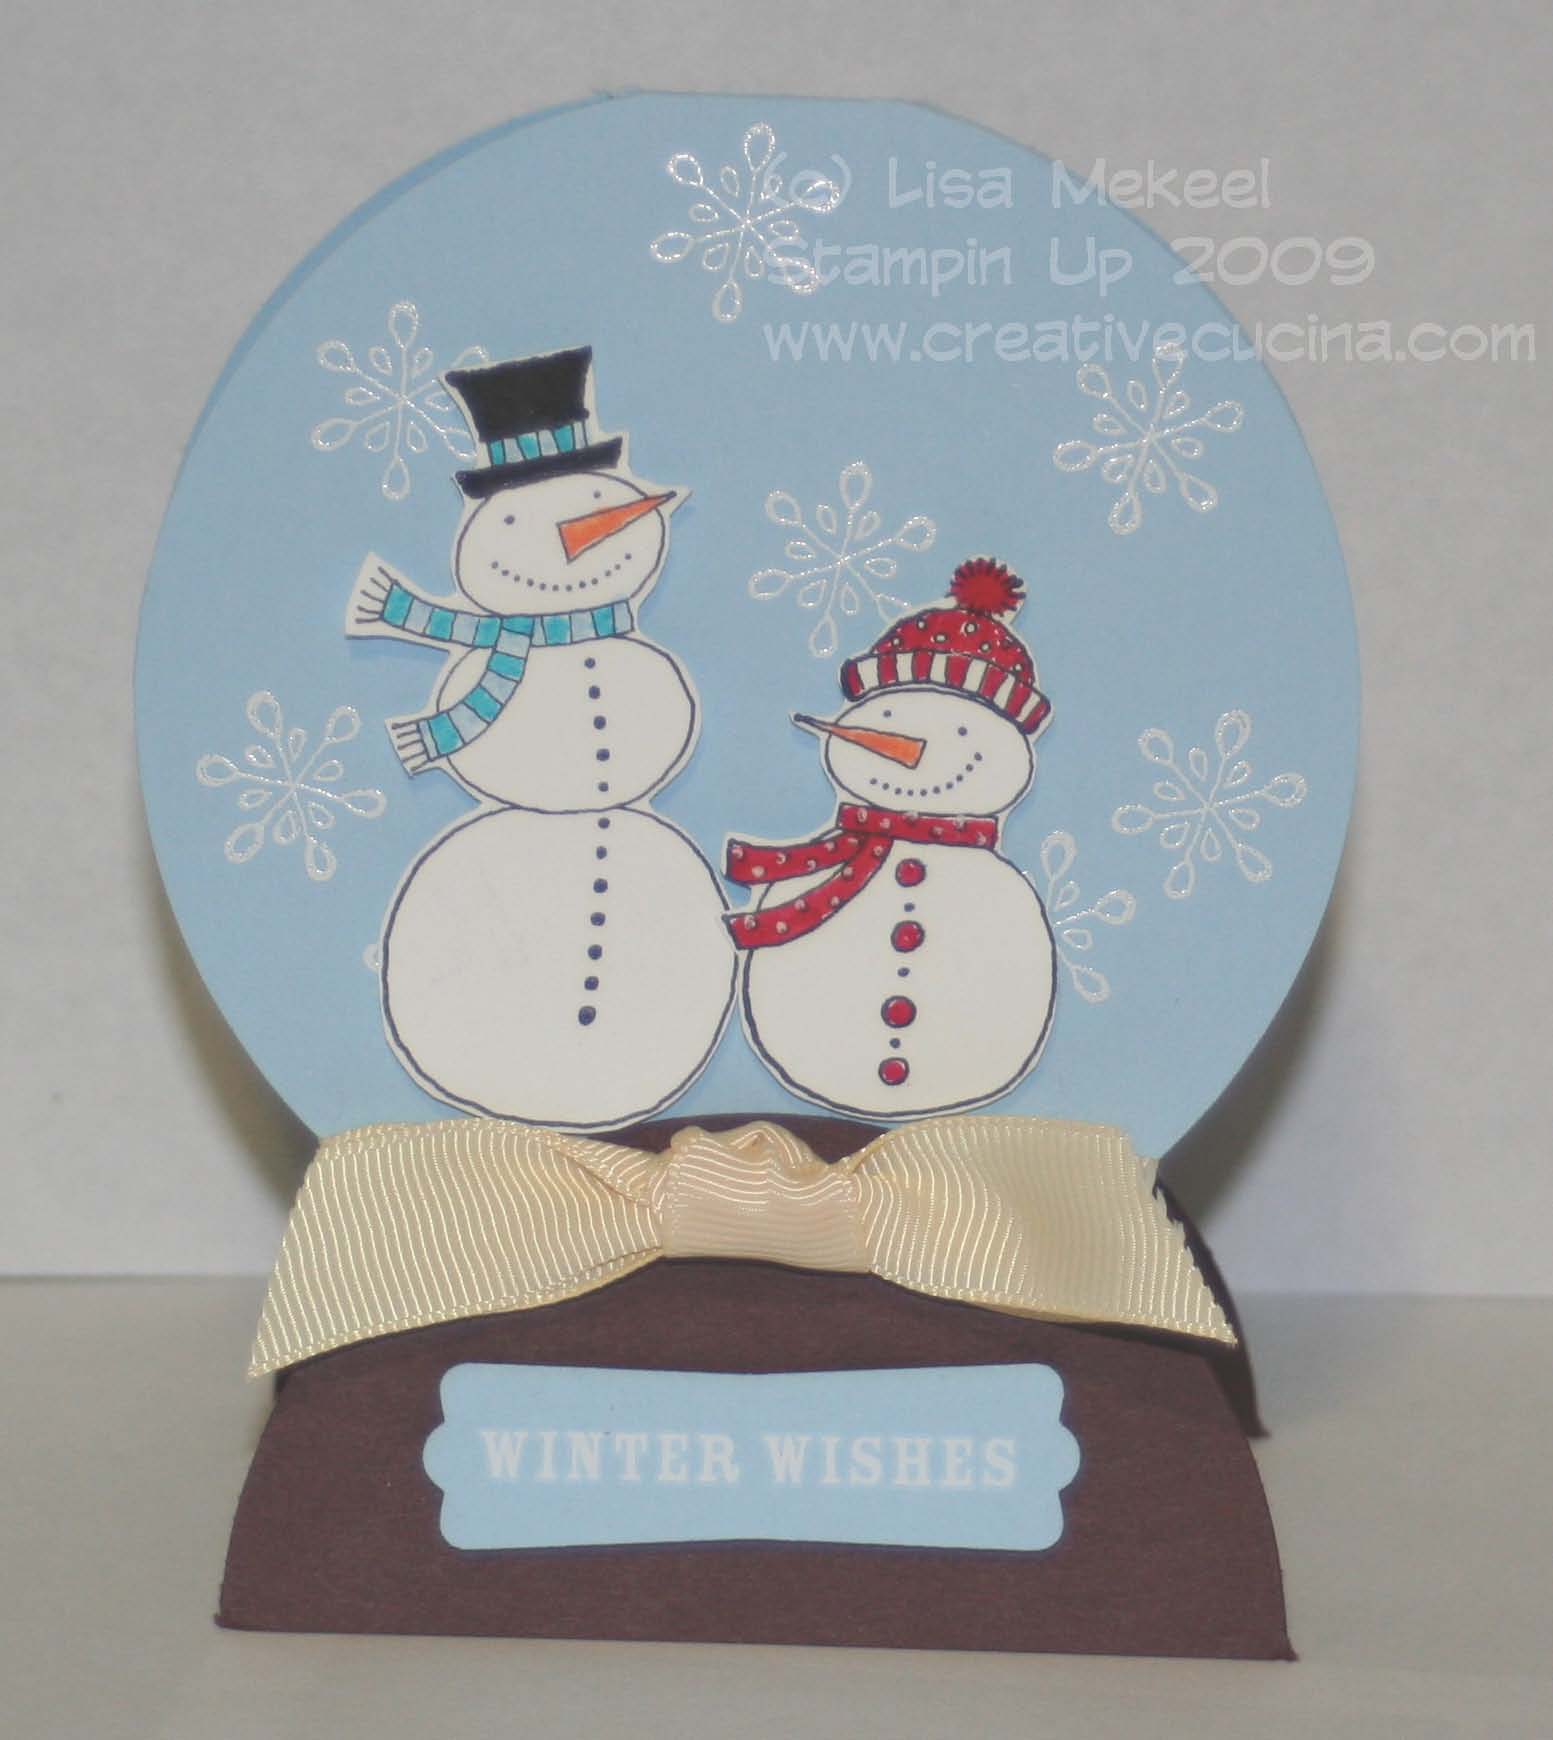
Snow Buddies Snow Globe

This is a CASE from the back cover of the Holiday Mini Catalog. I changed a few things, like the ribbon and base, and added a rub on sentiment. SO CUTE!

Directions: The sample didn’t come with directions so I winged it.

1. First, I used my Coluzzle (2nd to largest ring) to cut Bashful Blue card stock, folded at the top. Line up the Coluzzle cutting ring just above the fold to preserve it.

2. Cut another circle from a piece of Chocolate Chip card stock using the same 2nd to largest ring. Cut the cirle in half to make the base of the snow globe.

3. Glue the base pieces to the bottom of the snow globe and the back side as well. Make sure to line them up or your card won’t close properly!

4. Stamp the snowflakes onto the front of the Bashful Blue card stock. I used Vesamark and White Embossing Powder.

5. Stamp the snowmen from Snow Buddies onto Whisper White using Black Stazon. Color them in–I used Markers. Trim them out with paper snips.

6. Tie some ribbon around the base of the snow globe, here I used Very Vanilla 5/8″ Grosgrain.

7. Adhere your snowmen using dimensionals to the front of the snow globe.

8. Add a greeting to the base. I used Chit Chat Rub On in white on Bashful Blue card stock I punched out using Modern Label Punch.

Bad Behavior has blocked 361 access attempts in the last 7 days.

css.php