It’s a Girl Onesie Card {Baby Gift Card Holder}

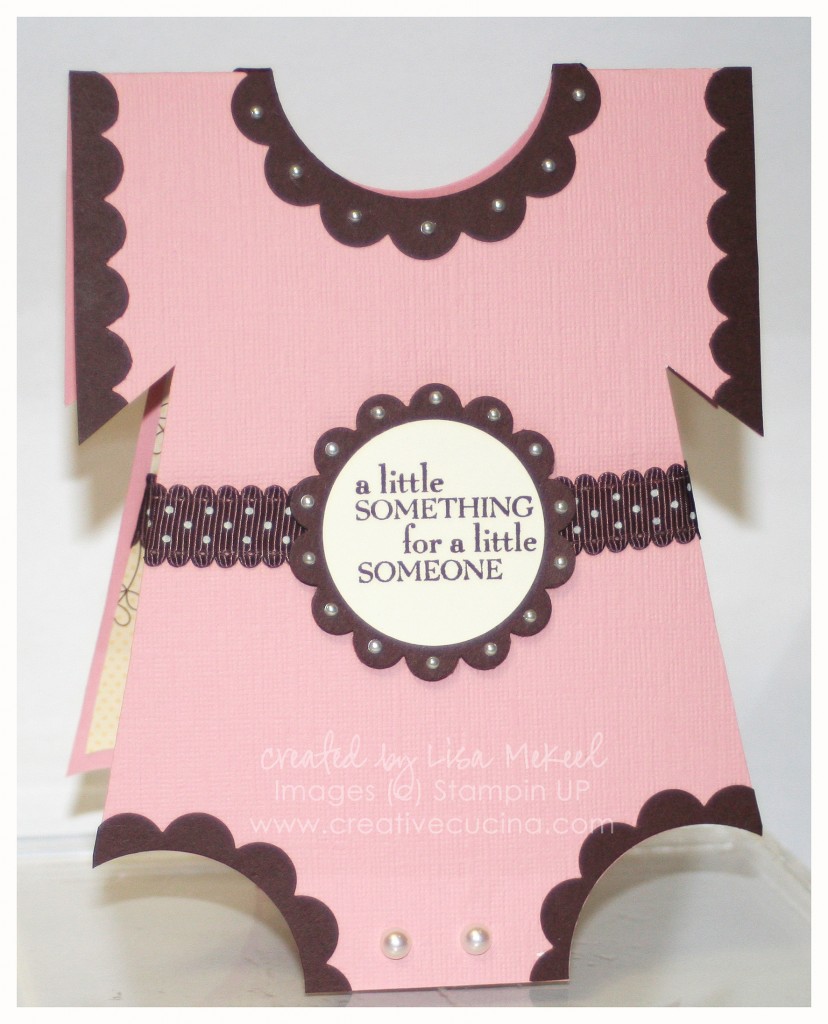
Here is a cute card idea for a baby shower or baby gift. My friend Cindy had a baby girl a few months ago and this was the card I gave her. I found some tutorials available online, but in the end, I just eyeballed it and made my own version of the Baby Onesie card.

I started with a standard size card–Blushing Bride textured card stock cut to 4 1/4″ x 11″ folded in half. Then, I used the 2 1/2″ Circle Punch for the neck and leg openings. Using scissors, I cut a line from the leg opening to about 3/4 of the way up the card, then notched out the area under the sleeve. I kept the card folded when I punched the holes and cut the lines to ensure it was the same on the front and back.

Around the leg and neck openings I added some Chocolate Chip trim with the 2 3/8″ Scallop Circle Punch. An easy way to do this is to punch a 2 1/2″ Circle out of the card stock first. You will actually not need the circle for this. Then, take the 2 3/8″ Scallop Circle Punch and line it up around the open circle on the sheet of card stock. Use this scalloped ring around the neck opening and cut another one for the legs.

Along the sleeves, I used the Scallop Edge Border Punch and Chocolate Chip card stock. Some Basic Pearls were added around the neck just to make it extra girly. Basic Pearls also were used for the buttons at the bottom.

The sentiment is from Best Yet, a retired hostess set. I stamped it on Very Vanilla and punched it out with the 1 3/8″ Circle Punch, layered with the Scallop Circle Punch. The ribbon around the waist is Chocolate Chip Scallop Dot Ribbon.

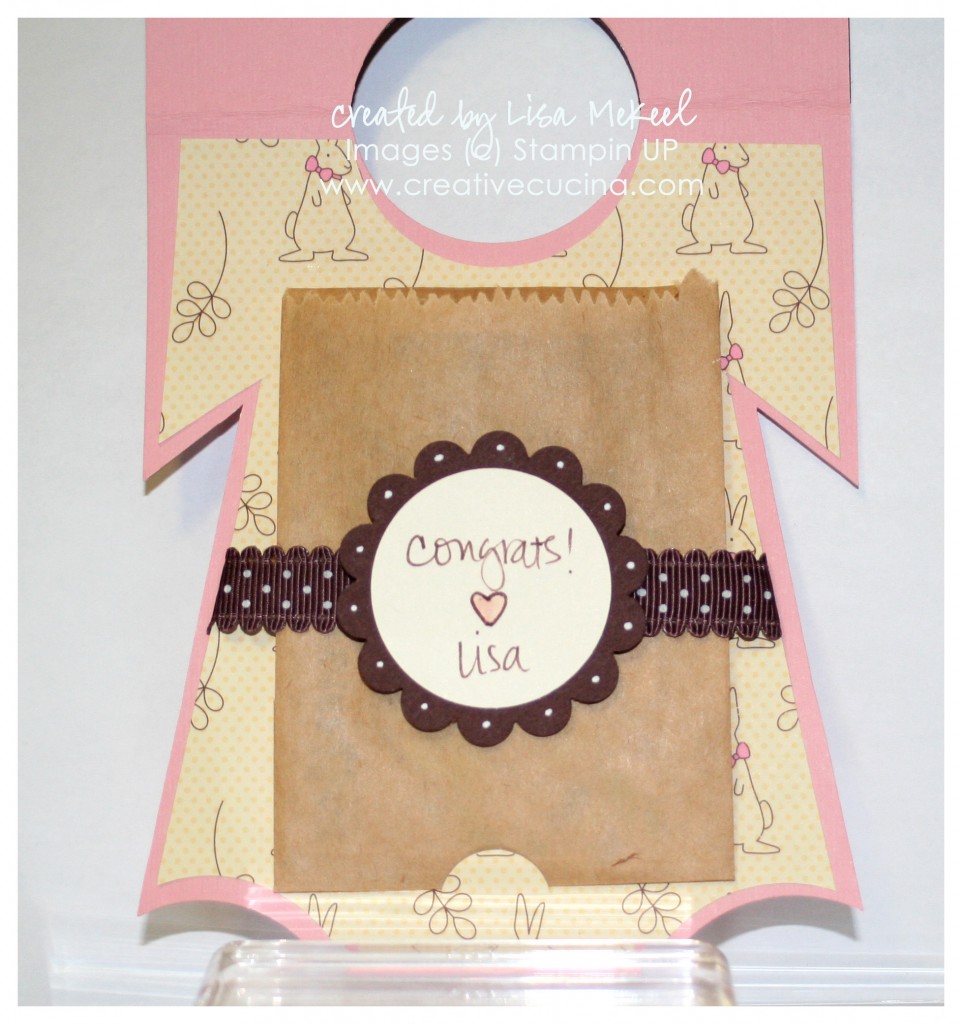
Inside, I lined the card with a cute bunny patterned paper from retired Nursery Suite DSP. To hold a gift card, I used the Slit Punch on the inside to create a little half circle to slide in and hold a gift card. The ribbon helps hold the gift card as well.
For Dads

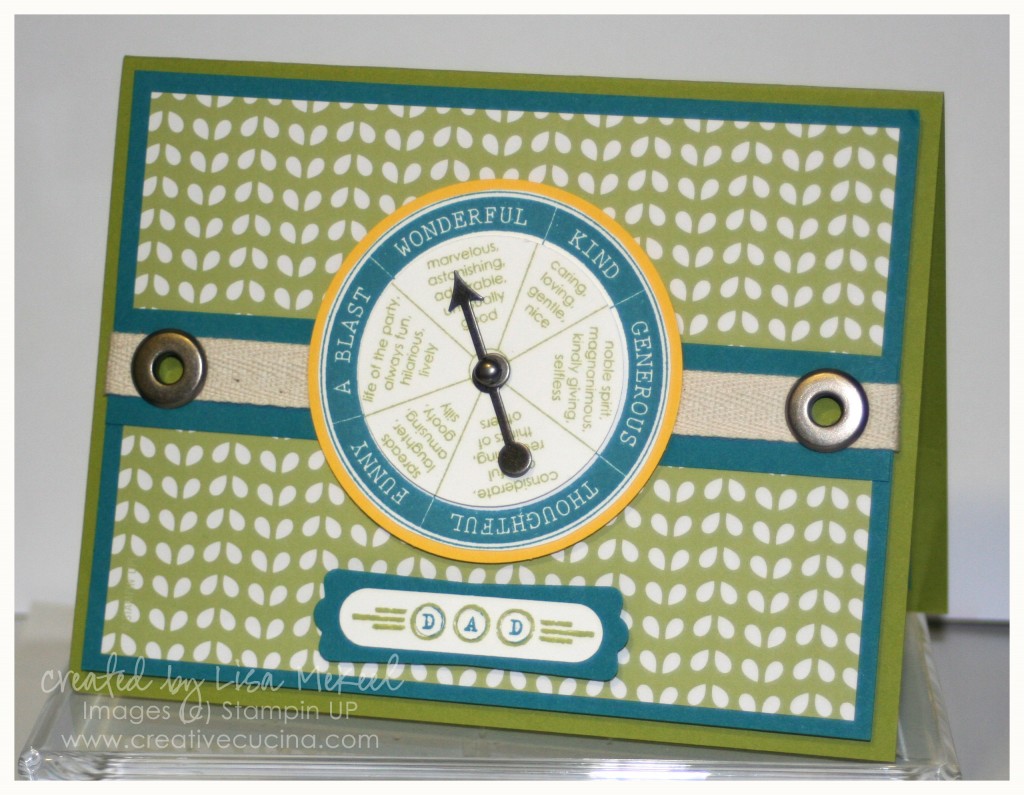
Although this card was for Father’s Day, it can be used for Dad’s Birthday or any other special occasion. Since it was for my husband, I went with his favorite colors: Green and Blue (well he really likes green, but I added some Indigo in there for good measure).

The card base is new In Color Lucky Limeade (available July 1st), layered with Island Indigo (another new In Color) and Nursery Suite DSP in the Old Olive/White combo.

Across the front, I took a strip of Island Indigo and wrapped Twill Tape around it. Then, using the cropadile, I added some pewter colored Jumbo Eyelets to either side.

In the center, I used Take a Spin and inked up the stamp once with Lucky Limeade and another time with Island Indigo ink. Then I stamped it each time onto Whisper White and punched out the Limeade image’s inner circle with the 1 3/4″ Circle Punch and hand cut the Indigo image’s outer circle very close to the stamped image with scissors. I added in a Game Spinner Hand and then popped up the smaller circle with stampin dimensionals. Finally, it was all layered onto Daffodil Delight card stock, punched with the 2 1/2″ Circle Punch.

The sentiment at the bottom is from To a Classic, stamped with Lucky Limeade and Island Indigo Markers. I punched it out with the Word Window Punch and then layered it onto Island Indigo Modern Label Punch. That is also up on stampin dimensionals.

Flower Fancy Birthday Pearls


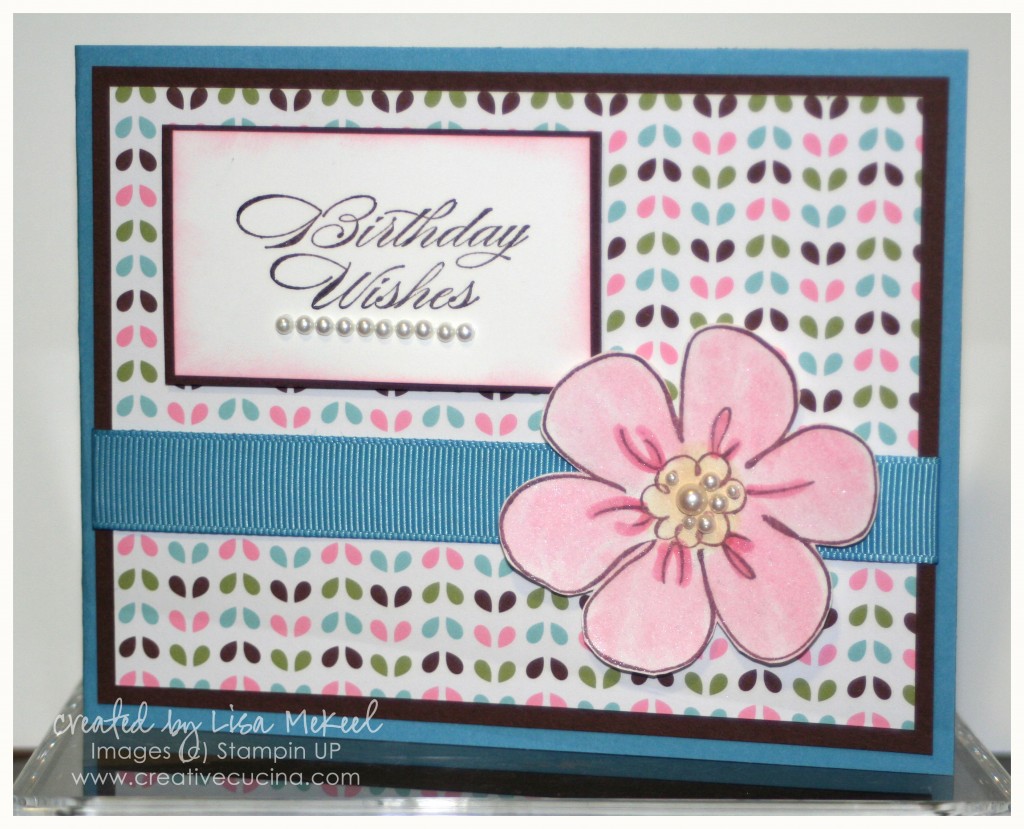
This is a birthday card using the Flower Fancy stamp set. By changing out the sentiment, this could make a beautiful Easter card, Get Well card, Thank You card, or general all occasion card.

The card base is Marina Mist textured card stock, layered with Chocolate Chip and Nursery Suite DSP. Across the front, I added Marina Mist 5/8″ Grosgrain Ribbon.

As I mentioned earlier, the flower is from Flower Fancy, stamped in Chocolate Chip ink on Whisper White. I colored the flower in with Pretty in Pink ink and an Aquapainter. The center is colored with So Saffron. To finish, I sprayed them with Shimmer Mist and cut them out with scissors. Using Basic Pearls, I dressed up the center of the flower with the adhesive back pearls in 3 different sizes. They are adhered to the base with stampin dimensionals.

For the sentiment, I stamped “Happy Birthday” from On Your Birthday in Chocolate Chip Craft ink and heat embossed with Clear Embossing Powder. Using the sponge dauber, I sponged Pretty in Pink ink around the edges and matted it onto Chocolate Chip card stock. Underneath the sentiment, I used more of the Basic Pearls.

Bad Behavior has blocked 476 access attempts in the last 7 days.

css.php