My Digital Studio 2nd Birthday Party Invitations

I love using My Digital Studio (MDS) to create invitations. Sometimes I create a project digitally first and then copy it “in real life”. Other times, I print straight from the computer (as was the case with this year’s Christmas cards).  I’ve gotten really comfortable using the MDS program, and I find it allows me to be just as creative as if I were sitting at my desk surrounded by all my papers, ink, and stamps.

My nephew is turning 2 soon, and my sister asked me to make invitations for his birthday party. I made some samples for her using MDS, and I thought I would share some of them with you.

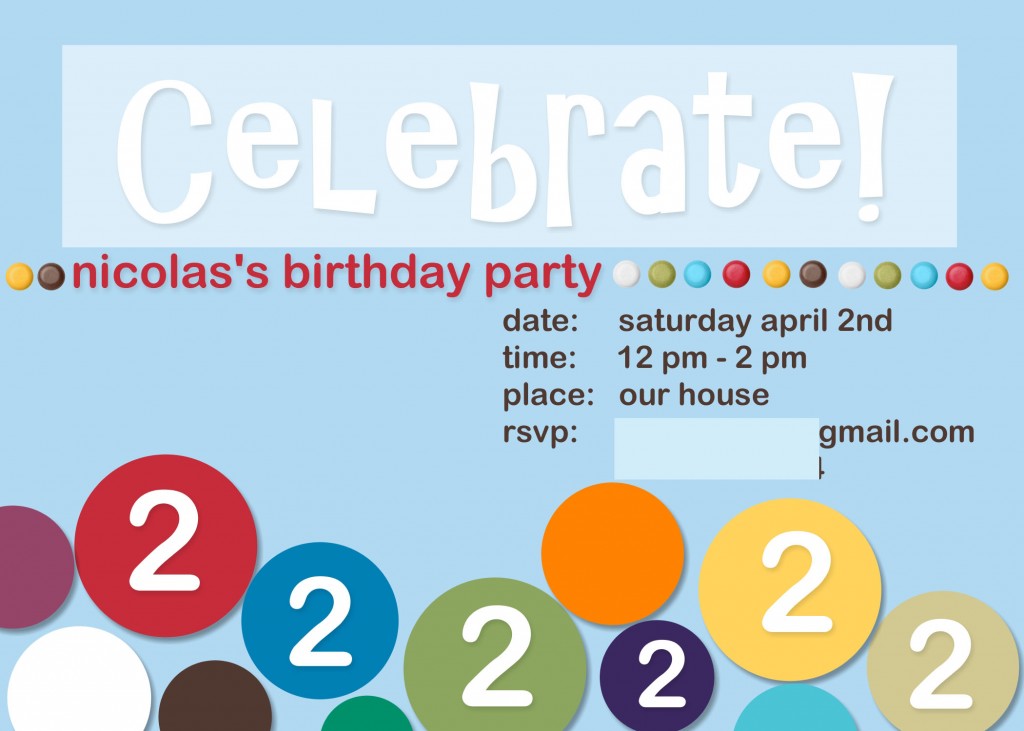
I love how bright and cheerful this one turned out!  To begin, I opened MDS and chose CARDS in the New Project Options, POSTCARD, 7″ X 5″ LANDSCAPE and the CREATE YOUR OWN option.  The background was made by choosing Bashful Blue card stock as the background. Then, I added a TEXT BOX and wrote “Celebrate”. To create that transparent box around the text, I added a PUNCH in the square shape, and stretched it out to frame the text. I chose to FILL the punch shape with Whisper White and then lowered the OPACITY to make it more transparent.

I added brads in coordinating colors from the EMBELLISHMENT menu, lining them up across the front of the invitation. Here is a tip: I always add a DROP SHADOW to my embellishments to give them the look of being 3D.

The party information was added using TEXT BOX again. Below that, I created the circles along the bottom by adding the CIRCLE PUNCH in various sizes–resizing, copying, and pasting as I went along. The colors were added using the FILL function, and I added DROP SHADOWS to them so they would pop off the page. In some of the circles, I added the number 2 using the TEXT BOX.

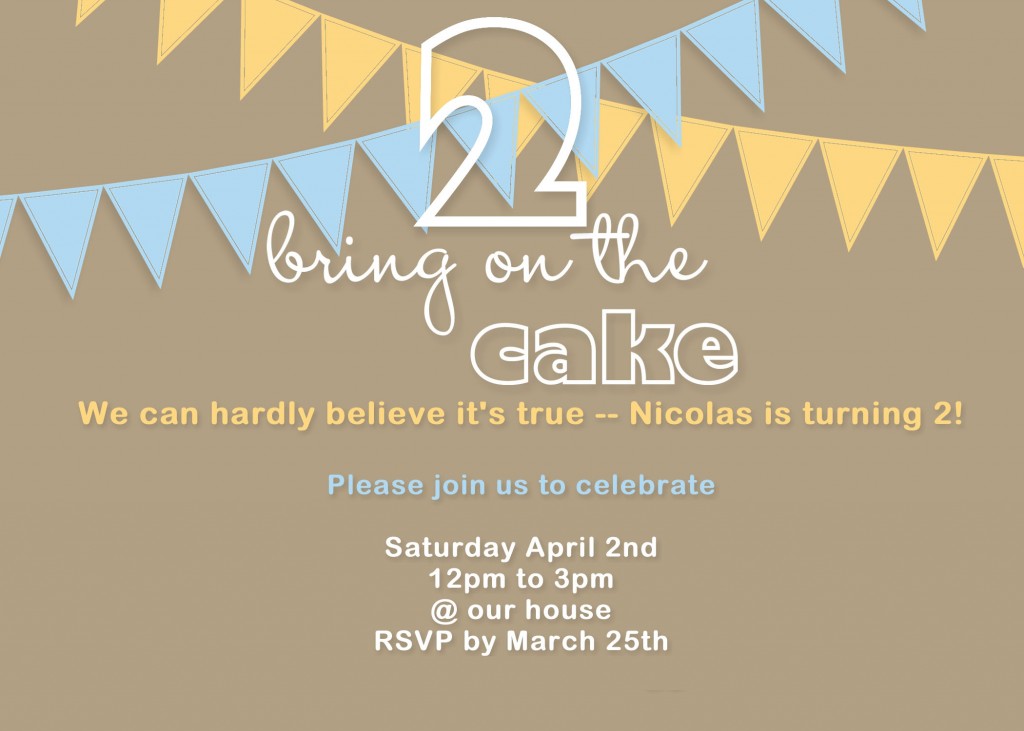
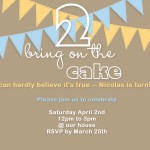
This invitation is a little more clean and simple. Personally, I liked this one very much but my sister did not. The number 2 and the “bring on the cake” digital stamps are from Bring on the Cake in the Occasions Mini Catalog and I LOVE LOVE LOVE IT. I’m a font freak and this stamp set has so many awesome fonts. I also ordered it in clear mount so I can use it for birthday cards and other projects too.

I made this the same way as the invitation above, except the background color is Crumb Cake card stock. The Celebrations Pennants are digital stamp images that come with the Celebrations Digital Kit. I chose Bashful Blue and So Saffron for the pennants.

The rest of the information was added using the TEXT BOXES and that’s it. Quick and easy, modern, but fun. I could see changing the blue to pink and it would make a sweet little girl’s birthday invitation.

Happy Birthday! Coffee Cup Slider Card Tutorial

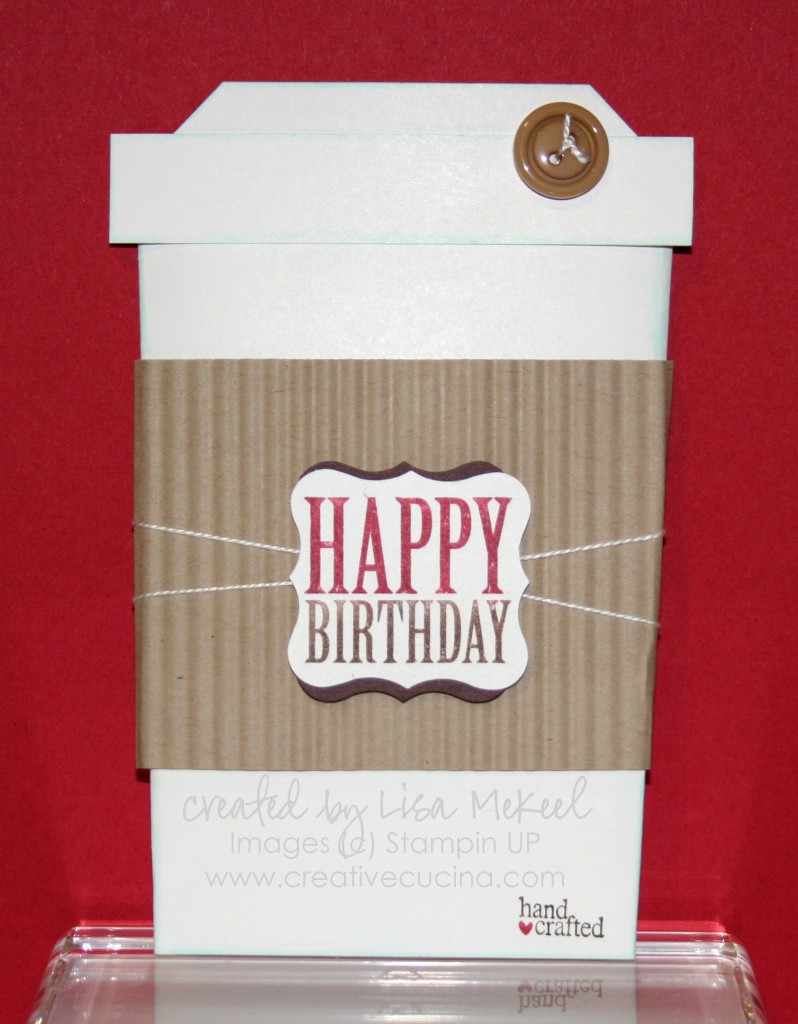
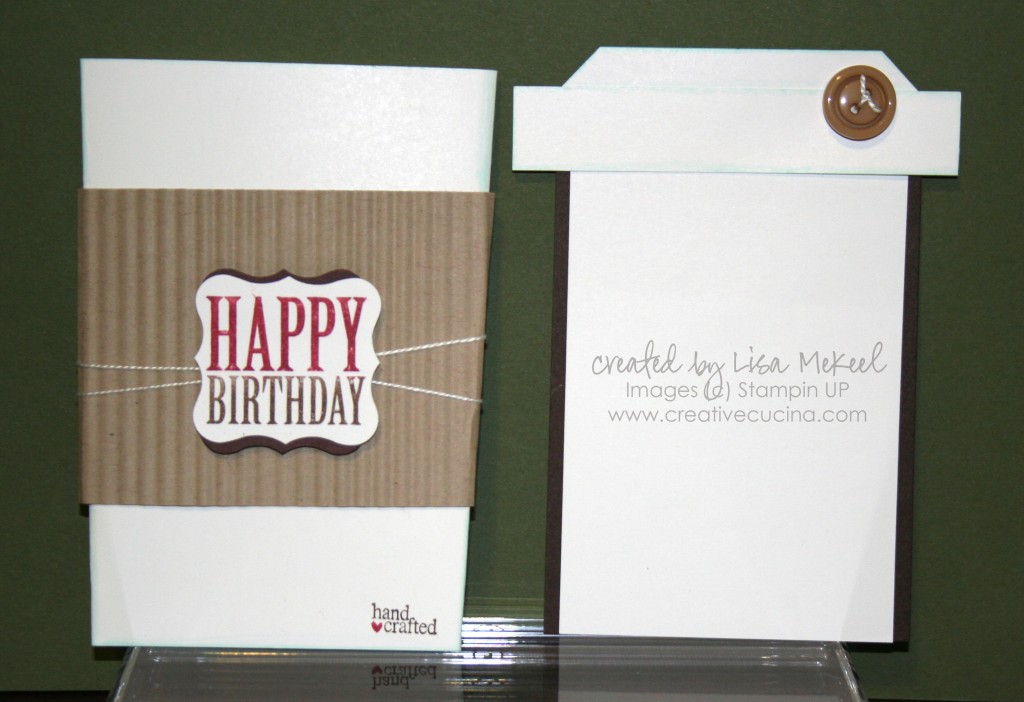
I was inspired by this card from the very talented Ilina Crouse and just had to try making my own version. This is a slider card, which I’ve made before, except in the shape of a coffee cup. Even though the shape is different, the same principal applies. I’ll list the supplies first, then go into directions below.

Supplies Card Stock: Whisper White, Early Espresso, and Crumb Cake; Ink: Early Espresso and Cherry Cobbler Marker, Copic Marker BG00 for shading; Stamps:Afterthoughts, Tiny Tags; Accessories: Designer Buttons (Neutrals), Crimper, Curly Label Punch, Stampin Dimensionals, White string, Sticky Strip, Tag Punch, glue dots.

Creating the Coffee Cup Slider Card:

Step 1:

Cut Whisper White card stock to 8 1/2″ x 7″. Fold each side  in on a slight angle as shown to create the cup. Make sure the distance between the folds at the bottom is 3 1/8″ (see photo below). Glue the flaps along the bottom of the cup closed with Sticky Strip, keeping the seal as close to the bottom as possible. Put more sticky strip along the edges of the back flap of the coffee cup and adhere it down. Do NOT seal the inside of the cup closed–you are creating a pocket.

Step 2:

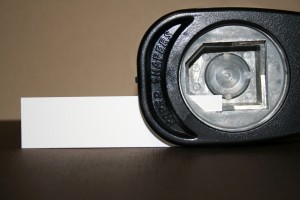
Place the sealed cup onto a paper cutter and line up the bottom of the cup at 4 3/4″, cutting straight across to remove the excess at the top/mouth of the cup.

Step 3:

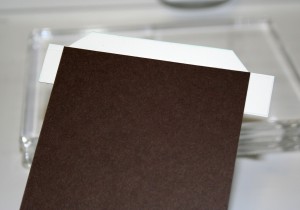
To make the slide out insert, cut a piece of Early Espresso card stock 4 1/2″ x 3″; and Whisper White card stock 4 1/2″ x 2 3/4″. Layer the Whisper White card stock onto the Early Espresso and adhere with SNAIL.

Step 4:

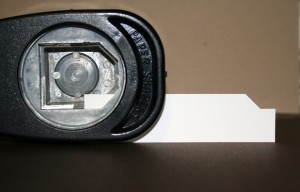
The lid is made using a 1″ x 4″ strip of Whisper White card stock. Using one corner of the Tag Punch, punch both ends of the strip to create the lid shape (see photos below).

Step 5:

For the lip around the lid, cut Whisper White card stock 4″ x 3/4″. Adhere it to the lower portion of the lid piece and trim the sides if necessary.

To attach the lid to the insert, take 1 piece of Sticky Strip about 2 3/4″ long and place it along the top edge of the insert. Attach the lid by lining up the top edge of the lip with the top edge of the insert (see photo below). This will leave the bottom part of the lid free, allowing it to hang over the front of the cup.

Step 6:

For the sleeve, cut Crumb Cake card stock to  7 1/2″ x 2 1/2″ and run it through the Crimper. Fold it around the coffee cup, adhering the back flap with Sticky Strip. A few small glue dots on the back keep it secure to the cup.

Step 7:

Stamp “Happy Birthday” from Afterthoughts on Whisper White card stock, inking up just part of the stamp with Cherry Cobbler and Early Espresso Markers. Punch it out with the Curly Label Punch. Layer onto Early Espresso or Chocolate Chip card stock punched with Curly Label Punch, rotating the brown piece 90 degrees.

Step 8:

Wrap some white string around the sleeve and attach the sentiment with stampin dimensionals. Add a designer button to the lid using white string and a glue dot. I added the “hand crafted” stamp from Tiny Tags in the lower corner of the cup using the Early Espresso and Cherry Cobbler Markers. Optional: Trace around the edges of the lid, lip, and cup with Copic BG00 for some shading.

Love Birds {Fall Theme}

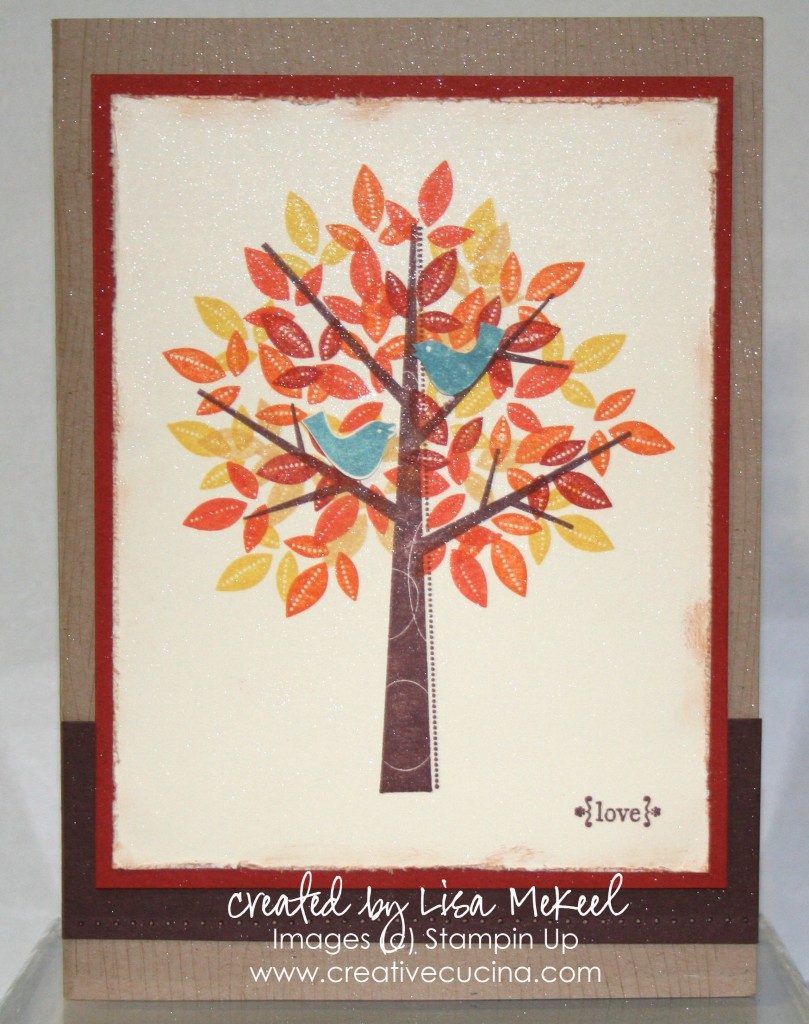
With an upcoming fall wedding (well, I haven’t technically been invited yet, but I know the invitation’s coming since I helped make them) I have autumn colors on the brain. This started out as a possible wedding invitation, but by leaving off any type of “you’re invited” sentiment, it’s general enough to use for any occasion really.

This card is 5″ x 7″ finished size, with the base color being Crumb Cake. I stamped the front with the Woodgrain stamp in the same crumb cake ink. Across the front, I added a strip of chocolate chip card stock, paper pierced along the bottom.

The main image is from Season of Friendship, stamped on Very Vanilla card stock in chocolate chip ink for the trunk, so saffron, pumpkin pie, and cajun craze for the leaves. As for the birds, I stamped them in taken with teal ink, then cut them out. In order for them to face each other, I turned over one of the birds and stamped all over the back with the stamp and taken with teal ink. Then, I used the White Gel Pen to make a little eye and that’s it–now they’re love birds! I attached them to the tree with 2 mini glue dots each.

In the lower corner, I stamped “love” from Tiny Tags in chocolate chip ink. I LOVE those little brackets–they are too cute.

I distressed the edges of the very vanilla card stock with the Cutter Kit distressing tool and rubbed some Creamy Caramel ink around the edges with a Sponge Dauber. Then, the very vanilla was layered with Cajun Craze and attached to the base.

Finally, I sprayed the whole front of the card with Shimmer Mist that I made using 70% Rubbing Alcohol and Frost Shimmer Paint.

Until the invitations are mailed, I don’t want to post a picture and spoil the surprise–so be on the lookout for the invitation that made the cut!

Bad Behavior has blocked 314 access attempts in the last 7 days.

css.php