Cracked Glass Technique Card

11_18 005 copy

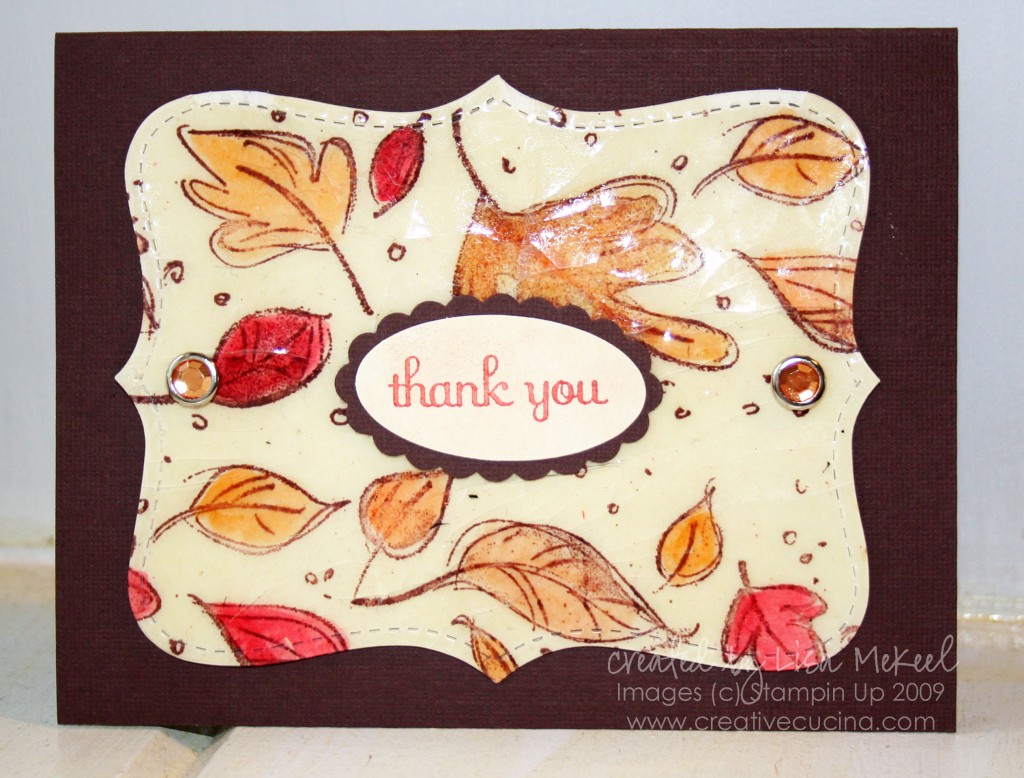
I was inspired by a card I saw using this stamp set and cracked glass technique. For my card, I used Very Vanilla card stock and the Leaves Awash Jumbo Wheel with Chocolate Chip ink. Then, I colored in the leaves with the Aquapainter and various colors of Classic ink pads.

Next, I followed the directions for the cracked glass technique and covered the entire surface of the card stock with Versamark and Glassy Glaze. I heat embossed the Glassy Glaze and repeated the steps 2 more times. As per the directions, I put the paper in the freezer and then cracked it in various places.

After that, I ran the card stock through the Big Shot using the Top Note Die. Please make sure your layers of glassy glaze are “dry” or “frozen” enough or bits of it will get stuck in your Top Note die!

To finish off the card, I added Circle Rhinestone Brads with the cropadile and mounted the very vanilla top note to the base with dimensionals. The sentiment is from Note of Thanks Mini Note Kit. I colored in part of the image with my Dusty Durango Marker and stamped it on Very Vanilla, punched it out with the Large Oval Punch, sponged some Creamy Caramel ink on top, then mounted it on a Chocolate Chip Scallop Oval Punch, attached with dimensionals.
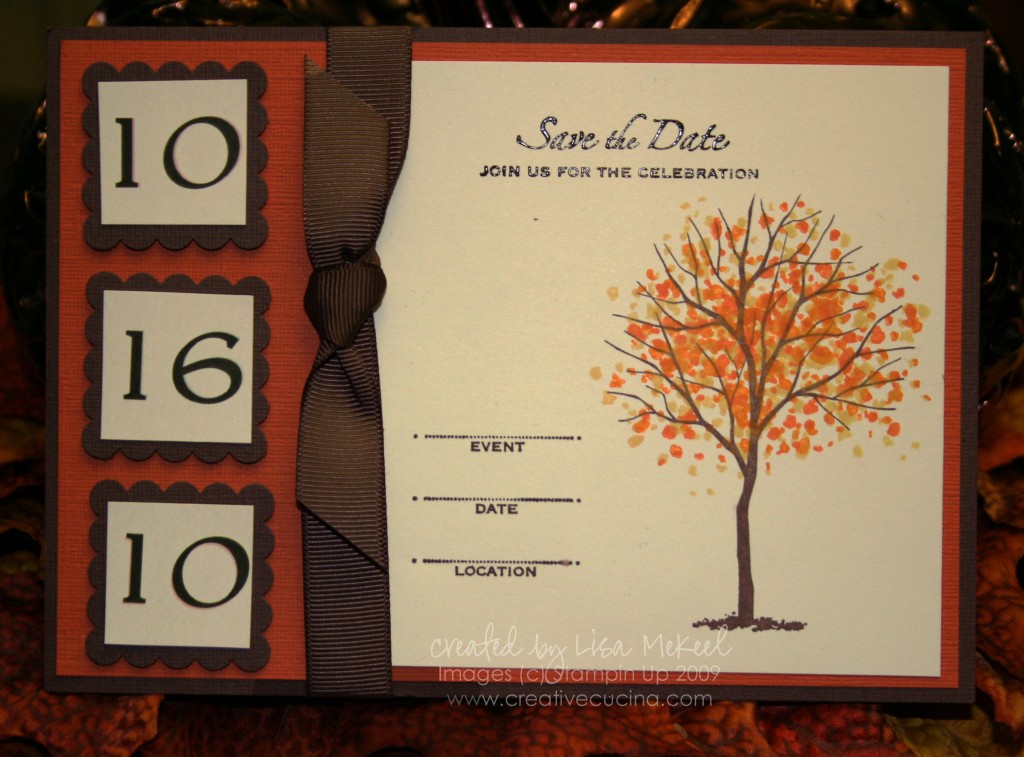
Branch Out Fall/Autumn Wedding Save the Date or Invitation

Ella 019 copy copy

Below is the updated version of the custom printed Branch Out Save the Date. The above version is no longer available.

Branch Out Sample Photo

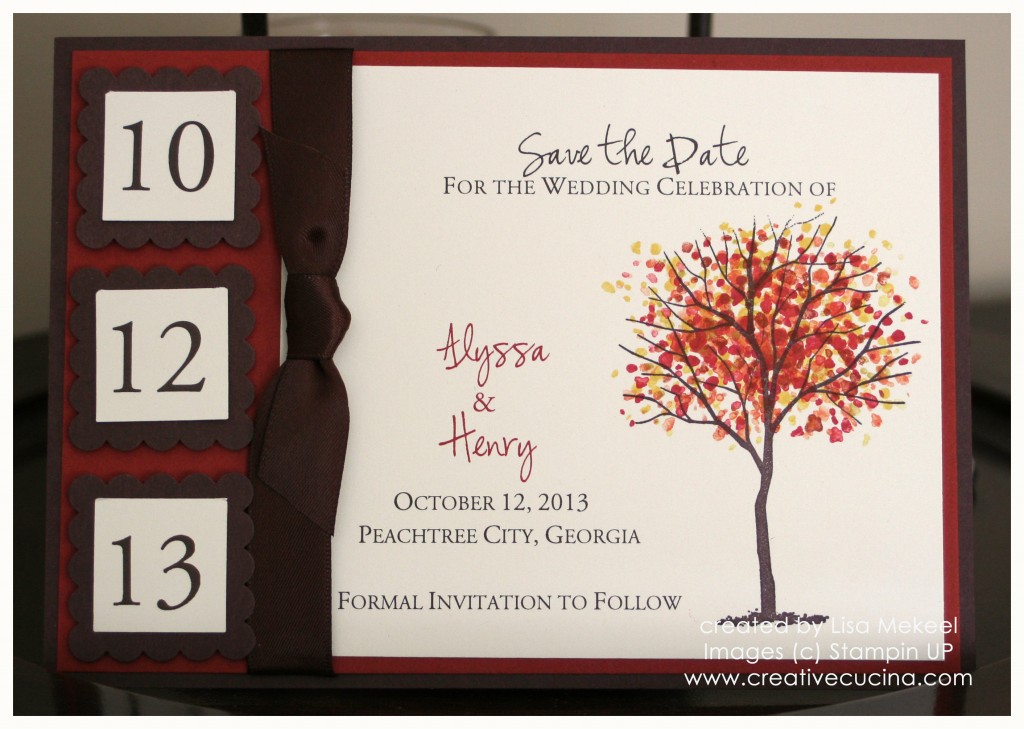
Here is another Save the Date card for a fall themed wedding. This is a 5″x7″ card, also known as an A7 card. The base is chocolate chip textured card stock, layered with a 4 3/4″x 6 3/4″ piece of cajun craze card stock.

Along the left side, I featured the wedding date. I punched out textured chocolate chip card stock using my Square Scallop Punch and printed the numbers on very vanilla card stock, trimmed to 1″ squares. They are adhered to the base with dimensionals.

The stamped image is from Branch Out. I stamped the tree in chocolate chip ink on very vanilla card stock. The leaves were stamped in various shades of ink.

To finish off the card and tie it all together, I added 5/8″ Chocolate Chip Satin Ribbon.

I think this could easily be turned into an invitation by printing the very vanilla panel with all the wedding information and maybe changing the three numbers to monograms, like A & B for example.

Letterpress Christmas Cards

IMG_1193 copy

I did some more playing with my L Letterpress kit last night. I can’t stress enough how little ink you really need to get a good impression. The slightest bit more and you’ll have problems with smudging.

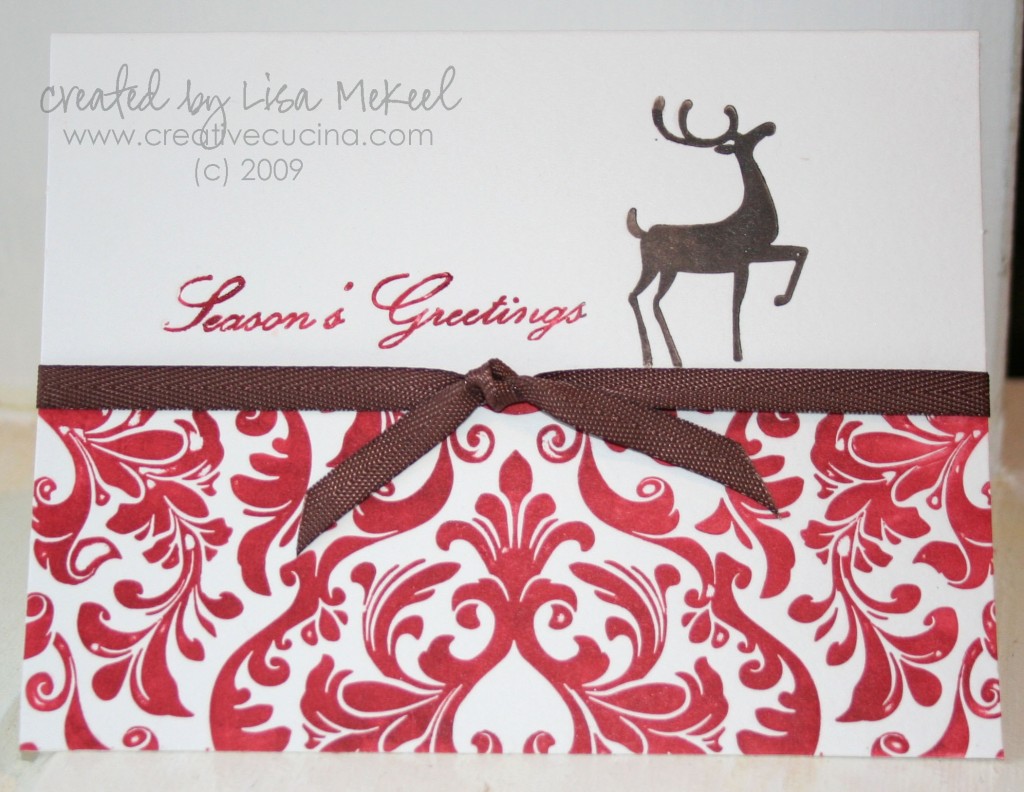
The above card was made using the A2 size cotton letterpress paper (it comes pre-scored). After arranging the printing plates on the platform where I wanted them, I inked up the Holiday Printing Plate in red ink, the reindeer in brown, and the greeting in red also.

I use the Big Shot with the Letterpress kit. I don’t need to use any card stock or shims with mine. The impression is always nice and deep.

To finish off the card, I wrapped a piece of Chocolate Chip 1/4″ Twill Ribbon around the card and tied it into a knot. This is really beautiful and I think it would make a striking Christmas card.

IMG_1195 copy

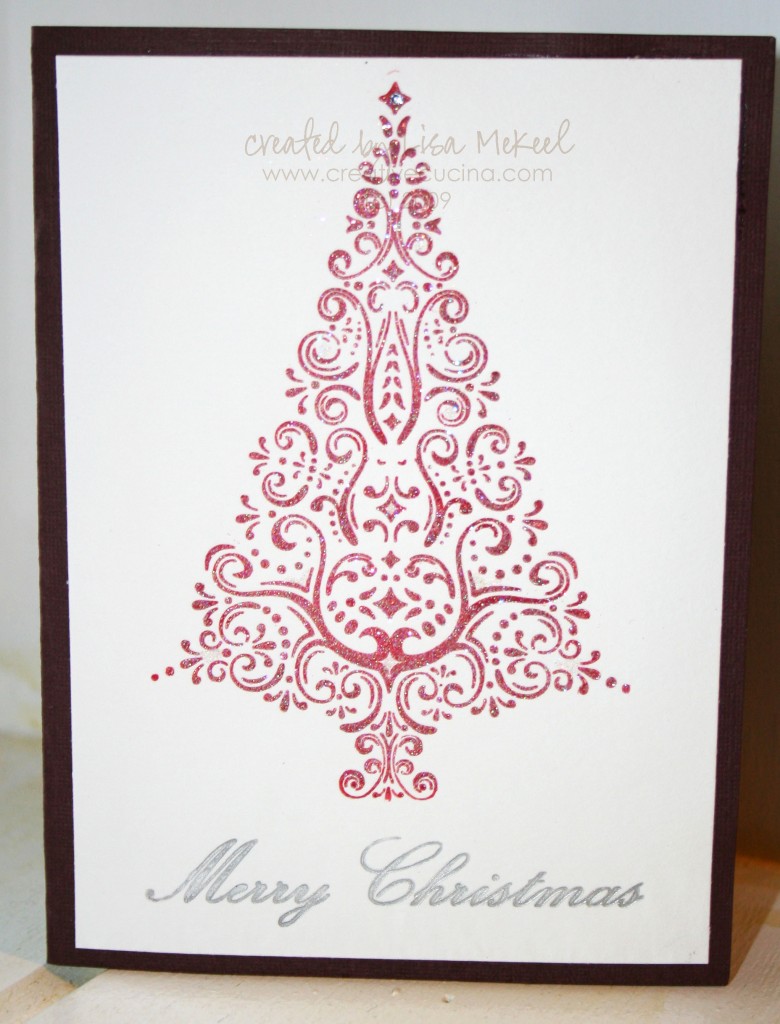
The Holiday Printing plate collection includes this gorgeous tree image. I inked up the tree in red ink and the Christmas greeting in Silver ink, running it through the Big Shot with A7 size cotton paper. I trimmed the paper down and layered it onto textured chocolate chip card stock, cut to 7″ x 10″ so I could use a 5″x7″ envelope.

To give the tree some more sparkle, I added Dazzling Diamonds Glitter over the image while the ink was still wet. It picks up a little of the shimmer in the metallic silver ink and just makes it more festive. At the top of the tree, I added a small sticky rhinestone for the star.

Bad Behavior has blocked 1029 access attempts in the last 7 days.

css.php