Archives for October 2009

The Magic Pumpkin–2 Ways

IMG_0811

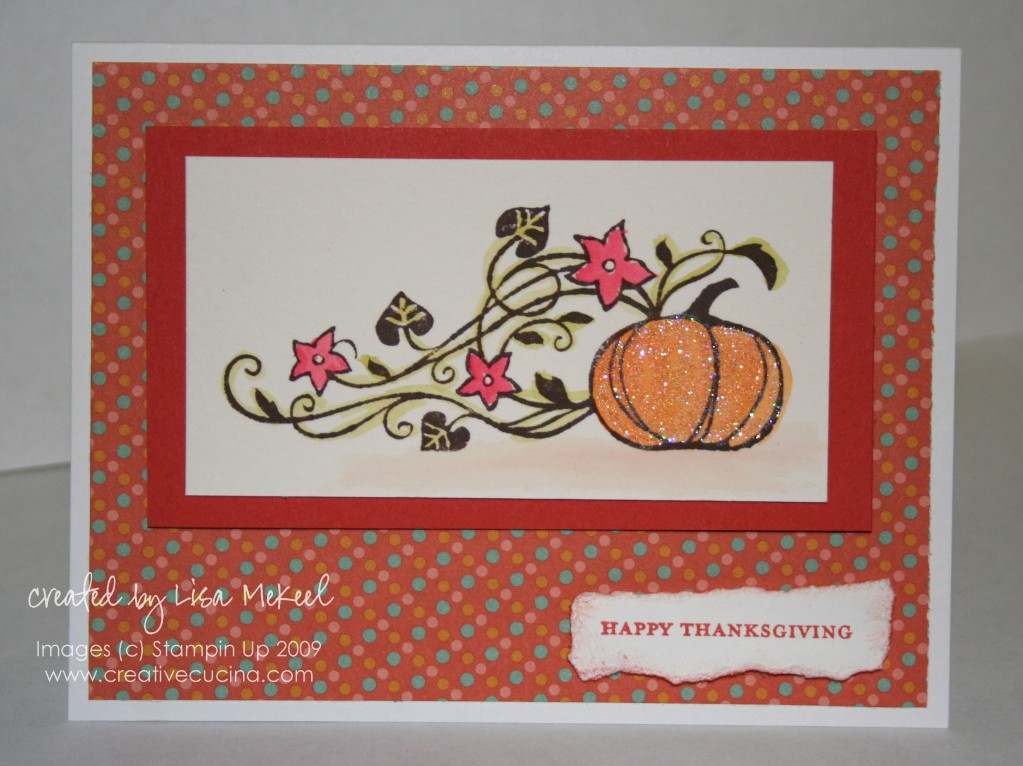
Something about the glitter on this pumpkin just makes me smile. I think it makes the card. The image is from a clear stamp (which I swore I’d never buy again…but I had a gift certificate…and it was there…and I bought it). I stamped the pumpkin image onto Watercolor Paper with Brown Stazon ink. Then, I colored it using Aquapainter and different color inks. After coloring in the pumpkin, I added Dazzling Diamonds with my 2 Way Glue Pen. That is layered onto dusty durango card stock.

The card base is white card stock, layered with Autumn Vines DSP. The sentiment is from Teeny Tiny Wishes, stamped in dusty durango ink onto whisper white card stock that I tore and sponged the edges.
IMG_0813

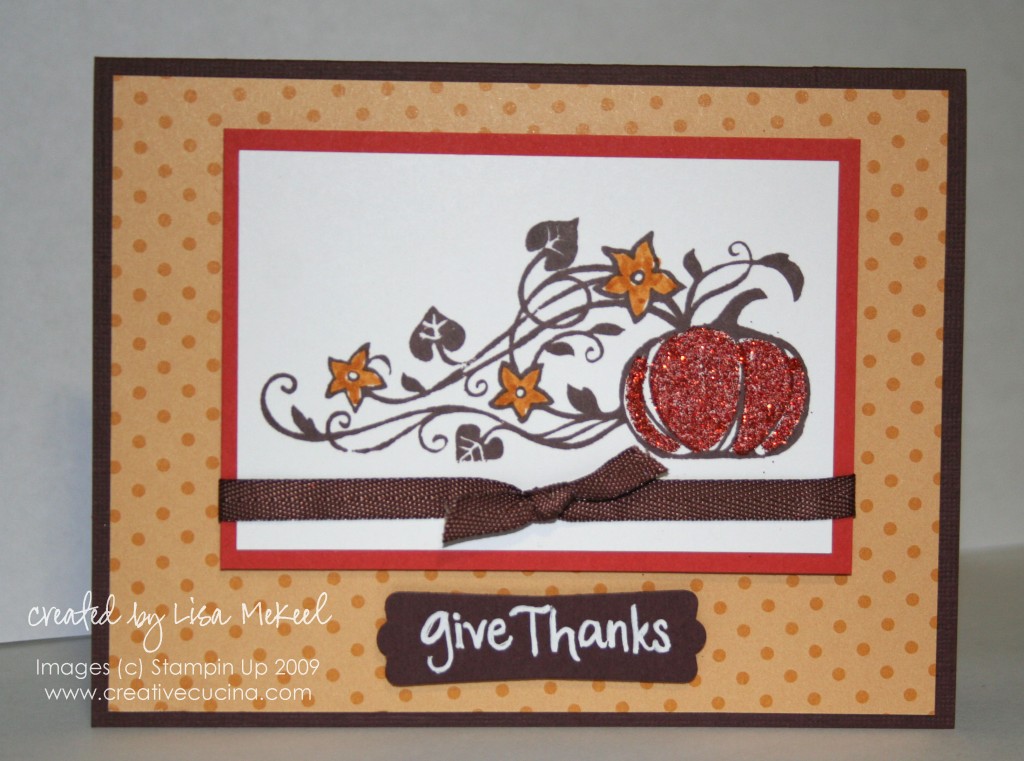
This card uses the same stamp but I changed up the colors a bit. Base is chocolate chip card stock, layered with Autumn Vines DSP, this time in a polka dot more mustard pattern.

The image layer was stamped on Whisper White card stock in Brown Stazon ink again, with just the flowers colored in More Mustard marker. I added Supernova Fine Cosmo Glitter in Orange to the pumpkin using the 2 Way Glue Pen. I then layered some dusty durango card stock, tied some Chocolate Chip Twill 1/4″ Ribbon and attached it to the base using dimensionals.

The sentiment is hand written in White Gel Pen on chocolate chip card stock I punched out using the Modern Label Punch.
Christmas Card Money Holders

Edited to Add: Please note the dimensions for these cards should measure no more than 6 1/2″ x 3 1/4″ when folded. I accidentally typed 3 1/2″ when I posted originally. I’m sorry for any confusion!

These cards are longer than the ones I usually make, and are meant to hold money or a check without having to fold the bill or check in half. For all of these projects, overall card size is 6 1/2″ x 3 1/4″, which correspond to Stampin Up’s Small Open-End Envelopes. Inside, I lined the card with whisper white or very vanilla card stock cut to 3″ x 6 1/4″. I also used the Slit Punch to make a little “lip” in the card to hold the bill or check, or even a gift card.

IMG_0788

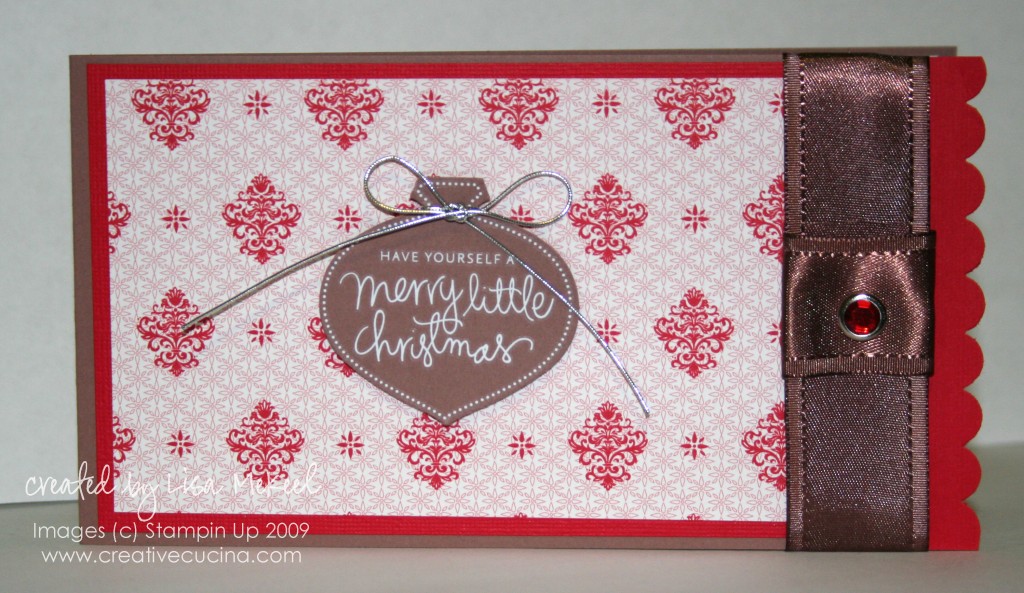
The first card was made from a 3 1/4″ x 12″ piece of close to cocoa card stock, scored at 5 1/2″. This will leave the back flap of the card 6 1/2″ long and the front flap an inch shorter. To make up the difference, I attached a strip of real red card stock that I scalloped with the Scallop Edge Punch.

Chocolate Chip Satin Ribbon covers any seams. I wrapped the ribbon around the entire card front and glued the top piece to the bottom piece of ribbon with SNAIL. Then, I took a shorter piece and wrapped it around the ribbon, creating a loop that I secured with glue dots. Slide the seam side underneath the vertical ribbon strip and using the cropadile, punch a hole through all the layers of ribbon. Add a Fire Circle Rhinestone Brad and there you have it!

The card front is layered with real red textured card stock and Christmas Cocoa DSP. In the center, punched out a close to cocoa ornament using the Ornament Punch and applied a rub on from Merry & Bright Rub Ons. Some Silver Elastic Cord was tied in a bow around the neck of the ornament and then it was attached to the base with dimensionals.

IMG_0790

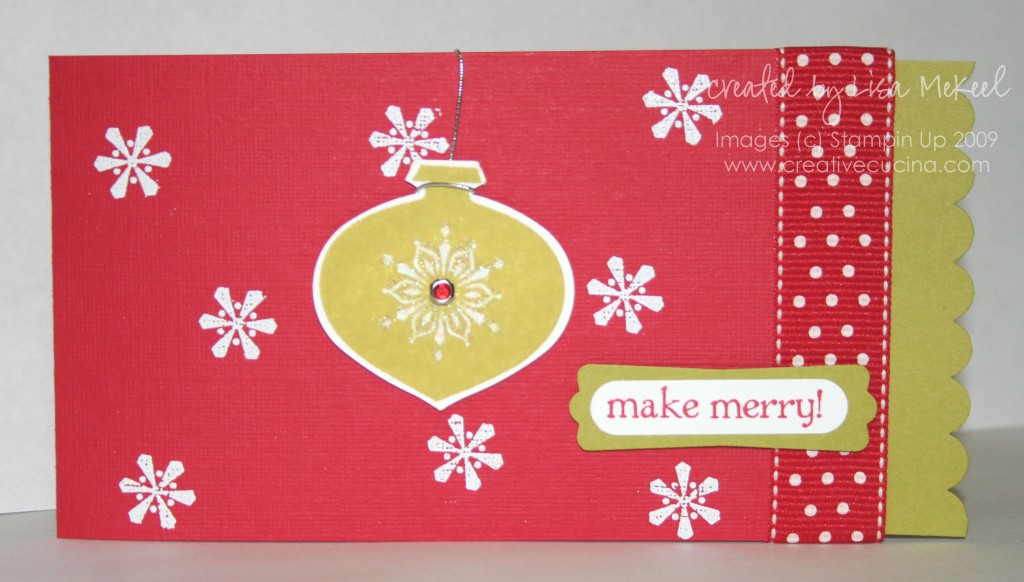
Here is another long card made the same way described above. Base is real red textured card stock, with a kiwi kiss scalloped edge. Real Red Polka Dot Ribbon hides the seam.

I stamped the snowflake from Merry (retired) in Versamark and heat embossed it with White E.P. The ornament from Delightful Decorations was stamped in Kiwi Kiss ink on whisper white and punched out using the Ornament Punch. I added dazzling diamonds glitter to the center of the ornament and a Fire Circle Rhinestone Brad. Next, I tied Silver Elastic Cord to the ornament and wrapped it around the inside.

The sentiment is from Berry Christmas stamped in real red ink on whisper white that I punched out using the Word Window Punch layered on a kiwi kiss Modern Label Punch. Both the ornament and sentiment are popped up on dimensionals.

IMG_0795

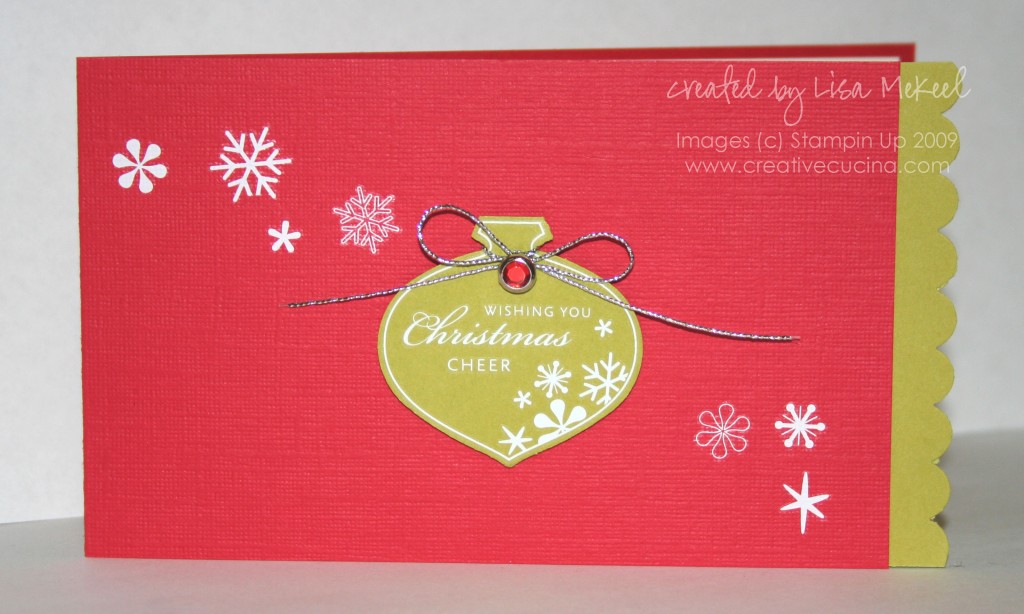
Using the same colors as above, I only used rub ons from Merry & Bright Rub Ons to decorate this card. The ornament is kiwi kiss card stock, punched with the Ornament Punch. I added a Fire Circle Rhinestone Brad and Silver Elastic Cord tied in a bow around the neck of the ornament, which is attatched to the base with dimensionals.

IMG_0793

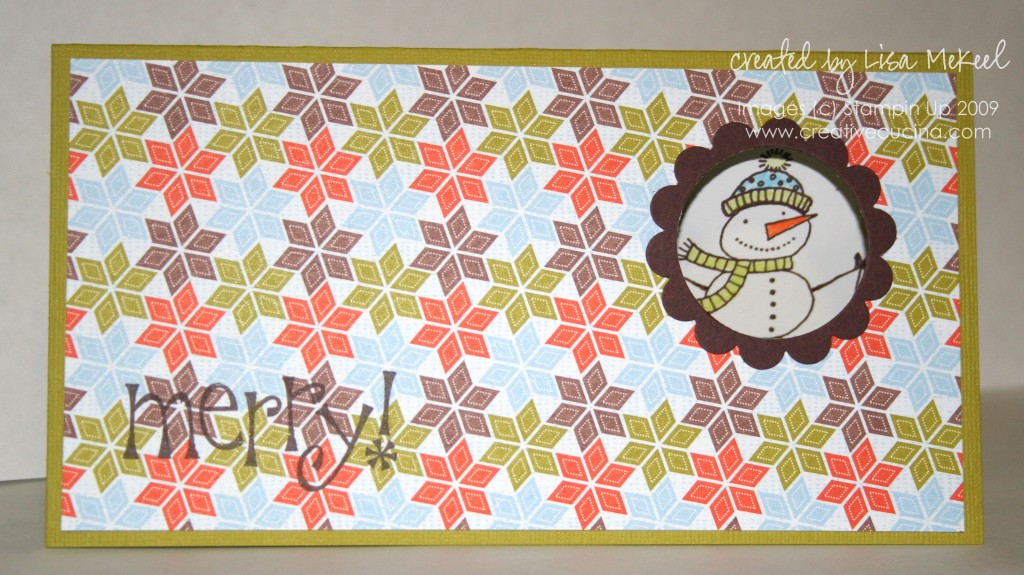
This might be my favorite one of the bunch! The base for this snowman card is cut to 6 1/2 x 6 1/2″, scored on one side at 3 1/4″ so the fold is on the top edge. Card base is textured Kiwi Kiss, layered with the Bulk Buy Holiday DSP that was part of the Inventory Clearance. I attached the DSP to the base and then using my 1 3/8″ Circle Punch, punched a hole through both layers of paper.

To get the scallop window, I took a piece of Chocolate Chip card stock and punched a 1 3/8″ circle. Then, I took the Scallop Circle Punch and centered it over the 1 3/8″ hole I just punched from the chocolate chip card stock. Punch it out and you have a scallop circle window! Glue the scallop circle window to the front of the card.

Inside, I lined the card with a 3″ x 6 1/4″ piece of whisper white card stock. Making small pencil marks, I drew where the window lined up with the inside of the card. Then, I stamped the snowman from Snow Buddies in Brown Stazon ink and colored him in with Watercolor Pencils and Blender Pen. Around the base of the snowman, I added Dazzling Diamonds glitter (not shown).

Outside, I stamped the “Merry” sentiment from Merry (retired) in Brown Stazon ink in the lower left corner of the card.

IMG_0804

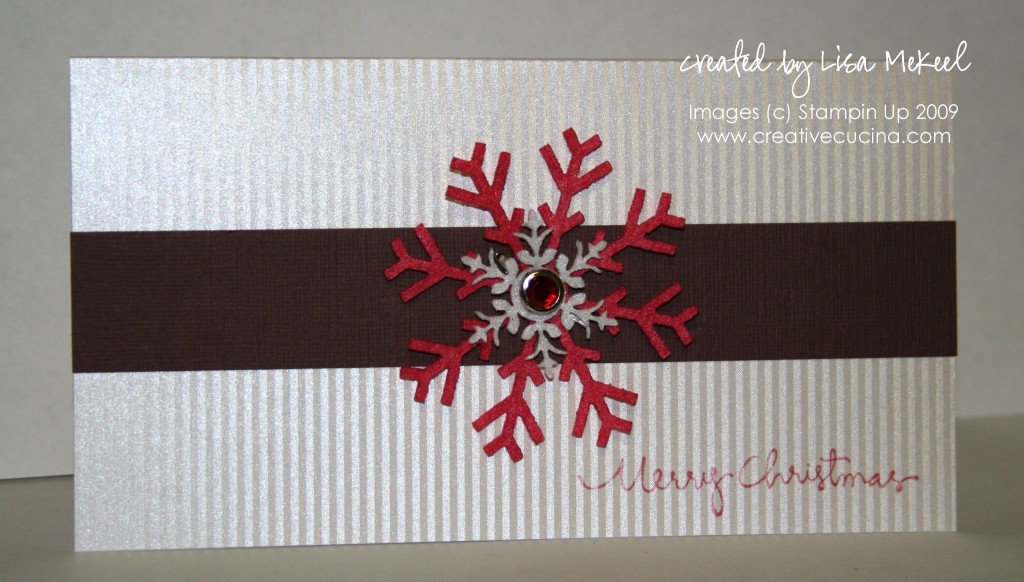
Finally, I made a money holder card using the shimmery white paper from Taste of Textiles (retired). This is another top fold card, cut to 6 1/2″ x 6 1/2″, scored at 3 1/4″ with the fold on top. I added a strip of textured chocolate chip card stock across the front and layered two snowflakes from Felt Flurries. In the center, I punched a hole using the cropadile and added a Fire Circle Rhinestone Brad, which I adhered using a large glue dot.

The sentiment, stamped along the bottom right corner, is from Christmas Greetings and is in real red ink. Inside, I stamped the corresponding sentiment from the same set (not shown).

More Colors, More Leaves

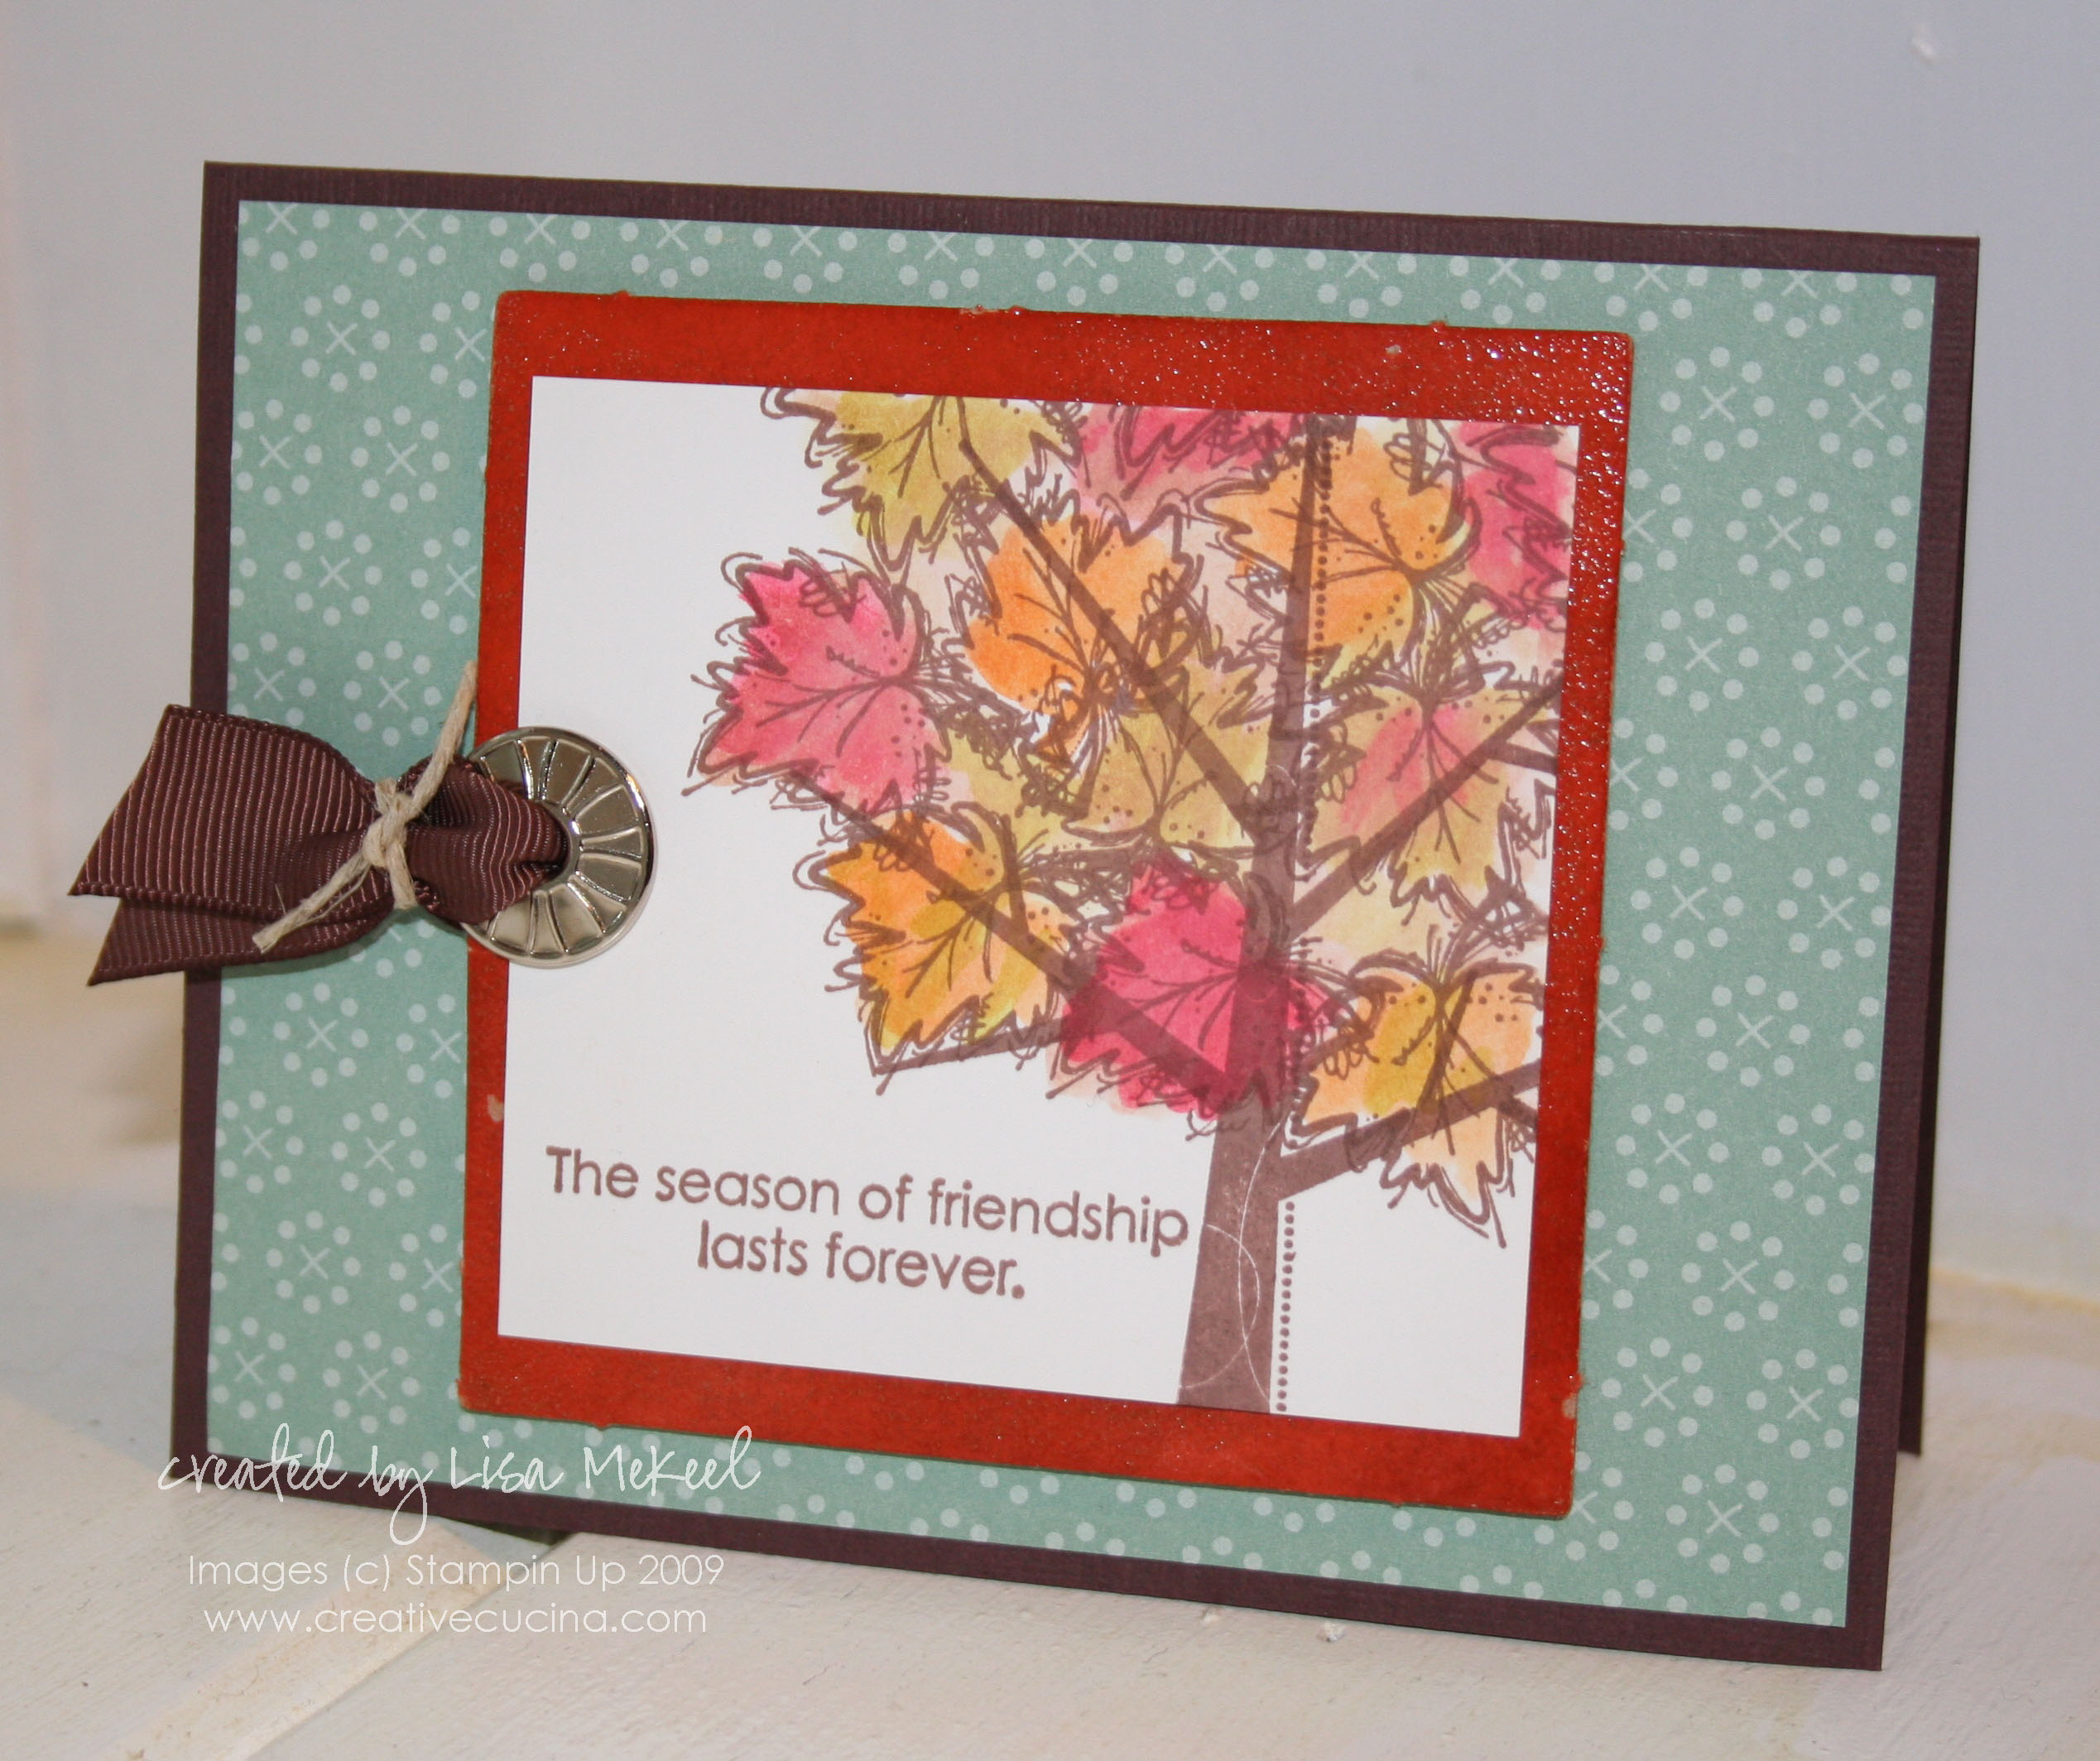
It must be pretty obvious by now that I LOVE this tree from Season of Friendship. Instead of using the leaves that come with the set, I decided to try this large leaf image from Autumn Harvest and it worked pretty well.

The card base is Chocolate chip textured card stock, layered with DSP from Autumn Vines DSP. The image layer is Whisper White, with a chipboard frame underneath. I covered the chipboard with Pumpkin Pie craft ink and then heat embossed it using clear embossing powder.

I stamped the images in Basic Brown ink and watercolored the leaves with my Aquapainter and the following ink pads: Riding Hood Red, Pumpkin Pie, Creamy Caramel, and Kiwi Kiss.

With the cropadile, I punched a large hole in the chipboard and put in an eyelet from Hooray kit. Then I looped a piece of 5/8″ Chocolate Chip Grosgrain Ribbon through and tied it with Hemp Twine.

Bad Behavior has blocked 349 access attempts in the last 7 days.

css.php