Archives for September 2008

A rare CASE

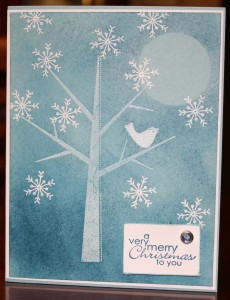
I usually don’t CASE other people’s work. I don’t even like to look at samples until I’ve had a chance to play with a stamp set myself first so that I’m not directly influenced by things I’ve seen. It takes some of the fun out of it for me if I’m just cranking out duplicates of someone else’s work. I enjoy the creativity process as much as the end result. Today, however, I happened upon this beautiful card by Jan Tink and I HAD to copy it! I quickly scanned her directions and ran upstairs to make one. Well, I didn’t follow all of her steps exactly but it came out pretty close, and beautiful nonetheless if I do say so myself.

She gives better directions but this is what I did:

Step 1: Stamped the tree in white craft on baja breeze 4″ x 5 1/4″ and embossed with clear ep. (I tried using versamark and clear ep like Jan suggested but it was too light, almost too light to see on mine. Maybe because I don’t have a brayer and skipped that step?)

Step 2: Punched out a mask with 1 3/8″ circle punch and placed it where I wanted the “moon” to be. Sponge Night of Navy all over the front of the card. Remove mask.

Step 3: Stamp snowflakes & bird in white craft and emboss with white ep. 

Step 4: Stamp sentiment on whisper white in night of navy ink and swipe the edges in baja breeze ink. Add rhinestone brad and adhere to base with dimensionals.

Stamps: Season of Friendship, Hostess Set The Best is Yet to Be; Cardstock: Baja Breeze, Whisper White; Ink: Versamark, White Craft, Baja Breeze, Night of Navy; Accessories: Embossing powder, Rhinestone Brad.
Balloon Card Tutorial

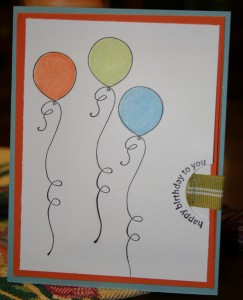
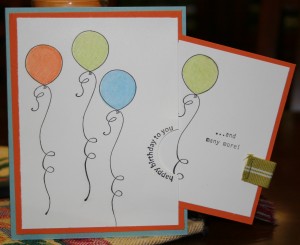
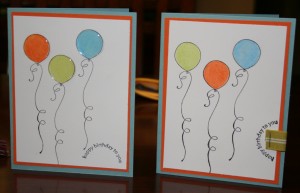
Balloon Birthday Cards: I started with the one on the left. I had a few large Rain Dots left (I know, I’m addicted to these things now) and they fit over the balloons perfectly. As for the sentiment, I stamped it at the bottom but then immediately regretted my decision because I had the thought to place it going up the side (as pictured on the right). It made sense to put it over there because I wanted to incorporate some ribbon while keeping it gender neutral. As soon as you tie a bow on a card, I feel it becomes too girly. I purposely chose these “boy” colors because I always gravitate toward pink & brown. Anyway, by placing the sentiment going up the side of the card, I had another idea–Punch out a half circle inside the sentiment and make a pull out insert with the ribbon tab!


 And drum roll please……………………………………………………………….


Tada! I was quite happy with this one. It took me a little while to get to this point, but this was my vision all along. Dimensions and supplies are as follows:

Main Card Base: Baja Breeze Layer 4 1/4″ x 5 1/2 “; Pumpkin Pie Layer 4″ x 5 1/4″; White Layer 3 3/4″ x 5”. 

Pull-Out Portion: Pumpkin Pie Layer 3″ x 4″; White Layer 2 3/4″ x 3 3/4″.

Directions: Assemble the main card base first; adhere the Pumpkin Pie layer to the Baja Breeze layer. Stamp your image (here I used Crazy for Cupcakes) and punch out a half-circle from the right hand side with a 1″ circle punch, or whatever size accomodates your image. Adhere that layer to the Pumpkin Pie by putting snail or sticky strip around the very outer edges of 3 sides ONLY (left side, top, and bottom). Keep the right side open. Stamp your image for the pull-out and adhere your two layers together (I used the sentiment from Birthday Whimsy). Attach a bit of ribbon to the side, lining it up with where you punched your semi-circle out. I used a staple but you could also use an eyelet or a brad to adhere your ribbon. Slip the pull-out into the pocket you’ve created and voila! A cute card with endless possibilities.

Some thoughts I had…Invitations with all the details on the insert; making the pull-out hold a gift card by using the slit punch; adhering a wallet size photo to the insert. I’m sure there are more ideas but just off the top of my head I can see these being great variations!


Crazy for Cupcakes

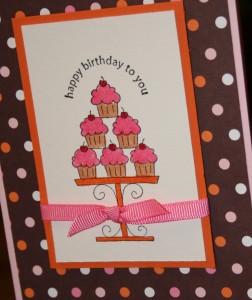
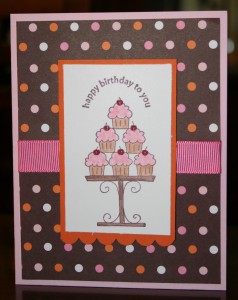
One of the new sets, Crazy for Cupcakes from SU, I’ve been dying to use. I’ve got quite a few birthdays coming up in October so I’m getting a head start on my cards now. This is a great set to use markers, watecolor crayons, or pencils. I did try watercoloring with the brush on watercolor paper but it ran a little into each cupcake, maybe because the images are so small? Anyway, these are the samples that were good enough to make the blog.

Left: Stamps: Crazy for Cupcakes; Cardstock: Pink Pirouette, Sweet Always DSP, Pumpkin Pie, Watercolor paper; Ink: Black Stazon, Markers: Regal Rose, Creamy Caramel, Pumpkin Pie, Real Red; Accessories: Regal Rose 1/4″ grosgrain, Scallop Edge Punch


Left: Same supplies as above except regal rose 5/8″ grosgrain, whisper white cardstock, and pretty in pink marker. Cherries are popped with a tiny Rain Dot, but you could also use Crystal Effects to achieve the same look.


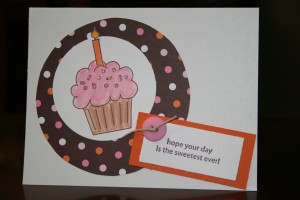
 Left: I was going for a more minimalist look here. I played around with putting a piece of pink cardstock behind the big circle but I think this way looks better. This is another image from Crazy for Cupcakes. For the largest circle I actually traced a spool of ribbon and cut it out myself. The white circle is the pink Marvy circle punch. The flame to the candle is actually cut out and popped up on a small glue dot because it was cut off when I punched out the circle. I’m finally using my buttons lately. Now that I started I can’t seem to stop. Oh and I used Dazzling Diamonds on the cupcake’s sprinkles.

Bad Behavior has blocked 454 access attempts in the last 7 days.

css.php