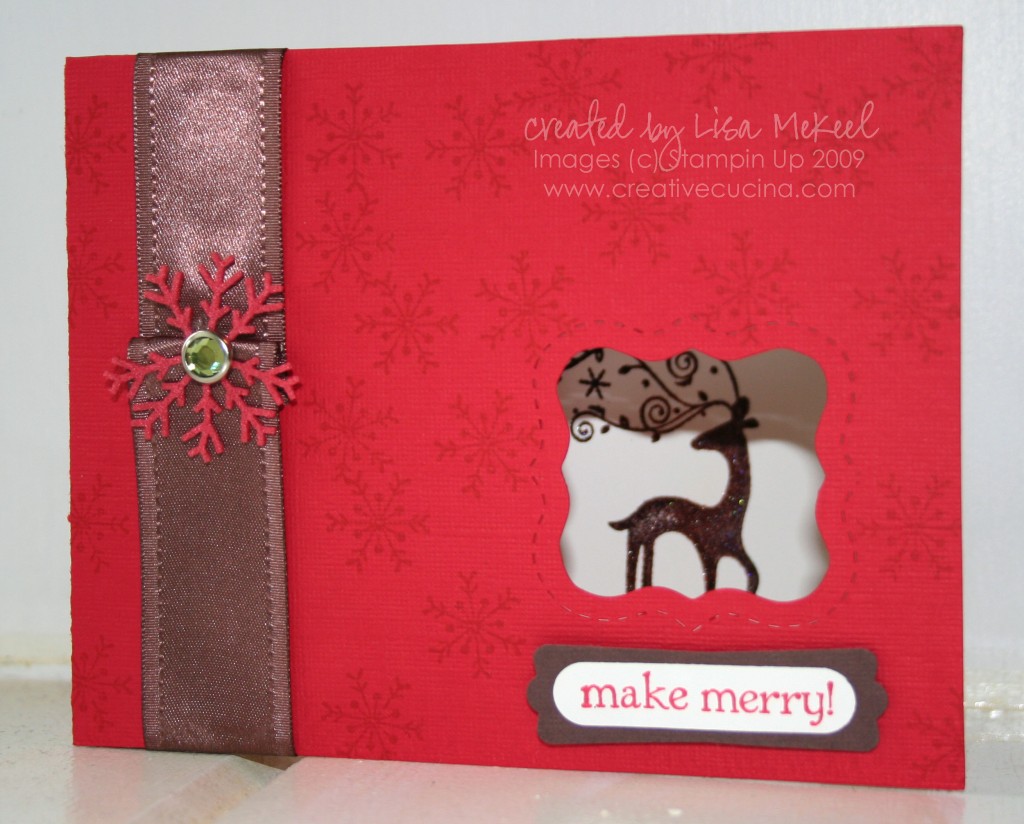
Dasher Embossed-Movers & Shapers Window Card

11_18 001 copy

The idea for this card came about from trying to glitter up the Dasher Reindeer stamp. My brown glitter wasn’t sticking permanently and I almost gave up completely when I decided to try iridescent ice embossing powder.

On whisper white card stock, I stamped the reindeer in chocolate chip craft ink, then heat embossed it  with iridescent ice. Then, using the stampamajig, I stamped the image again in chocolate chip craft ink and heat embossed it with clear embossing powder, which gave it a little more shine. The whisper white card stock was then adhered to the inside of the card. Placement of the reindeer is important, so I made light pencil marks on my white card stock around the curly label window.

The card base is real red textured card stock, cut with the Movers and Shapers die in the Big Shot. I stamped the front randomly with the snowflake from Season of Friendship in real red ink. Along the side, I took some Chocolate Chip Satin Ribbon and added a Felt Flurry and a Circle Rhinestone Brad, which I attached using the cropadile.

Below the curly label window, I stamped the greeting from Berry Christmas in real red ink on whisper white. I punched it out using the Word Window Punch and layered it on chocolate chip card stock I punched with the Modern Label Punch. That is attached to the card using dimensionals.
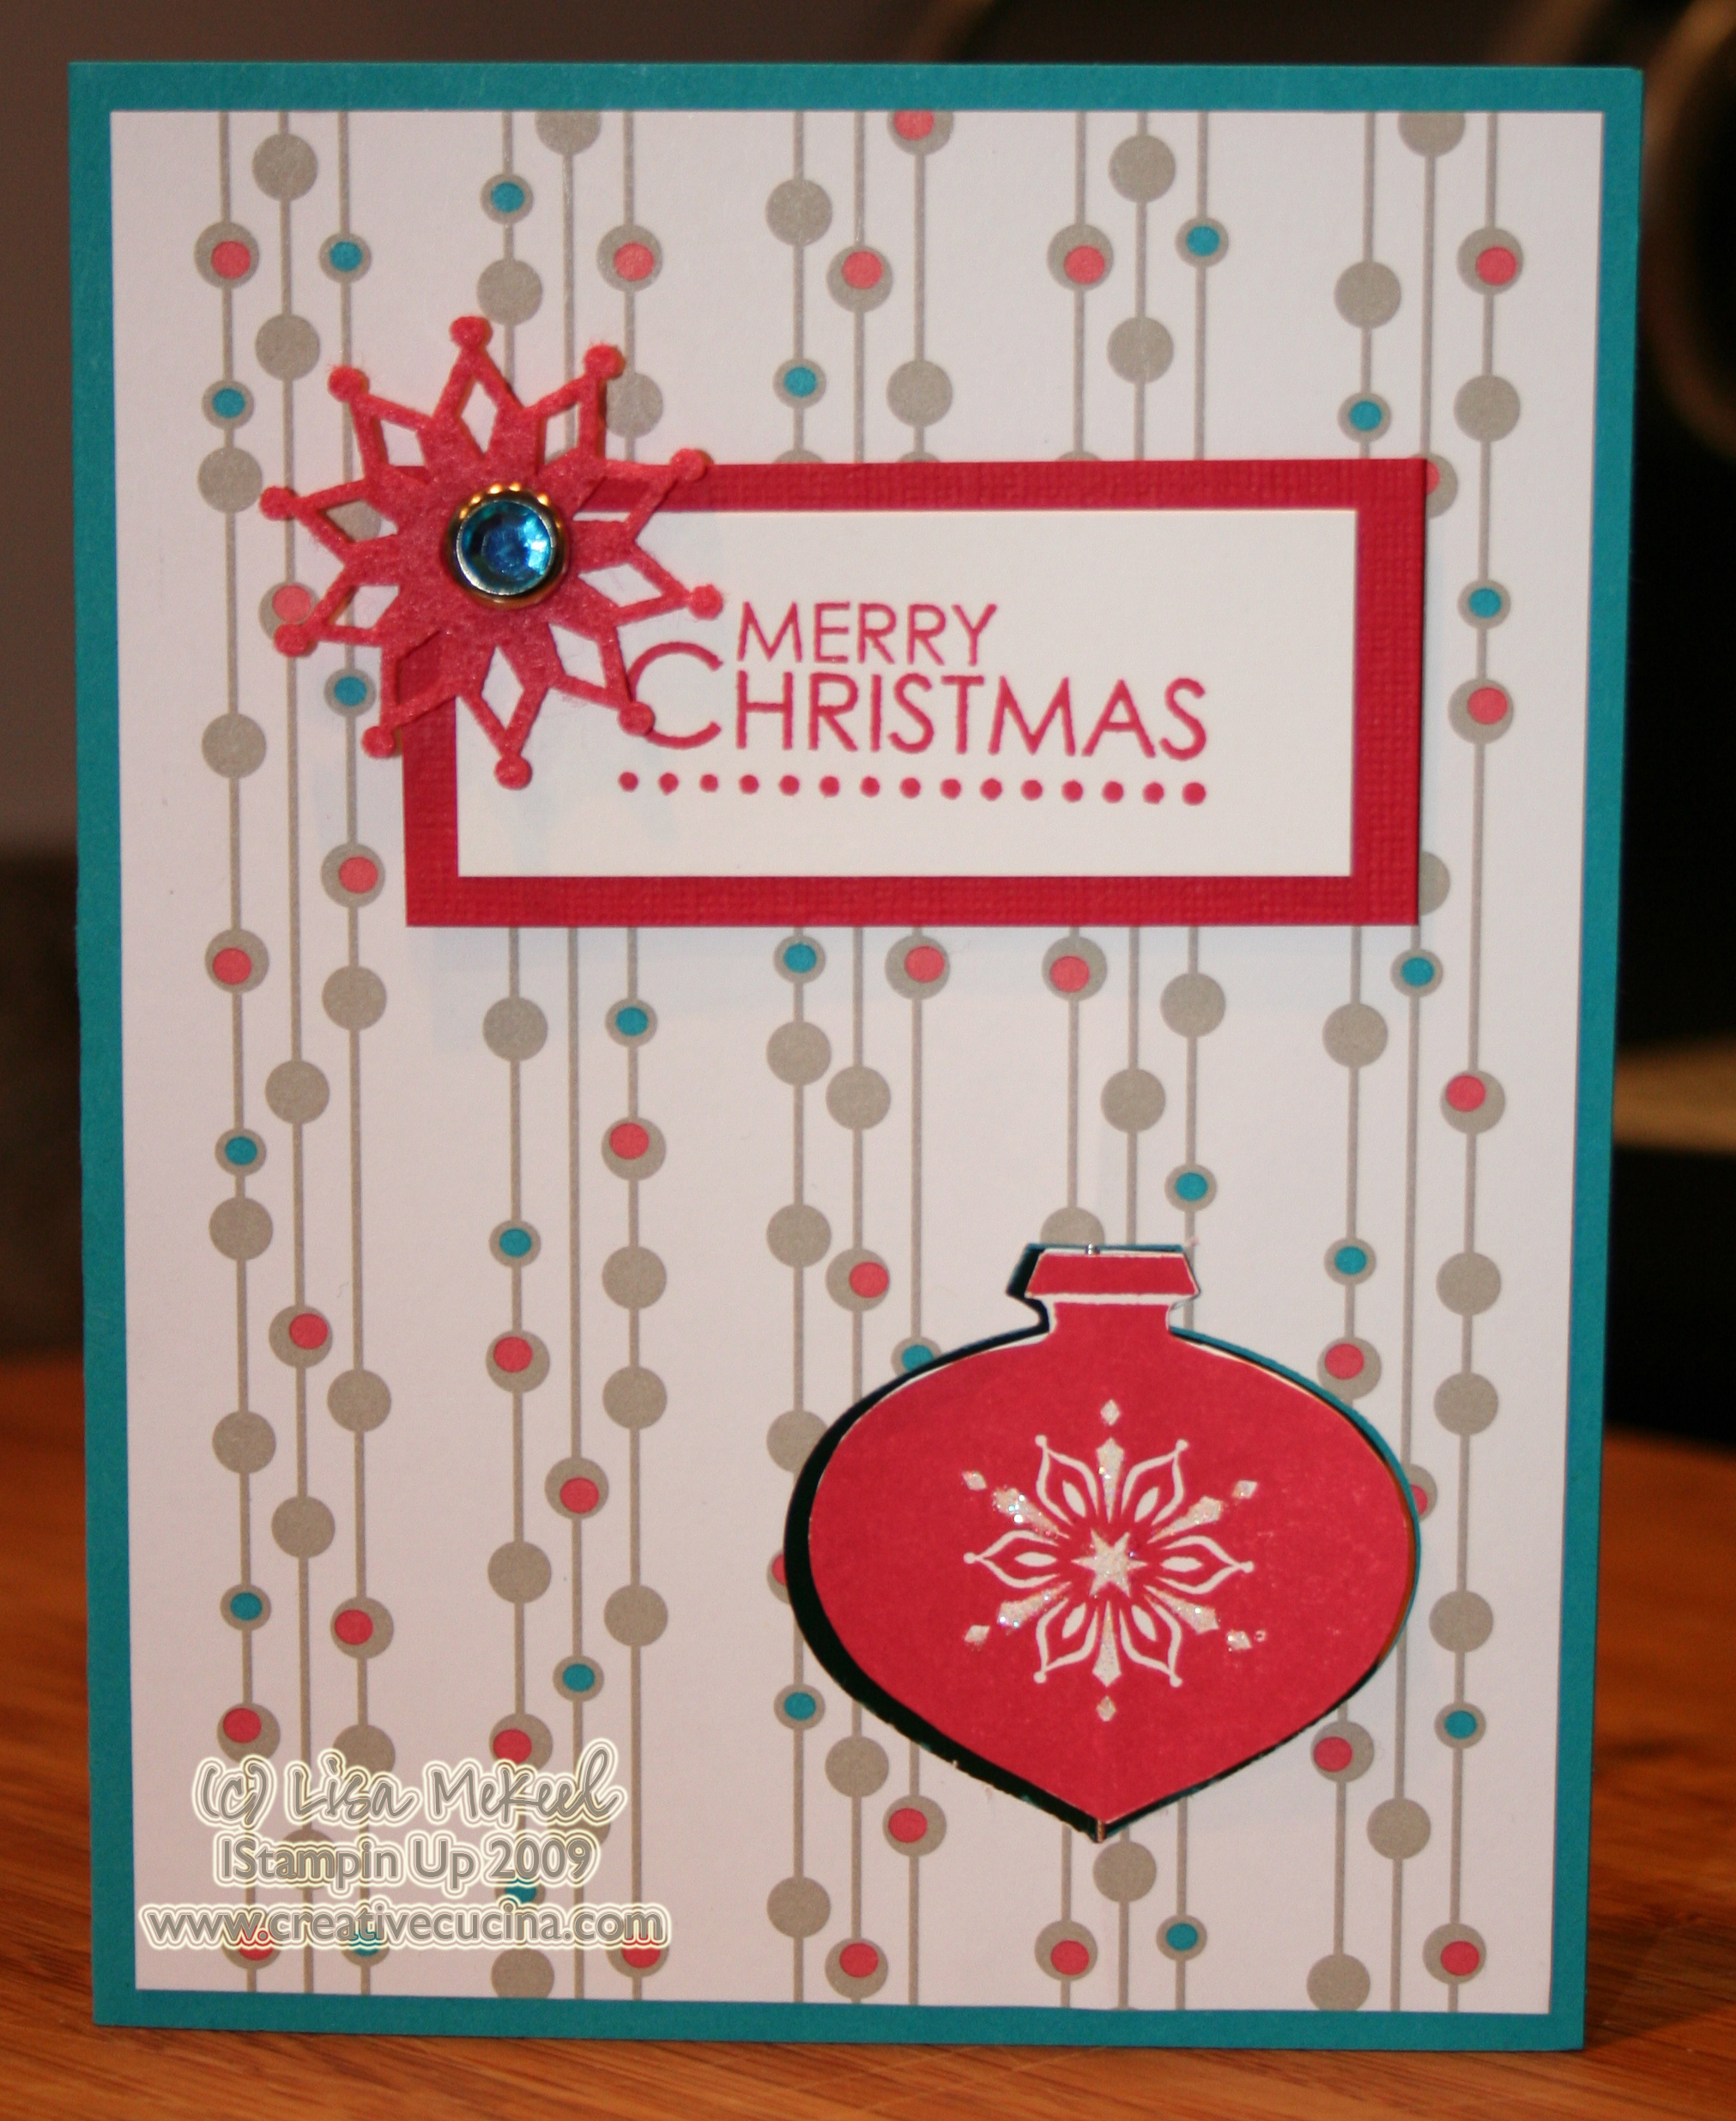
Ornament Suspension Card

OK, here’s ANOTHER Delightful Decorations card but this time I changed it up a bit and made a suspension card (see tutorial here).

Card base is taken with teal, layered with Holiday Lounge DSP. To make the punch out, I lined up my DSP exactly where it was going to be on the card base and punched the two papers at the same time using the Ornament Punch. Then, I stamped the ornament from Delightful Decorations in Real Red ink on whisper white card stock TWICE, and trimmed them out using my paper snips. Because the punch is slightly larger than the stamp image, the suspension card will work if you trim very close to the image so it will fit in the punched out area.

Next, follow the directions for the suspension card and apply sticky strip to the back side of the DSP, above and below the punch out window. Then, put sticky strip on the back sides of the ornaments you cut out. Attach a piece of dental floss and apply your ornaments. (See tutorial for step by step instructions).

The sentiment is from Season of Joy, stamped in real red ink on whisper white. I layered it with real red textured card stock and then added a Circle Ice Rhinestone Brad and Felt Flurry in the upper corner.

Although hard to see, I added some Dazzling Diamonds to the snowflake on the ornament.

Bad Behavior has blocked 479 access attempts in the last 7 days.

css.php