Tote-ally Tess Made you a Cupcake

tess_cupcake

Ever since I saw the stamp set Tote-ally Tess, I knew I was going to have her holding a cupcake! The set comes with stamping stuff, which is cute, but I hope they come out with other kinds of accessories for her too!

The card base is Pale Plum. I layered Shades of Spring DSP on to Basic Black card stock to make it pop more. Tess is stamped with Memento Black ink on white card stock. I colored her in with Copic Markers. The cupcake is from Crazy for Cupcakes, also colored with Copic Markers and popped up with a Stampin Dimensional.

The sentiment is from Tote-ally Tess stamp set, which I stamped in Memento Black ink on Whisper White card stock. Again, I layered it with Basic Black and attached it to the base with Dimensionals.

HAPPY NEW YEAR EVERYONE! Hope 2010 is going to be a good year for my family and yours!

Beautiful Butterfly Wings

butterfly_1

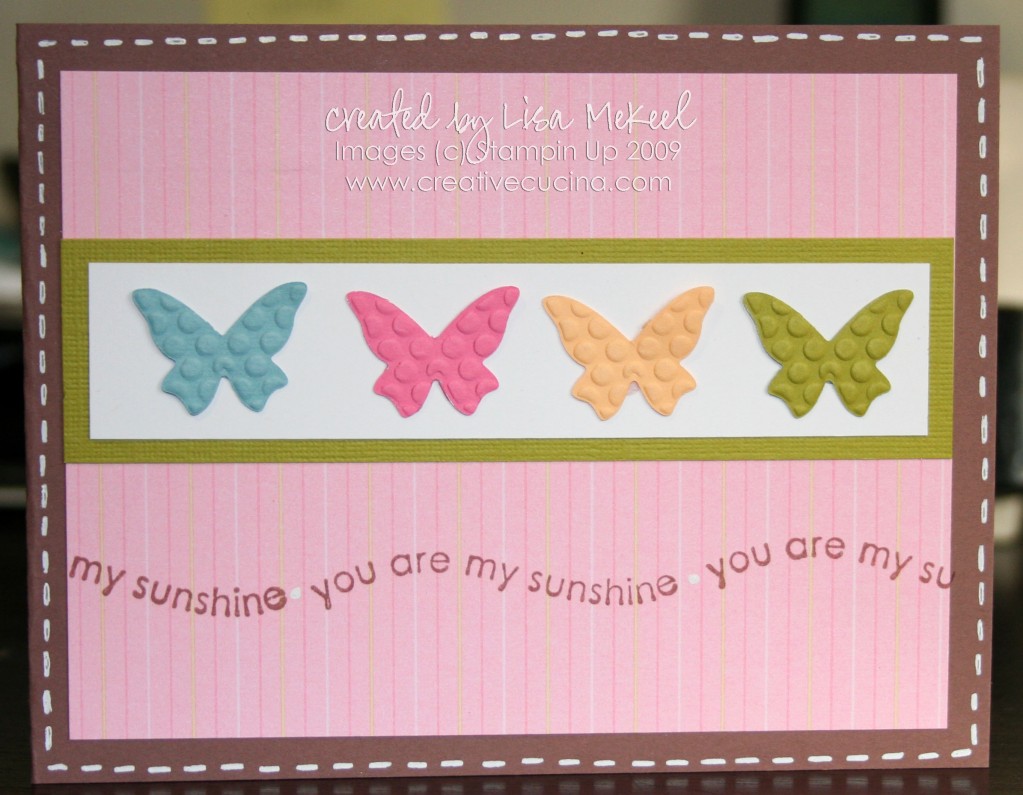
I finally got around to placing a preorder from the 2010 Occasions Mini Catalog and it’s just what I needed to get back in the swing of things. Although there’s snow outside today, I’m in the mood for Spring and these butterflies made with the Beautiful Wings Embosslit and the Big Shot called to me instantly.

The card base is Close to Cocoa card stock, layered with a piece of Shades of Spring Designer Series Paper. Around the edge of the card front, I used my Gel Pen to add a little stitched outline.

As I mentioned earlier, the butterflies were made using the Beautiful Wings Embosslit with Kiwi Kiss, Apricot Appeal, Regal Rose, and Baja Breeze Card stock. I adhered them to a strip of Whisper White card stock using Mini Glue Dots. I layered the strip of white card stock on Kiwi Kiss and attached it to the card front with SNAIL adhesive.

The sentiment is actually from the new stamp set Something Sweet. I opted to order the clear mounted version and it really is easy to use. Not as quick as the wood mounted (just peel and stick to the wood block–ready to use). I have to get used to the new system of mounting each time, stamping, cleaning, and putting away. But the ease of storage is really winning me over! It’s really just one additional step (finding the block and mounting the stamp) so I think I’ll get used to it pretty quick.

I stamped the “you are my sunshine” stamp in close to cocoa ink. Since I was using a clear block and could see the stamp, placement was easy and no stampamajig was needed! In between each stamp, I added a white dot with my Gel Pen.

Amaretti Cookies

dec09 050

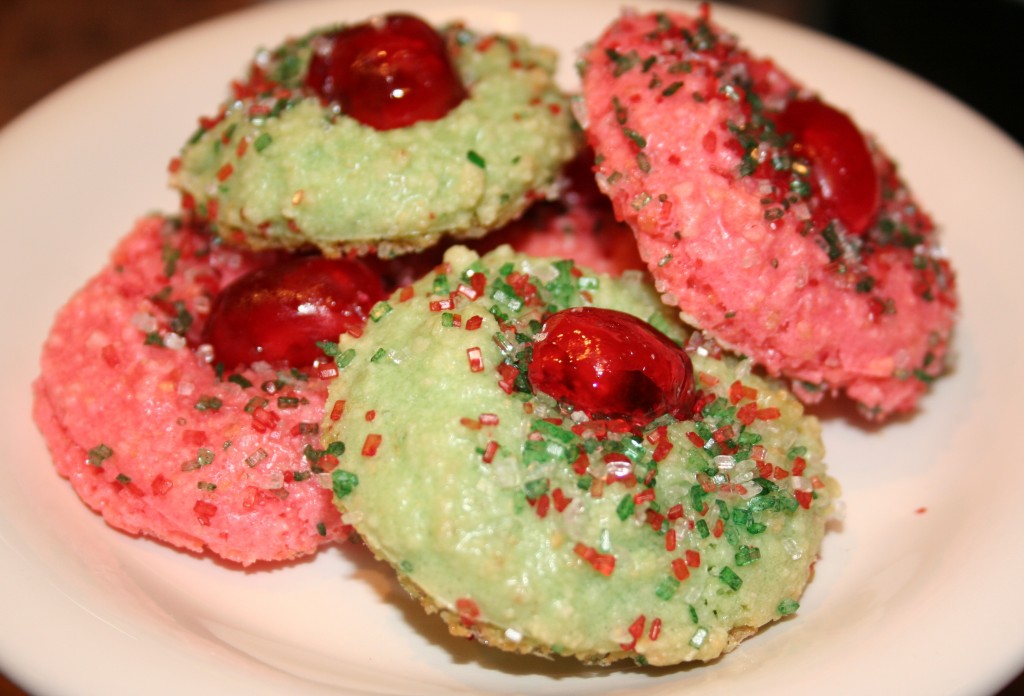
A family friend recently shared her recipe for Amaretti cookies. They’re a chewy, almond flavored sweet cookie made from very few ingredients. The recipe has a slight twist to it–you let the cookies firm up overnight, uncovered, before baking.

Ingredients

  • 1 cup blanched almonds
  • 1 cup sugar
  • 2 egg whites
  • 1/2 tsp Almond Extract
  • Crystallized sugar
  • Candied Cherries

Directions

  1. Dry blanched almonds thoroughly by placing them in a warm oven (350 degrees) for 5 to 10 minutes.  Grind as fine as possible, until powdery, while still warm.
  2. Combine ground almonds and sugar in a medium size bowl; add unbeaten egg whites and almond extract; beat thoroughly.
  3. Divide dough into sections.  Add food coloring of your choice. Drop by teaspoonfuls onto cookie sheet lined with parchment paper leaving 1 inch between cookies. Wet fingers with water and smooth into rounds. Sprinkle on crystallized sugar and top off with candied cherries (cut in half).
  4. **Let cookies stand overnight, uncovered until dough hardens**
  5. Bake in moderate oven (375 degrees) for 10-12 minutes.  Remove from oven and let stand for 5 minutes.  Carefully remove cookies with spatula ( if cookie stiffens, put back into oven for a few seconds to soften.)  Store in an airtight container when thoroughly cooled.

Bad Behavior has blocked 463 access attempts in the last 7 days.

css.php