Making a blog banner is so easy using Stampin Up’s My Digital Studio. Here are step by step directions on how to turn your MDS creation into a work of art you can display on your blog. Click on the images to enlarge.
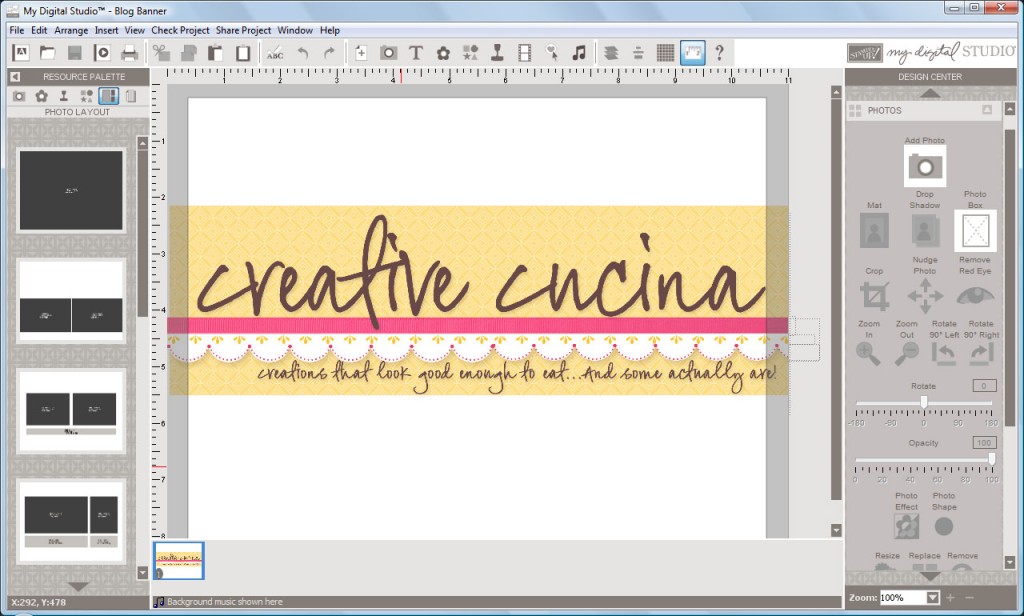
Step 1: Create your image in MDS
As you can see, I made my image in MDS by opening up a blank 8 1/2″ x 11″ page and kept my design approximately 3 1/2″ x 11″ (roughly the size of my blog header). Save your file as a .JPEG in MDS.
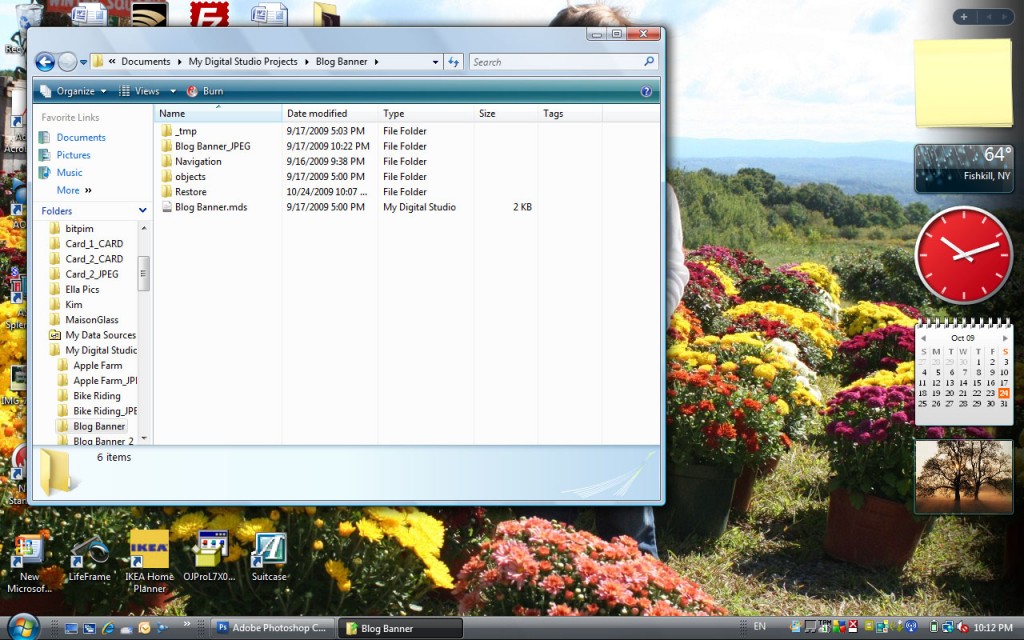
Step 2: Open up your My Digital Studio Projects Folder and select the folder where your .JPEG is saved (Mine is called “Blog Banner_JPEG”)
Step 3: Right Click on the .JPEG file and select “Open with Photoshop”
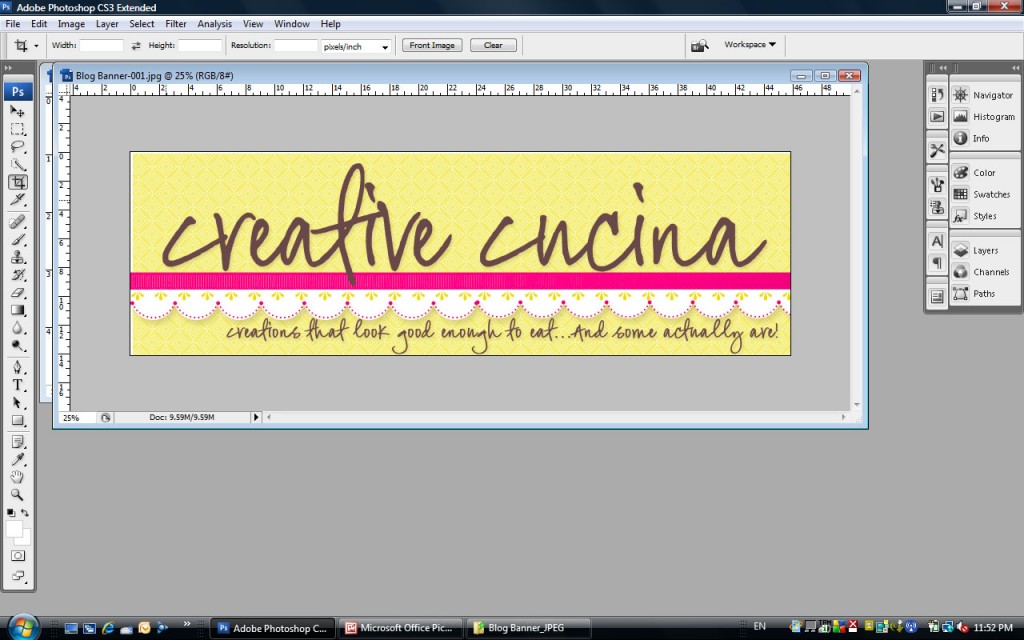
Step 4: Crop your image in Photoshop so there is no white space showing
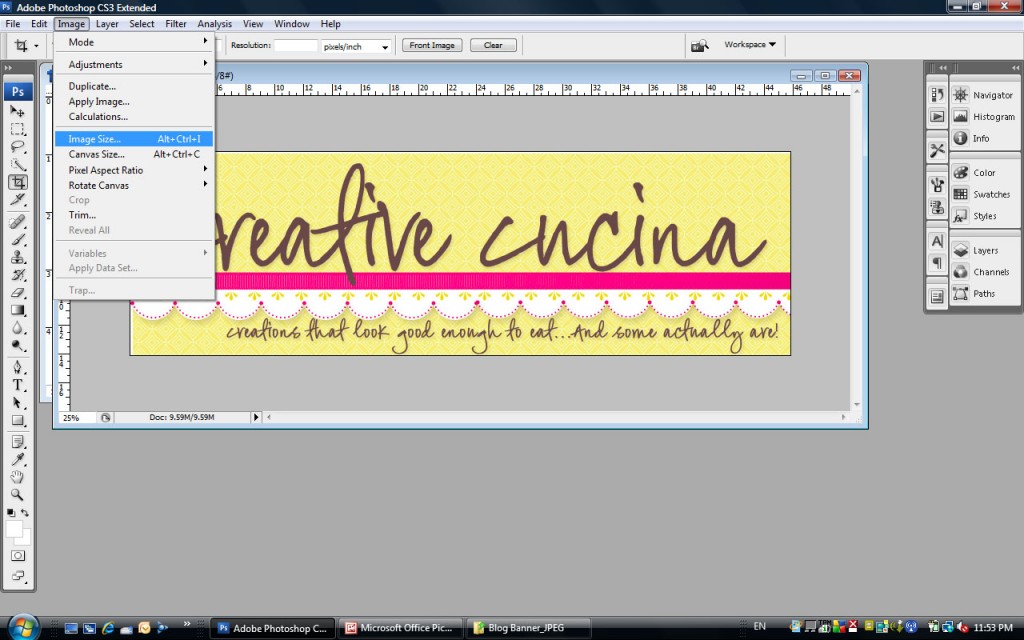
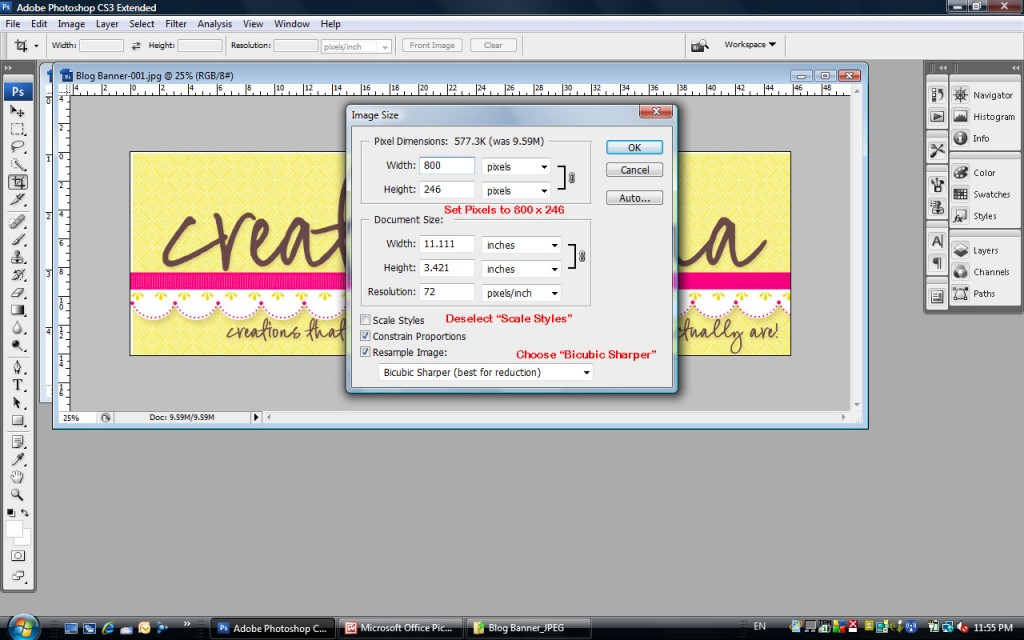
Step 5:Click Image/Image Size
Step 6: Resize your image
Resizing may be necessary before uploading the image to your blog. To resize and avoid distortion (a)Deselect “Scale Styles” box; (b) Choose “Bicubic Sharper” at the bottom; and (c) Set the pixel width to 800 (you can play around with the number but close to this seems to work for most blogs). Note: The pixel value for height will automatically adjust once you input 800 for the width. Click OK.
Now that you’ve resized your image, make sure to view it at 100%. It should not look pixelated or blurry. If it looks good, then you’re done! Uploading to your blog will vary depending on which service you use (wordpress, blogspot, etc.)
For my wordpress blog, I saved the .JPEG file to my site theme’s image folder, and made a simple HTML anchor link with the image. Then, I placed the anchor into the header.php file of my theme so it would show up on my blog. Generally, the code will appear as shown below. Yours may vary so it may not work for everyone. Try substituting in your information as follows:
<a href=”http://www.yoursite.com” alt=”http://yoursite.com“><img src=”http://yoursite.com/wp-content/themes/your-theme/images/yourbannerfilename.jpg“</img></a>

Thanks so much… that is great!!
You’re welcome. I hope it helps!
Thanks!! Your tutorial was very helpful.