Autumn Days Fall Scrapbook Pages

October 27th, 2009 - No Responses

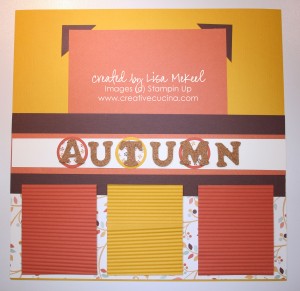
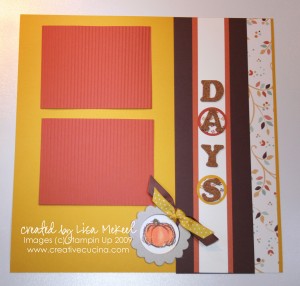
In the northeast, it’s peak leaf season. The trees are colored with red, yellow, gold, orange, and rust. I tried to use some of those colors in these pages, which I intend to fill with pictures of my daughter playing in a pile of leaves.

IMG_0885 copy IMG_0883 copy

These 12×12 pages are made from Crushed Curry textured card stock for the base. Across the bottom half of page 1, I used Autumn Vines DSP. In the center, I layered chocolate chip card stock with Really Rust DSP from Autumn Vines and whisper white. The cork letters were from a craft store. I mounted some of them onto 1 3/8″ Circles layered with 1 1/8″ circle of DSP.

The photo mats are really rust and crushed curry card stock that I ran through the Crimper for some texture, adhered to the page with dimensionals. I made faux photo corners by placing a chocolate chip square underneath the upper corners of the DSP photo mat on page 1.

On page 2, I took a scallop chipboard frame and tied some Chocolate Chip 5/8″ Grosgrain and Crushed Curry Polka Dot grosgrain around it. Underneath, I stamped the pumpkin from Autumn Harvest in Brown stazon ink, and watercolored it with Tangerine Tango ink and my Aquapainter.
Cookie Swap Flyer

October 27th, 2009 - No Responses
cookie swap-001

All images (c) Stampin Up

This was made using My Digital Studio. I was playing around with it and designed a flyer for a cookie swap using the Christmas Jingle Designer Kit elements. It’s so easy to make your own flyers, signs, cards, scrapbook albums, even DVDs with this software.

I’m not sure what cookie I’ll be bringing to the swap yet. Recipe testing will begin shortly though!

Making a Blog Banner with My Digital Studio

October 25th, 2009 - 3 Responses

Making a blog banner is so easy using Stampin Up’s My Digital Studio.  Here are step by step directions on how to turn your MDS creation into a work of art you can display on your blog. Click on the images to enlarge.

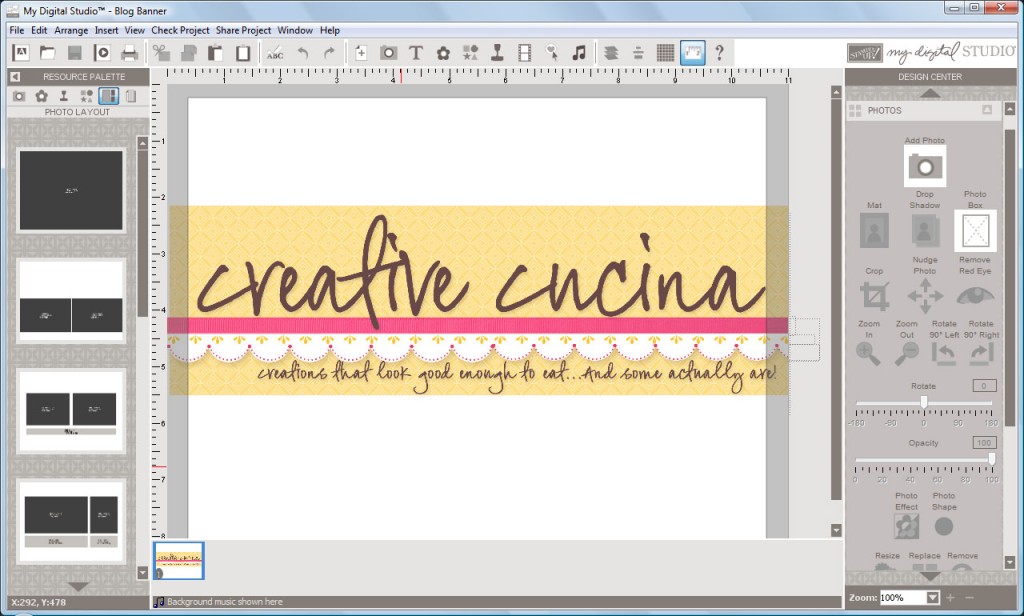
Step 1: Create your image in MDS

blog_banner1

As you can see, I made my image in MDS by opening up a blank 8 1/2″ x 11″ page and kept my design approximately 3 1/2″ x 11″ (roughly the size of my blog header). Save your file as a .JPEG in MDS.

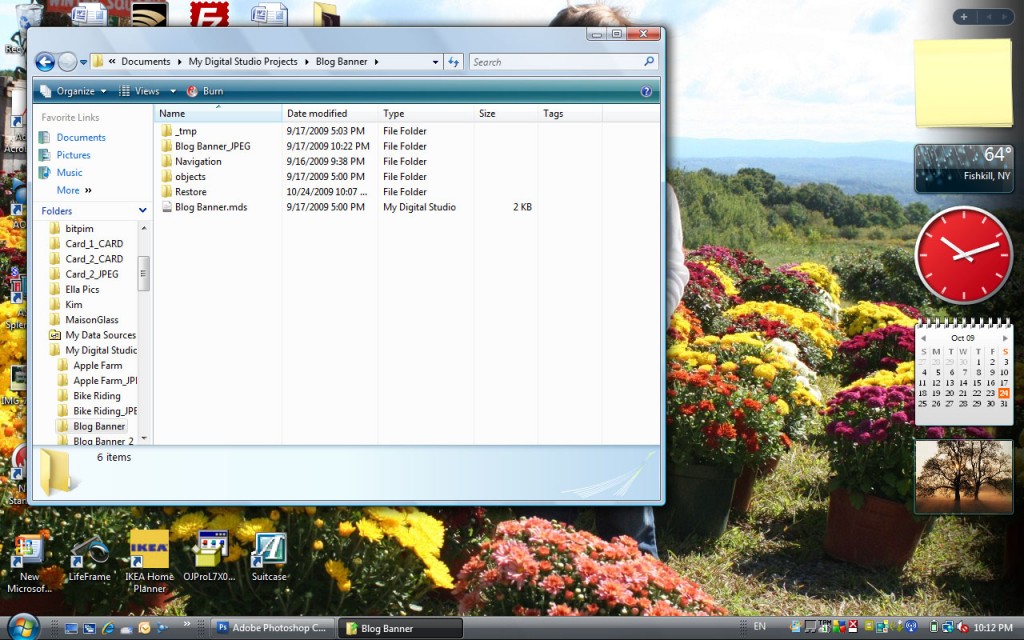
Step 2: Open up your My Digital Studio Projects Folder and select the folder where your .JPEG is saved (Mine is called “Blog Banner_JPEG”)

blog_banner2

Step 3: Right Click on the .JPEG file and select “Open with Photoshop”

blog_banner3

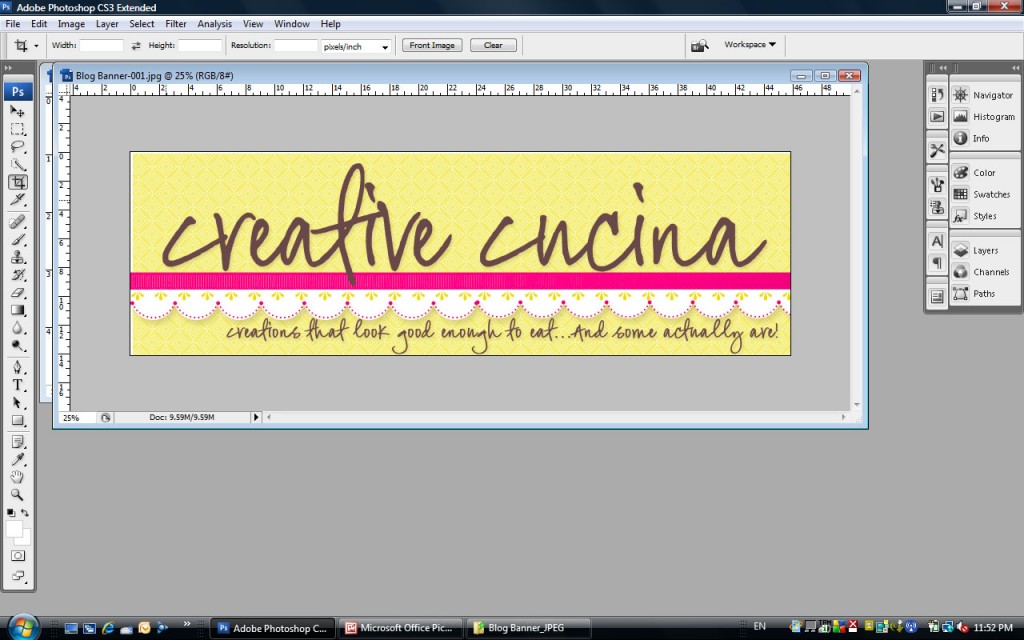
Step 4: Crop your image in Photoshop so there is no white space showing

blog_banner5

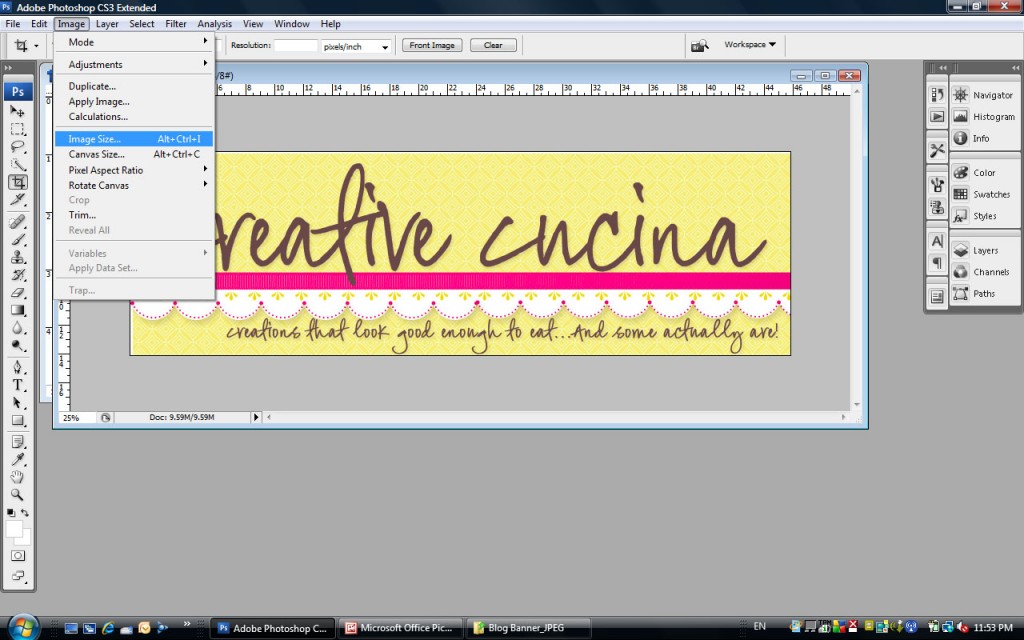
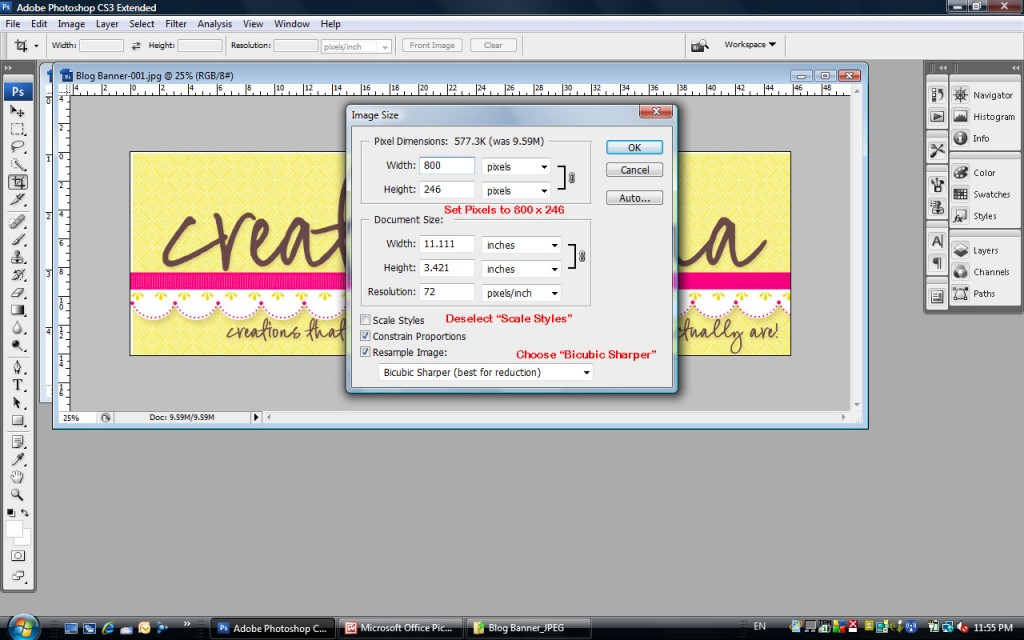
Step 5:Click Image/Image Size

blog_banner6

Step 6: Resize your image

blog_banner7

Resizing may be necessary before uploading the image to your blog. To resize and avoid distortion (a)Deselect “Scale Styles” box; (b) Choose “Bicubic Sharper” at the bottom; and (c) Set the pixel width to 800 (you can play around with the number but close to this seems to work for most blogs). Note: The pixel value for height will automatically adjust once you input 800 for the width. Click OK.

Now that you’ve resized your image, make sure to view it at 100%. It should not look pixelated or blurry. If it looks good, then you’re done! Uploading to your blog will vary depending on which service you use (wordpress, blogspot, etc.)

For my wordpress blog, I saved the .JPEG file to my site theme’s image folder, and made a simple HTML anchor link with the image. Then, I placed the anchor into the header.php file of my theme so it would show up on my blog.  Generally, the code will appear as shown below. Yours may vary so it may not work for everyone. Try substituting in your information as follows:

<a href=”http://www.yoursite.com” alt=”http://yoursite.com“><img src=”http://yoursite.com/wp-content/themes/your-theme/images/yourbannerfilename.jpg“</img></a>


Bad Behavior has blocked 395 access attempts in the last 7 days.

css.php