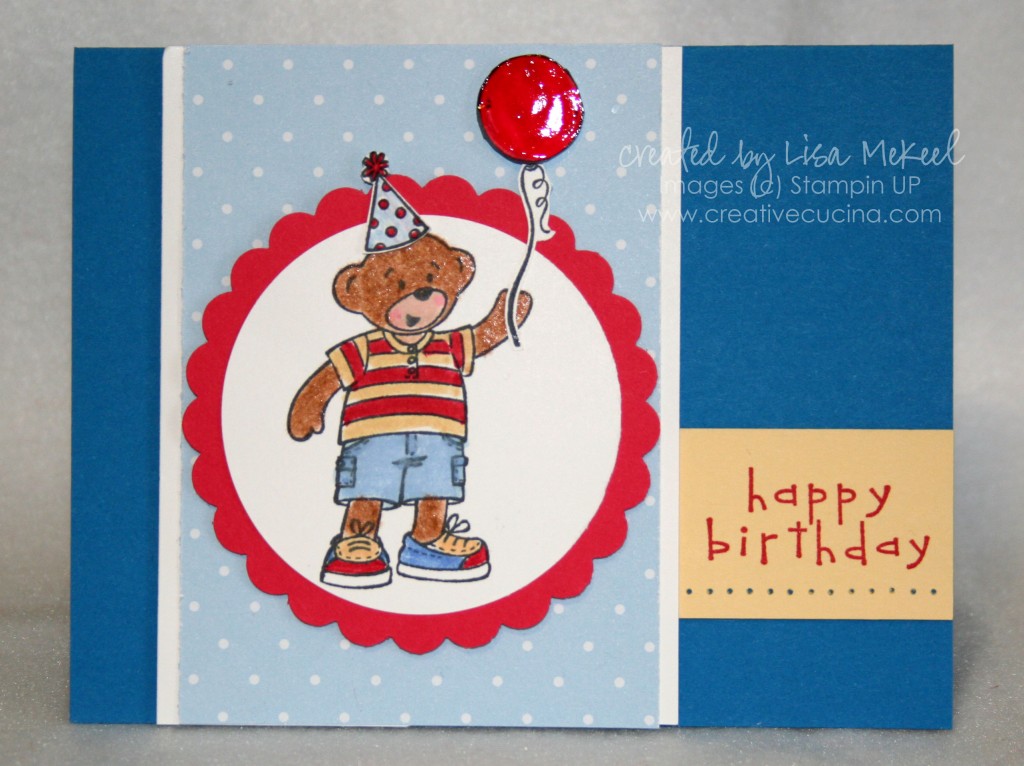
I made this card a few weeks ago, using what I consider to be “boy” colors and the Build A Bear stamp set Beary Best Friends. The funny thing is, since then, Stampin Up has announced its Color Renovation and all of these colors will remain! The colors I used here are: Pacific Point, Soft Sky, Real Red, So Saffron, and Whisper White.
The card base is Pacific Point, cut to 5 1/2″ x 8 1/2″ folded in half. I took a wide strip of Whisper White and layered it with Bashful Blue DSP from the Prints Pack. Underneath that, to the right, I added a strip of So Saffron card stock, stamped with “happy birthday” from Eat Cake in Real Red ink. To add more interest, I pierced holes below the sentiment with the Paper Piercer and adhered it to the base with Stampin Dimensionals.
For the bear, I stamped the image onto Whisper White card stock with Basic Gray ink. I colored in the image with Stampin Up Markers and added Brown Flocking Powder to the bear’s body. Then, I punched out the image with a Mega Circle Punch, layered onto a Real Red Giga Scallop Circle punch.
The hat and balloon images are from the accessories set Beary Best Times. I stamped the hat onto a separate sheet of Whisper White, colored it, and cut it out with scissors. The balloon was also stamped on another piece of whisper white, colored with Real Red Marker, and then highlighted with Crystal Effects. I cut out the pieces of the balloon and attached them to the card with SNAIL and Stampin Dimensionals.
Categorised in Card Designs, Uncategorized

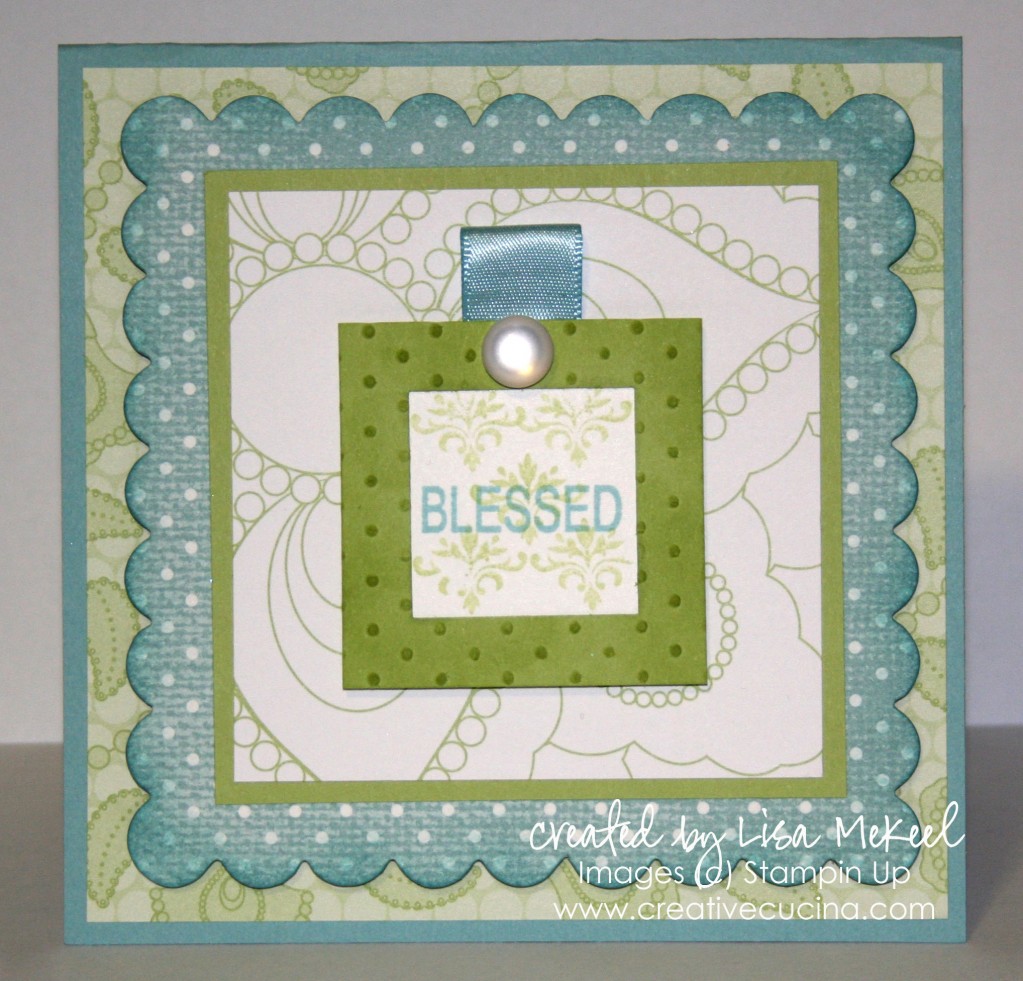
I copied this card from the May issue of Stampin Success, by Jolene Slack, on page 23. Unfortunately, I am not allowed to post the original picture, but it was featured in the new Color Renovation section. Jolene’s sample used new Marina Mist, here, I substituted Baja Breeze, a returning In Color.
The card base is made from a 5 1/4″ x 10 1/2″ piece of Baja Breeze, folded in half. Next, I took a 5″ square of Shades of Spring DSP in the Certainly Celery pattern and layered it on the card base.
I used the Scallop Square Bigz Die and the Big Shot to cut a scallop square from Parisian Breeze DSP (retired). I sponged Baja Breeze ink along the edges using a Sponge Dauber, then adhered it to the base with Stampin Dimensionals.
Using more paper from Shades of Spring DSP, I layered a 3 1/4″ square of Certainly Celery on a 3″ square of DSP, attaching it to the base with SNAIL adhesive.
The square window was made by embossing Certainly Celery card stock with the Swiss Dots embossing folder and the Big Shot. Then, I cut the embossed piece down to 2″ square. I punched a window in the center with the 1 1/4″ Square Punch and sponged the frame with Certainly Celery ink. I stamped “Blessed” from So Very (a retired SAB set) in Baja Breeze on Whisper White, layering it behind the window. I also stamped an image from Tiny Tags in Certainly Celery ink, stamped off, randomly over the whisper white.
At the top, I added a loop of Baja Breeze Satin Ribbon from Valet Ribbon Originals and a half back sticky pearl. Finally, I adhered the window piece to the base with Stampin Dimensionals.
Categorised in Card Designs, Uncategorized

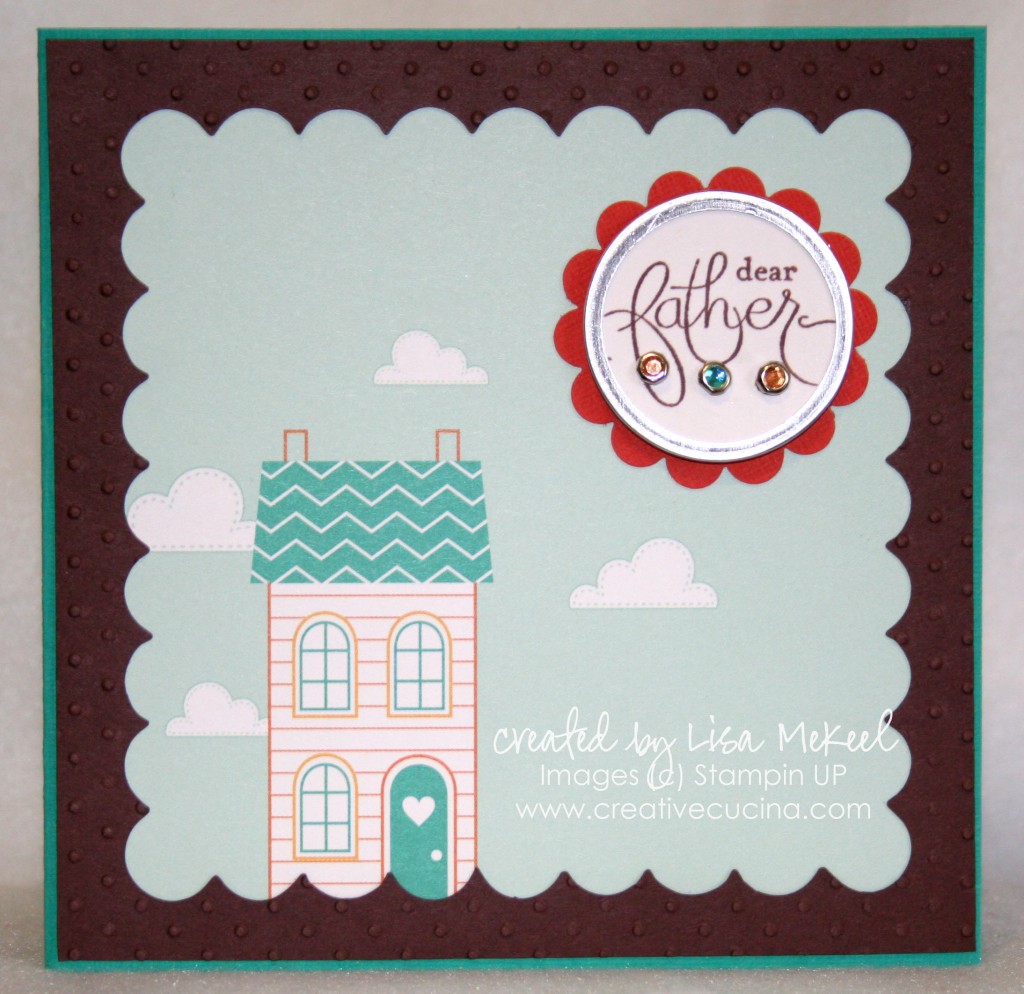
This card all came about from a scrap of paper. For some reason, after using the Scallop Square Bigz Die on another project a while ago, I held onto the negative part. Looking at it in my pile of scraps, I decided to try making a big square card with it. I trimmed down the Chocolate Chip card stock to 5 1/4″ square and ran it through the Big Shot using the Swiss Dots embossing folder.
Then, taking a sheet of paper from the Welcome Neighbor DSP pack, I layered it behind the Chocolate Chip, then adhered it to a 5 1/2″ x 11″ piece of Bermuda Bay textured card stock, folded in half.
The sentiment is from Well Scripted, stamped in chocolate chip ink onto a Small Metal Edge Tag. Using the Cropadile, I punched three holes and added Circle Rhinestone Brads in orange and blue. That was layered onto Dusty Durango card stock I punched with the Scallop Circle Punch (Pumpkin Pie would also be a good color choice).
I haven’t decided whether I’m going to use this for my father’s birthday or as a Father’s Day card. Inside, I will add the appropriate sentiment when the time comes.
Categorised in Card Designs, Uncategorized


