Archives for 2008

Glitter Crazy

This year my christmas tree will be all peridot and gold. I was inspired by some ornaments I saw at AC Moore a couple of weeks ago and decided on that color scheme. During that same shopping trip, I picked up some clear christmas ball ornaments to play around with. These were so fun to do, and addicting. I went back to buy a second set of balls so I could experiment with more color combinations. I tried many different things, these were my findings:

  • Using reinker mixed with  water was easiest to ensure even coverage before glittering
  • Colored glitter made for more intense color, coverage, and reflectivity as compared to dazzling diamonds alone
  • Mixing the fine colored glitter (red, green, dazzling diamonds, and blue) produced a neat result

More pictures & explanations
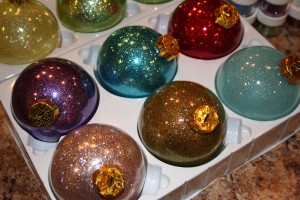
Supplies: Reinkers, cosmo glitter, dazzling diamonds.
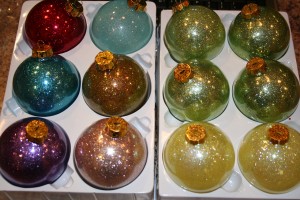
From left: (1)Riding Hood Red reinker with Romantic Red glitter; (2)Baja Breeze Reinker with Dazzling Diamonds; (3-4)Kiwi Kiss reinker with Green cosmo glitter; (5)Baja Breeze reinker with blue cosmo glitter; (6)Kiwi Kiss reinker with mixed glitter (see bullet above); (7-8)Kiwi Kiss reinker with green cosmo glitter; (9)Real Red & Pacific Point Reinker with purple cosmo glitter; (10)Pink Pirouette with Silver glitter; (11-12)Kiwi Kiss reinker with Dazzling Diamonds.

Directions: I found a great tutorial here. As I said before, this project is a lot of fun, easy for all skill levels, and the result is WOW!! Try different color reinkers with different color glitter, add rub-ons
Carrot Cupcakes

Somehow I ended up with a 12 cup bag of walnuts. I found the bag in my cupboard last week and I’ve been determined to use them all up before the expiration date. I’ve already made (a) Cranberry Walnut White Chocolate Oatmeal Cookies; (b) Cinnamon Apples with Walnuts over Vanilla Ice Cream; and (c) Chocolate Chunk Jam Layer Bars. All that, and I STILL have about half the bag left!

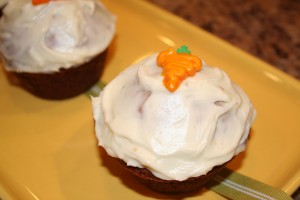
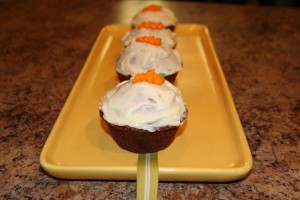
Tonight I decided to make carrot cake, but instead of a 9-inch cake, I wanted to make cupcakes. The recipe came from Elise Bauer at Simply Recipes. I’ve made this recipe twice, and the cupcakes came out exactly the same both times. It’s not an overly sweet recipe, which is the way my husband likes it. I prefer my carrot cake a bit sweeter, but his co-workers and family members really enjoyed these. Maybe because I made them into cupcakes they remind me more of muffins than cake.

I tried one batch with crushed pineapple, drained, and one batch with the juice. There was no discernable difference in my opinion. As for the frosting, I made my own version (see below).

Ingredients


Cake:

  • 3 cups unbleached all-purpose flour
  • 1 1/2 cups sugar
  • 1 teaspoon salt
  • 1 Tbsp baking soda
  • 1 Tbsp ground cinnamon
  • 1 1/2 cups olive oil or grapeseed oil
  • 4 large eggs, lightly beaten
  • 1 Tbsp vanilla extract
  • 1 1/2 cups shelled walnuts, chopped
  • 1 1/2 cups shredded coconut
  • 2 cups of shredded carrots
  • 1 cup of drained crushed pineapple


Frosting: (Makes enough for 2 batches)

  • 16 oz cream cheese, at room temperature
  • 2 Tbsp butter, room temp
  • 1 to 1 1/2 cup of confectioners’ sugar (depending on texture and taste)
  • 1 teaspoon vanilla extract
  • A few dashes of cinnamon


Method

1 Preheat oven to 350 degrees F. Spray 2 cupcake pans liberally with Pam or other non-stick spray. (I have given up on paper liners with cupcakes–they always seem to stick to the paper. I find spraying the pans liberally produces a sturdy “shell” around the bottom of the cupcake which makes them stand up nicely. I haven’t had any stick to the pans yet.)

2 Sift dry ingredients into a bowl. Add oil, eggs, and vanilla. Beat well with wooden spoon or paddle attachment. Fold in walnuts, coconut, carrots and pineapple. Batter will be stiff at first. After mixing in nuts, coconut, carrots and pineapple, batter gets much thinner.

3 Pour or spoon batter into cupcake pans. I use an ice cream scoop to spoon the batter into each cup. This ensures they’re all the same size and is much neater. Set on the middle rack of oven and bake for 30-35 minutes, until edges have pulled away from sides and a toothpick inserted into the cupcake comes out clean. Cool on a wire rack.

4 To prepare frosting, cream together the cream cheese and butter in a mixing bowl. Slowly add in the confectioners sugar and beat until mixture is free of lumps. Stir in vanilla and cinnamon.

5 Once cupcakes are cooled, frost. Keep any unused frosting refrigerated and I would also recommend refrigerating any frosted cupcakes as well.

These are also great as is, without frosting. Store covered for 1 week (although they won’t last that long).

Thinking of Thanksgiving

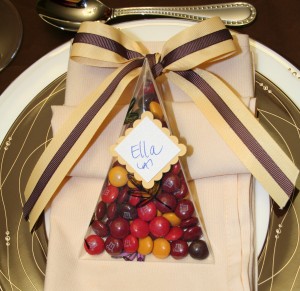
I was on Splitcoast last week and saw a new tutorial for a triangle box. The first thing I thought was to make it using acetate. Stamping on acetate was a little tough, not sure if I did it right, but it came out good enough for my little experiment. (I think you have to stamp on the back or rough side?)

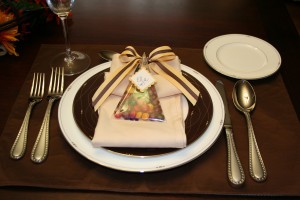
When following the instructions for the triangle box, you will end up with a small strip of paper left over (3 1/2″ x 11″). The actual box is quite larger than I anticipated so I made the box again using the small scrap and I like that size much better for my application. Being that the triangle is tapered at the bottom, and therefore lies down more than stands up, I thought it would make a good placecard or favor since it could lie on a plate or be tucked into a napkin.

This is how it turned out as a placecard and/or favor. I think it would look great on my Thanksgiving table and yours too! Next time, I might make some changes to the stamped image or the ribbon and maybe even the candy, but I used what I had on hand today (M&Ms).

Other ideas I had: I put a couple of cinnamon sticks inside, tied with a little cord. You could also tie a cinnamon stick in the ribbon topper, or use twine instead of ribbon for a more rustic look. If you have something colorful inside (like these M&Ms) you may not even need to stamp the outside. Just dress it up with a belly band. The new Stampin Up Curly Label Punch or Designer Label Punch would be perfect layered on a belly band with the person’s name on it.

Supplies: Cardstock: acetate, so saffron, shimmery white; Stamps: Hostess set Fall Flair; Ink: Black StazOn; Accessories: Square scallop punch, So Saffron Twill Ribbon, Chocolate chip 1/4″ grosgrain, sticky tape, cropadile.

Bad Behavior has blocked 416 access attempts in the last 7 days.

css.php