Video Tutorial For Slide Out Gift Card Holder

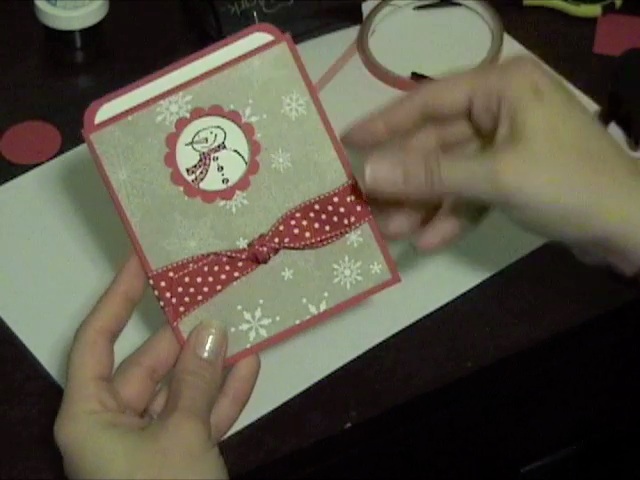
Here is a video demonstrating how to make a Slide Out Pocket Card. This particular one is a Christmas gift card holder but I also show examples of baby shower card versions.

P.S. Making a video is harder than I thought! I’m sorry the lighting isn’t great I’ll know better for next time. All dimensions will be listed at the bottom of this post in case you miss something in the video. Thanks for watching!

Christmas Card Money Holders

Edited to Add: Please note the dimensions for these cards should measure no more than 6 1/2″ x 3 1/4″ when folded. I accidentally typed 3 1/2″ when I posted originally. I’m sorry for any confusion!

These cards are longer than the ones I usually make, and are meant to hold money or a check without having to fold the bill or check in half. For all of these projects, overall card size is 6 1/2″ x 3 1/4″, which correspond to Stampin Up’s Small Open-End Envelopes. Inside, I lined the card with whisper white or very vanilla card stock cut to 3″ x 6 1/4″. I also used the Slit Punch to make a little “lip” in the card to hold the bill or check, or even a gift card.

IMG_0788

The first card was made from a 3 1/4″ x 12″ piece of close to cocoa card stock, scored at 5 1/2″. This will leave the back flap of the card 6 1/2″ long and the front flap an inch shorter. To make up the difference, I attached a strip of real red card stock that I scalloped with the Scallop Edge Punch.

Chocolate Chip Satin Ribbon covers any seams. I wrapped the ribbon around the entire card front and glued the top piece to the bottom piece of ribbon with SNAIL. Then, I took a shorter piece and wrapped it around the ribbon, creating a loop that I secured with glue dots. Slide the seam side underneath the vertical ribbon strip and using the cropadile, punch a hole through all the layers of ribbon. Add a Fire Circle Rhinestone Brad and there you have it!

The card front is layered with real red textured card stock and Christmas Cocoa DSP. In the center, punched out a close to cocoa ornament using the Ornament Punch and applied a rub on from Merry & Bright Rub Ons. Some Silver Elastic Cord was tied in a bow around the neck of the ornament and then it was attached to the base with dimensionals.

IMG_0790

Here is another long card made the same way described above. Base is real red textured card stock, with a kiwi kiss scalloped edge. Real Red Polka Dot Ribbon hides the seam.

I stamped the snowflake from Merry (retired) in Versamark and heat embossed it with White E.P. The ornament from Delightful Decorations was stamped in Kiwi Kiss ink on whisper white and punched out using the Ornament Punch. I added dazzling diamonds glitter to the center of the ornament and a Fire Circle Rhinestone Brad. Next, I tied Silver Elastic Cord to the ornament and wrapped it around the inside.

The sentiment is from Berry Christmas stamped in real red ink on whisper white that I punched out using the Word Window Punch layered on a kiwi kiss Modern Label Punch. Both the ornament and sentiment are popped up on dimensionals.

IMG_0795

Using the same colors as above, I only used rub ons from Merry & Bright Rub Ons to decorate this card. The ornament is kiwi kiss card stock, punched with the Ornament Punch. I added a Fire Circle Rhinestone Brad and Silver Elastic Cord tied in a bow around the neck of the ornament, which is attatched to the base with dimensionals.

IMG_0793

This might be my favorite one of the bunch! The base for this snowman card is cut to 6 1/2 x 6 1/2″, scored on one side at 3 1/4″ so the fold is on the top edge. Card base is textured Kiwi Kiss, layered with the Bulk Buy Holiday DSP that was part of the Inventory Clearance. I attached the DSP to the base and then using my 1 3/8″ Circle Punch, punched a hole through both layers of paper.

To get the scallop window, I took a piece of Chocolate Chip card stock and punched a 1 3/8″ circle. Then, I took the Scallop Circle Punch and centered it over the 1 3/8″ hole I just punched from the chocolate chip card stock. Punch it out and you have a scallop circle window! Glue the scallop circle window to the front of the card.

Inside, I lined the card with a 3″ x 6 1/4″ piece of whisper white card stock. Making small pencil marks, I drew where the window lined up with the inside of the card. Then, I stamped the snowman from Snow Buddies in Brown Stazon ink and colored him in with Watercolor Pencils and Blender Pen. Around the base of the snowman, I added Dazzling Diamonds glitter (not shown).

Outside, I stamped the “Merry” sentiment from Merry (retired) in Brown Stazon ink in the lower left corner of the card.

IMG_0804

Finally, I made a money holder card using the shimmery white paper from Taste of Textiles (retired). This is another top fold card, cut to 6 1/2″ x 6 1/2″, scored at 3 1/4″ with the fold on top. I added a strip of textured chocolate chip card stock across the front and layered two snowflakes from Felt Flurries. In the center, I punched a hole using the cropadile and added a Fire Circle Rhinestone Brad, which I adhered using a large glue dot.

The sentiment, stamped along the bottom right corner, is from Christmas Greetings and is in real red ink. Inside, I stamped the corresponding sentiment from the same set (not shown).

Tis the Season to Get Krafty

Today, I decided to break out the last 12×12 sheet of Striped Kraft cardstock (from Taste of Textiles) in my stash. I’ve always wanted to try stamping directly on the Kraft and then coloring in with white pencil. I’m not sure if that technique has a name, but I’ve always wanted to do “that”.

As I said, the card base is striped kraft (from retired Taste of Textiles) stamped with the tree from Season of Joy in Stazon Brown ink. The snowman is from Snow Buddies, stamped in Stazon Brown ink and colored in using Watercolor Pencils.

In the background, I stamped the snowflake from Snow Buddies in White Craft ink. The glittery swirl image, from the same stamp set, is stamped in Palette Glue Pad, then stamped on the paper. I added Dazzling Diamonds immediately after stamping. Along the branches I used my MS Glue Pen and Dazzling Diamonds glitter to make snow.

Along the bottom of the card, I took whisper white card stock and tore it for a snowy effect. To make it even more sparkly, I ran my glue pen along the torn edge and added more Dazzling Diamonds. Although hard to see in the picture, I also stamped “Merry Christmas” from Christmas Greetings in White Craft ink on the 5/8″ Real Red Grosgrain Ribbon. Then, I wrapped the ribbon around the white card stock and adhered it to the base.

Bad Behavior has blocked 2502 access attempts in the last 7 days.

css.php